🛒 Best Price Today on Amazon
Prime members get fast, free shipping on everything above, plus member-only deals. New members get a 30-day free trial — cancel anytime.
- Which compact analog keyboard should you buy?
- How do the optical and magnetic switches compare?
- Which software and layout are easier to live with?
- What differences matter if you plan to keep the keyboard for years?
- How should you compare the two if your games have different input demands?
- How should you test either board before deciding?
- Conclusion
Choose the Wooting if you want web-based configuration and a path to compatible switch changes. Choose the Razer if you prefer optical switches and quick adjustments from the keyboard. In Razer Huntsman V3 Pro Mini vs Wooting 60HE Plus, both provide adjustable actuation and Rapid Trigger. Check which setup you will actually use.
Which compact analog keyboard should you buy?
Choose the Wooting 60HE Plus for Wootility and compatible parts
The 60HE Plus is the better fit for someone who wants to set up the board in Wootility, save onboard profiles, and experiment with compatible magnetic switches. Its Hall effect design senses a magnet’s motion, and Wooting offers documented parts and modifications. That makes it easier to treat the 60% layout as a platform you can change over time.
Web configuration is useful when you prefer to avoid a permanently running device application. Use a compatible browser and wired connection to configure it, then verify the stored profile after closing the configurator.
The installed version of Wootility is also available where supported. Confirm that the exact effects or bindings you want can be stored on the keyboard.
Buy the assembled 60HE+ if you want a working keyboard out of the box. A 60HE+ Module is a different purchase and can require compatible parts. Decide which package you are comparing before assigning value to case, keycaps, stock switches, or stabilizers.
Choose the Huntsman Mini if its hardware adjustment fits your routine
The original Huntsman V3 Pro Mini gives you optical analog switches, a compact wired case, and documented keyboard shortcuts for adjusting actuation and Rapid Trigger. The board is particularly useful when you set those features often and want a quick local way to get back to a known profile.
You can use Synapse to configure deeper details on a supported computer. Razer also documents saving relevant settings and selecting profiles from the board.
That makes the Mini reasonable for someone who wants some adjustment without opening software at every session. Verify the saved behavior with the app fully closed instead of relying on a preview.
Choose it for its actual stock key feel and software workflow. Do not buy it on the assumption that it offers the same switch replacement path as the 60HE+.
Check its price and how easy it is to obtain the exact regional layout. The stronger reason to choose it is the combination of immediate controls and the optical keyboard you want to use as supplied.
| Feature | Razer Huntsman V3 Pro Mini | Wooting 60HE Plus |
|---|---|---|
| Main layout | Wired 60%, without separate arrows or function row | Wired 60%, without separate arrows or function row |
| Sensing method | Razer Analog Optical Switches Gen-2 | Hall effect sensors and compatible magnetic switches |
| Published adjustable actuation | 0.1–4.0 mm | 0.1–4.0 mm |
| Rapid Trigger | Supported | Supported |
| Base report-rate class | Original Mini is a 1,000 Hz model | 60HE+ is a 1,000 Hz model |
| Configuration | Razer Synapse and model-specific onboard shortcuts | Wootility desktop or web, plus onboard profiles |
| Switch customization | No standard user hot-swap path | Compatible magnetic switch swaps |
| Closely named product to verify | Standard Huntsman Mini and other Huntsman V3 Pro sizes | Original 60HE, separate module, and newer 60HE v2 |
How do the optical and magnetic switches compare?
Focus on the result of a keypress in the game
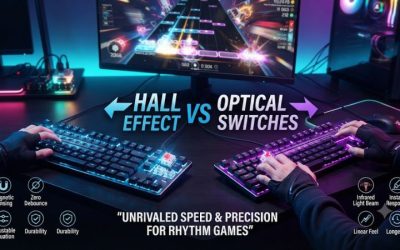
The Huntsman’s optical sensors track movement using light. The Wooting’s Hall effect system tracks a moving magnet.
Both can infer how far a key moved and let you choose where it registers. Any difference you feel includes the spring, travel, cap, stabilizer, plate, and firmware as well as the sensing method.
Start with the same middle-range actuation setting where each model supports it. Keep Rapid Trigger off for the first comparison and use the same game and movement sequence.
If one board gives more accidental presses, compare the stock force and key shape as well as the displayed setting. A number in millimeters cannot account for how you rest your fingers.
If you prefer a certain sound, compare each completed board at the same desk. The Wooting’s modding options give you more ways to change its sound or spring later, provided you choose compatible parts. The Razer is an easier decision when you already like the supplied linear optical feel.
Separate Rapid Trigger release from the fixed actuation point
Adjustable actuation changes where the first press registers from rest. Rapid Trigger can release an active key after a small upward movement and allow a new press during the next downward movement, depending on the setting. This can make repeated actions feel responsive without needing to travel back to a traditional fixed reset point.
Set a comfortable fixed actuation number first. Then enable Rapid Trigger for a small set of keys and compare how you stop and restart movement.
If your character stutters because you move your fingers slightly during a hold, try a less sensitive setting and retest. A shallow mode earns its place only when it improves control in your hands.
Keep a separate typing profile where practical. An extremely light press setting that feels useful for a specific movement can produce stray letters while you edit text. On both boards, start with software defaults or a simple baseline before adding very aggressive settings across the entire layout.
Treat tiny distances and polling numbers as specifications
Both manufacturers advertise an adjustable range down to 0.1 mm under supported conditions. That is a configuration claim. It does not establish that two physical keys activate at identical measured depths or that the smallest advertised increment is repeatable on every sample.
The original Huntsman Mini in this comparison and the 60HE+ are in the 1,000 Hz class. The newer Wooting 60HE v2 is a separate generation with a different polling specification.
Similarly, a Huntsman model marked 8KHz is a separate product. Use the spec page for the edition you would buy.
RTINGS has compared a Huntsman V3 Pro family sample with the earlier Wooting 60HE. That comparison provides context for the hardware families.
It is not a direct matched test of the Mini against the exact 60HE+ here. A fair latency comparison needs exact samples, known settings, and the same method.
Which software and layout are easier to live with?
Use the Razer’s onboard adjustment to verify changes quickly
Razer documents Fn + Tab to enter onboard actuation adjustment on the Mini and Fn + Caps Lock for the Rapid Trigger adjustment procedure. Use the model’s instructions to test the current setting, choose a supported value, save, and leave the adjustment mode. Rapid Trigger mode is not available on the factory default profile, so check the active profile as well as the shortcut.
Start with one setting you can recognize in play. Run a short movement or rhythm drill and confirm it works after you reconnect. If changing a setting appears to do nothing, verify that the expected profile is active and that the game receives a normal key rather than a remapped command.
This is a strong workflow at a fixed gaming desk or when you cannot rely on the same software being open. If you want detailed per-key adjustments, use the supported Synapse route and test whether the behavior stays with the profile you selected. The shortcut is a convenience for making or confirming adjustments, not a reason to skip verification.
Use Wootility for a predictable saved configuration
Open the desktop or compatible web version of Wootility and begin with a simple profile. Make one change to a familiar movement key, close the configurator, and check the input in a game. This confirms that the selected settings actually persist in onboard memory under your intended setup.
If you switch between more than one PC, name profiles by purpose, such as a typing map and a game map. Keep a plain default available. On a different computer, verify the profile using ordinary text and game inputs before taking its behavior for granted.
Use compatible parts and model-specific guidance if modding is the main reason for the purchase. The 60HE+ uses a magnetic sensing system and does not take arbitrary conventional contact switches. Check whether the listing is an assembled kit or a module, and check the manufacturer guidance for switch, case, and stabilizer fit before paying for extras.
Make sure a 60% board fits the rest of your use
Both boards remove the dedicated arrow cluster, navigation group, and function row. Access usually moves to a layer.
This is a clear benefit if you want the biggest possible area for the mouse and rarely reach for those keys during a match. It is less helpful if your regular tasks depend on the missing cluster.
Try editing a document or changing game bindings on your normal desk. Check how quickly you can access arrows and function keys while the mouse stays where you want it. If you continually use a chord for a key you need, a TKL or 75% version offers a different compromise.
A short board gives you room to choose the best hand positions instead of merely fitting into a small space. Put the selected board slightly left of the center of the screen if that makes the mouse path more comfortable. Verify the cable and your largest sweep once before treating the smaller size as a daily benefit.
What differences matter if you plan to keep the keyboard for years?
Decide whether you want a finished board or a platform to modify
An assembled Wooting and a Wooting module can look like similar listings because both belong to the 60HE+ generation. They are different projects.
If you want to build, check which plate, stabilizers, caps, case, and magnetic switches come with the version you are considering. Include the cost of parts you must buy separately before comparing it with the ready-to-use Huntsman.
If you already enjoy the Razer’s supplied switches and keycaps, its fixed construction does not need to count heavily against it. What matters is whether it will keep working the way you want. If you have a known interest in testing different magnetic spring weights or changing the case, the Wooting offers a clearer documented route.
A switch swap can change feel and sound, and a case change can alter the way the board sits on the desk. Check Wooting’s fit guidance before ordering a matching part.
A conventional 60% case may look like it fits from the outside and still require specific mounting clearance. The same is true for a switch advertised as magnetic without confirmed support.
Compare the profile controls you can actually remember
Razer documents six switchable onboard profiles on the Mini, including two presets. Wooting’s 60HE+ starter guide documents up to four profiles.
Those are different allocations of stored settings. For most people the useful issue is whether they can reach a typing profile and a game profile reliably by touch.
Wooting’s guide shows profile shortcuts and default Fn layers, while Razer gives direct shortcuts for adjusting actuation or Rapid Trigger. If you tend to tune the board at your desk and then take it elsewhere, make sure your usual settings remain when you close the configuration program. If you frequently alter settings during a session, try the relevant keyboard shortcuts before treating that access as a major benefit.
Set a plain fallback profile that keeps ordinary typing intuitive. Then set up one game profile matching a real movement need.
Use one key you can test quickly to confirm the correct profile is loaded after reconnecting. An extra profile is useful only when the saved changes remain clear enough to recover.
Keep analog gamepad output separate from digital testing
Analog position sensing enables adjustable digital commands, and it can also support analog-style behavior in certain software and games. These are different uses. Test the boards as ordinary digital keyboards first if you are comparing movement and release in a game that expects standard keyboard input.
If a title accepts an analog controller axis, check whether it also handles controller and mouse input together in the way you need. Some games can change prompts or device behavior quickly when both types are present. Verify compatibility in that title with one axis assignment before remapping the entire movement group.
Keep a standard profile available in case the configurable mode creates a confusing result. A board can send an analog signal successfully while the game handles it in a way you dislike. The purchase should depend on what the game receives and how you can control it, as well as on the features listed by the keyboard maker.
How should you compare the two if your games have different input demands?
Start with a movement-heavy game and a less sensitive profile
In a shooter, try moving and stopping at the same point before and after a sensitivity change. Choose a private practice area where you can repeat the sequence.
Watch for movement after you expect it to stop and early presses when your fingers settle. Do not change the function of the keys while comparing how they respond.
Try a less sensitive release setting if your character stops moving during a normal hold. If the first motion feels too immediate, change fixed actuation instead.
The advantage of both boards is that these two controls can be adjusted separately. That difference is more meaningful than which sensor label appears on the box.
Use a separate test for rhythm or repeated input
In a rhythm game, evaluate patterns you already know and keep the same game timing offset and frame settings. Try one profile with ordinary actuation and another with a modest repeat-friendly setting.
Note whether isolated misses or unintended releases change on the same pattern. A result from a new song may reflect unfamiliar timing.
Avoid setting the least possible travel across every key before this check. A setting that works for brief repeated taps can make a sustained note less steady if your fingers move during a hold. Keep both tests quick and repeatable so you can try a different configuration without learning an entirely new keymap.
Weigh returns, price, and layout after the baseline works
At a close price, ask which board you would keep in its current form. If the Wooting’s additional part options are the reason for purchase, list the specific changes you plan to make and price the parts. If the Razer’s direct controls solve the problem on day one, compare it without assuming you will later need to modify it.
For a used or regional purchase, check the USB cable, firmware recognition, and legends before judging performance. If the package claims to be a different revision from the label, verify its exact identity with the supported configuration tool. Do this before applying another model’s polling or actuation claims.
How should you test either board before deciding?
Run a fair movement and release comparison
- Reset to a known setup. Use a normal USB connection, plain mapping, and moderate actuation. Check that both boards start with Rapid Trigger off.
- Run the same movement drill. Test a held direction, a clean release, and several reversals. Use the same game and mouse sensitivity.
- Enable Rapid Trigger on a few keys. Repeat the movement and make an isolated sensitivity change if inputs become unstable.
- Separate typing and gaming. Write for a few minutes using the profile you plan to keep for work. Check whether resting fingers cause stray keys.
- Verify persistence. Exit the configurator, reconnect the keyboard, and retest the selected profile.
The goal is repeatable control in the titles you actually play. A board that exaggerates small finger movements can initially feel responsive and later prove difficult to hold steady. Adjust upward from a manageable setting only after you see a recurring need.
If you use any optional input feature that prioritizes opposing directions or combines actions, confirm the rules of your game or event. You can compare ordinary actuation and Rapid Trigger while those features remain disabled. Their availability differs from whether a setting fits your intended competition.
Buy the exact package rather than its best advertised configuration
Compare the cost of the fully assembled units first. Add compatible parts only if you plan to install them.
The Wooting’s greater modding potential is worth considering when you can name a switch or finish you want. A mod that would remain in the box does not improve the value of a board you are buying for its stock setup.
The Razer can make more sense when you want to plug it in and use the documented hardware controls as supplied. Check the original Mini label and the switch family. A standard Huntsman Mini and a Huntsman V3 Pro Mini share a footprint but are different products.
Availability can also differ between the older and newer Wooting generations. Compare the 60HE+ with a 60HE v2 as two separate offers if both appear in your store.
Confirm whether a used board is the Plus model and what is included. Price the actual parts before deciding which name on the listing is better value.
If you are buying specifically to leave a tournament computer untouched, test your chosen profile after unplugging the board and moving it to a second machine. Verify the movement behavior and the shortcut you will use to switch profiles. A setting that only works in your usual software session can change which keyboard fits that job.
Conclusion
Choose the Wooting 60HE Plus for Wootility and compatible magnetic switch changes. Choose the original Huntsman V3 Pro Mini for optical switches and direct onboard actuation and Rapid Trigger adjustments. Both offer a small wired layout and deep input tuning, so compare stock feel, your preferred profiles, and the exact assembled package before deciding.