🛒 Best Price Today on Amazon
Prime members get fast, free shipping on everything above, plus member-only deals. New members get a 30-day free trial — cancel anytime.
Learn how to save Razer keyboard profiles to onboard memory by assigning a profile to a supported hardware slot in Synapse. Then switch to that slot and test a remap with Synapse closed. Your keyboard model determines which shortcuts, macros, and lighting settings travel with you to another computer.
Save a Razer keyboard profile to a hardware slot
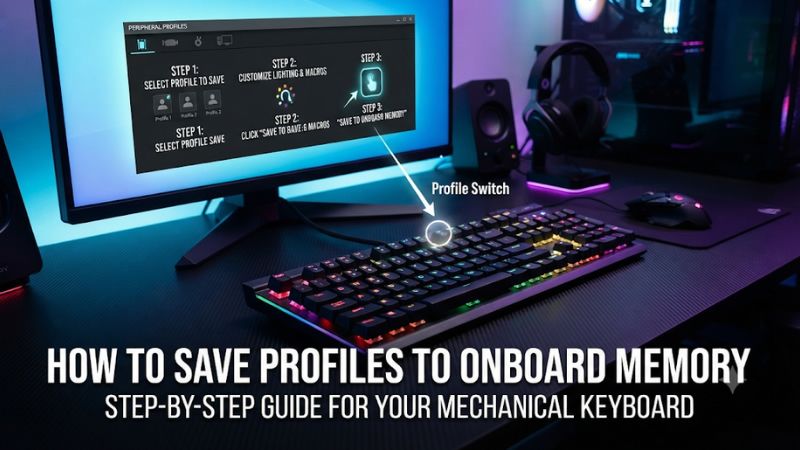
Open the keyboard in Razer Synapse, select the profile you want to carry, and open On-board Profiles or On-board Memory beside the device’s profile selector. Use that panel to transfer the profile to a hardware slot. Then close Synapse completely, activate the slot on the keyboard, and test a simple remapped key. This last step confirms the keyboard can apply the setting on its own.
The exact panel and slot controls depend on your keyboard and software version. Some models show numbered or colored slots. Others, such as the Huntsman V3 Pro, have model-specific onboard profiles and physical adjustment controls. Start with the device’s own page and look for the controls documented for your exact model.
Check the exact model and supported software
Read the model name and identifier on the underside of the board or its packaging. Confirm that the guide you follow covers the same size and revision. A standard BlackWidow, a Pro version, and a 75% version can use different firmware and controls even when they are in the same product family. Published profile counts can also include a reserved slot, so check how many positions you can actually edit.
Use Synapse 4 if your keyboard supports it. Razer ended updates and cloud support for Synapse 3 on February 3, 2026. If the profile you need exists in an old installation, check Razer’s migration workflow and confirm the settings appear on the new device page before assigning them to a slot. Migration and hardware transfer are separate steps.
If your keyboard uses an older utility or supports only local hardware shortcuts, follow the model’s instructions. The presence of a profile menu in one version of Synapse gives you no assurance that every keyboard in that software has writable onboard storage.
Create a profile you can recognize offline
Open the keyboard’s Customize page and select an existing profile or create one. Use a clear name such as Travel, Work, or the name of your main game. Make one safe, observable change on a key you seldom use. For example, remap an available navigation key to another ordinary keyboard key and check the result in a text editor or keyboard test view.
Select the exact profile before making a change. If you have several names that differ only slightly, duplicate the working profile and rename the test copy. This gives you a clear reference if something changes when you open a game or plug into another computer.
Keep your original assignment recorded. Once you confirm that the onboard slot works, you can remove the test remap and transfer the final version. A small one-to-one remap is the clearest signal because it does not rely on a separate program opening, a game becoming active, or another Razer device receiving a command.
Open the onboard panel and transfer the profile
- Connect the keyboard in the wired or wireless mode that lets Synapse detect and configure the exact model. Wired USB is a useful starting point if multiple modes are supported.
- Open Razer Synapse, select the physical keyboard, and go to Customize or the device’s main configuration page.
- Confirm that the desired profile is selected and the test remap works.
- Open the On-board Profiles or On-board Memory icon near the profile selector.
- Assign the profile to an available hardware slot. If the panel displays Drag profile here, drag the profile from the list to the intended slot.
- Confirm that the slot shows the desired profile. Note its color, number, or documented keyboard shortcut.
- Quit Synapse, switch to that slot using the keyboard, and test the remap again.
If every slot is occupied, identify an old profile you can replace. Export it through the profile menu if your software offers export and you want to keep a copy. Replacing a hardware slot changes what that position on the keyboard loads. A backup keeps you from having to reconstruct the old assignments from memory.
Distinguish an app profile from its hardware copy
The device’s profile selector lets you change which Synapse profile you are editing or using. The onboard panel manages the profiles stored in the keyboard. A profile appearing in the drop-down confirms that Synapse knows about it. A named hardware slot and a successful offline test confirm that the relevant settings are usable without the app.
A cloud-synced or exported profile can be useful if you use Synapse on multiple computers. It serves a different purpose from onboard storage. A profile file needs compatible software to import it, while a saved hardware setting can be applied by the keyboard if the model supports that setting.
After making a substantial edit, check the slot again. If the offline result still matches the older profile, open the onboard panel and transfer the current version again where the interface allows. Treat the behavior after reconnecting as the final check.
What a Razer keyboard can carry in onboard memory
Start with ordinary keyboard assignments
A simple key-to-key assignment is the best first test. It uses an ordinary keyboard event that the receiving computer can recognize. If the remap works when the keyboard is moved to a second machine without Synapse, you have verified the hardware slot and the key assignment together.
More complex mappings may involve a different software or device path. An assignment to launch a program can depend on the application and its path on the host computer. An inter-device command can depend on another peripheral and software. Check each feature you actually need after you know the simple mapping works.
| Setting or behavior | What to verify offline |
|---|---|
| One-to-one keyboard remap | Select the onboard slot and test the key in a plain app |
| Macro | Check model support and test that exact macro, including its playback behavior |
| Linked game or app profile | Switch manually if automatic selection depends on the host software |
| Chroma Studio or app-linked RGB | Check which effects need software and which hardware effects your model offers |
| Analog actuation or Rapid Trigger | Confirm the supported profile and test it with Synapse closed |
| Button that changes profiles | Verify the model’s documented offline shortcut and indicator |
Test macros individually
Some keyboards can retain supported macro assignments. Behavior can vary with the model and the type of macro. Start with a harmless sequence in a local text editor, such as a short string you need for work. Confirm it works with Synapse open. Then quit the app and run the same test on the intended hardware slot. If basic remaps work and the macro stops, you have narrowed the issue to the assignment or its dependency.
Keep the test separate from mouse movements, app launches, or shortcuts that require the right window to be active. Those introduce several reasons for a command to fail. A simple sequence is easier to diagnose. If that works, bring back the feature you need one element at a time.
For gameplay, use only the bindings permitted by your game or event. A profile can be technically portable while still containing an assignment you should leave out of a competitive configuration. Keep a separate clean profile if the keyboard travels between work and play.
Use a hardware lighting preset if the model offers one
A Razer keyboard may retain its remaps while switching back to a built-in lighting effect when Synapse closes. Chroma Studio synchronization, app-reactive effects, and other host-driven lighting can require software. Several models offer separate onboard lighting shortcuts. Check the support list and manual for the exact sequence because it varies.
On supported models, Razer documents shortcuts in the Fn + Ctrl + number family for cycling through built-in quick effects. The options available vary by board and mode. Try a static color or brightness change with the software closed if your goal is to see the legends on a second computer.
Test lighting and key behavior independently. Seeing a different color after unplugging the keyboard does not establish that your remap disappeared. Likewise, seeing the color you expected does not prove the rest of the profile loaded. Use the visible key test to confirm the profile.
Account for special handling on an analog Huntsman
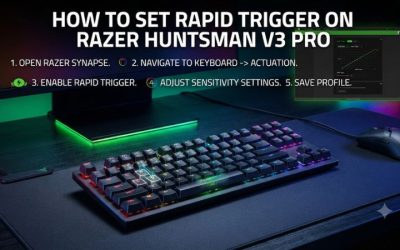
The original Huntsman V3 Pro family includes a Last-used Synapse Profile, represented by a white profile indicator, and a fixed Factory Default profile, represented by green. Razer also documents editable profiles and hardware adjustments for supported actuation and Rapid Trigger settings. Follow the manual for the layout you own, because the physical shortcuts can differ among versions.
For portability, select the intended profile and test a behavior you can reproduce offline. On an analog keyboard, a change to an ordinary remap may be easier to verify than a subtle change in actuation. After confirming the slot, separately compare press depth and release behavior on a few clearly chosen keys.
Some controller-style mappings have their own software requirements. If your analog profile sends a joystick-style input, test that feature in a supported game or input view rather than assuming that ordinary offline keypresses establish controller support. Record which functions worked in the exact mode you intend to use.
Verify the profile without Synapse
Quit the background application before testing
Use the system tray to exit Synapse where that option is available. Closing the main window can leave the program active in the background. If a linked profile, macro, or Chroma effect is still running, your test may look successful while relying on the host software.
Once the application is closed, select the onboard profile using the shortcut documented for your board. Try the remapped key, switch to another hardware profile, and verify that the key changes back. Return to the intended slot and test again. The difference between two slots gives you stronger confirmation than a single test.
If Synapse starts again automatically after a reboot, use a compatible second computer without the software for the cleanest test. A direct USB connection avoids mixing hardware storage checks with Bluetooth discovery or receiver pairing issues. After confirming the profile, repeat in the exact connection mode you actually use.
Reconnect and confirm the selected slot
Unplug the keyboard, reconnect it, and see which slot or state the board loads. Some devices can return to a default or last-used position. Record the shortcut for the profile you need instead of assuming it will always activate on startup. If your board has a profile light, note the color only after confirming what the remapped key does.
Test the keys that matter to your real use. At a station with a different keyboard layout, an ordinary key can produce a different character even when the hardware remap is correct. Verify the operating system’s selected input language if a remapped punctuation key looks wrong while letter or navigation keys behave as intended.
For a traveling setup, test from the scenario you care about. If you will use a borrowed PC with no administrator access, choose assignments that are useful as basic keyboard events. If you need a particular app, check that its shortcuts make sense on the destination system.
Use a simple record of what travels
Make a short note of the model, slot, switching shortcut, and the features you tested with Synapse closed. Separate confirmed mappings from software-dependent effects. This makes it easier to recover after a firmware update or when you swap the board between a desktop, a laptop, and a work setup.
If you use more than one game profile, add one harmless way to distinguish each profile. You can also export software profiles for backup if the option is available. Keep the export with a note about its model and application version so the file is useful later.
The purpose of this check is portability. A small profile with a few known working functions is easier to use under time pressure than a full set of settings that you have only seen inside Synapse.
Fix missing hardware slots or profiles that reset
If there is no onboard memory icon
Confirm that Synapse detects the physical keyboard and that you are on its device page. A global settings, profile management, or Chroma page may show profile names without showing the keyboard’s hardware slots. Go back to the actual device and open its Customize page.
Then consult the manual for the model and revision. If the keyboard stores a limited set of settings automatically, or uses dedicated onboard presets, those controls may look different from the drag-and-drop panel shown for another board. A fully writable profile manager is a feature of specific models.
If the manual documents onboard profiles and your device page is incomplete, compare a direct data connection and verify the supported Synapse release. Check the exact device firmware if detection remains inconsistent. Avoid resetting a working keyboard until you have recorded the settings you need and tested the simpler connection and software checks.
If the wrong profile keeps loading
Check the physical slot indicator and the effect of your test key. If the board changes only when a game launches, review app-linked profile settings in Synapse. A game-linked profile can become active while the hardware profile remains correctly stored. Close the app and manually select the hardware slot to separate the two paths.
Check that the profile stored in the slot has the intended name and latest assignment. Two similarly named profiles can be easy to confuse after migration. Rename them clearly, transfer the right version, and test offline before opening the game.
If you leave Synapse running for RGB but want a predictable keymap, decide whether to use manual switching or a deliberate app link. Test the transition from desktop to game and back. A reliable setup comes from knowing which source is controlling the board at each moment.
If only a particular setting fails offline
Return to the simplest verified remap. If it still works, the onboard slot is active. Now test the missing function by itself and check the model’s supported offline behaviors. Complex macros, Chroma effects, app launch actions, and controller-style inputs can each fail for different reasons.
If basic keys also fail after reconnecting, verify the active slot, replace its contents with a known-good profile, and retest on a direct connection. If several slots behave inconsistently across hosts, collect the model number, firmware version, connection type, and the smallest reproducible test for support.
Keep the recovery process reversible. Save or record your working profiles before removing software or resetting the keyboard. Once you can reproduce a basic onboard mapping, restore the additional assignments one at a time so you can see which setting changes the result.
Conclusion
To save a Razer keyboard profile to onboard memory, open the keyboard in Synapse, transfer the profile to a supported hardware slot, and select that slot directly on the keyboard. Quit Synapse and verify a simple remap after reconnecting. Then test macros, lighting, and analog settings separately. Your exact model and the successful offline test tell you which settings you can take to another computer.