🛒 Best Price Today on Amazon
Prime members get fast, free shipping on everything above, plus member-only deals. New members get a 30-day free trial — cancel anytime.
A keyboard PCB should be checked before switches are permanently soldered or the case is fully assembled. The best keyboard pcb testing tool for diy builds depends on whether you need to verify key registration, identify broken traces, inspect solder joints, or diagnose electrical faults.
Quick Verdict: Which PCB Testing Tool Is Best?
A digital multimeter with audible continuity and diode-test functions is the most versatile hardware tool for diagnosing keyboard PCB faults. For ordinary pre-assembly key registration, however, a suitable conductive probe and keyboard-testing software may be sufficient.
The iFixit Digital Multimeter is our preferred all-around diagnostic choice because its documented functions include continuity, resistance, voltage, and diode testing.
The Fluke 101 provides a simpler dedicated measurement option, while the Klein MM400 is a strong general-purpose alternative.
Builders who already own a multimeter may benefit more from a precision electronics toolkit than from purchasing another measuring instrument.
Quick Comparison Table
These recommendations include five electrical measuring instruments and two supporting toolkits. The toolkits do not replace a multimeter; they provide tweezers, screwdrivers, and other accessories that are useful for exposing contacts, checking key registration, or reaching components during diagnosis.
| Tool | Category | Main Strength | Best For |
|---|---|---|---|
| iFixit Digital Multimeter | Electrical measurement | Comprehensive diagnostic functions | Best overall |
| Fluke 101 | Compact multimeter | Audible continuity and diode test | Reliable basic diagnosis |
| Klein Tools MM400 | Auto-ranging multimeter | Broad measurement capabilities | General DIY electronics |
| UNI-T UT61E+ | Advanced multimeter | High-resolution measurement | Frequent PCB work |
| Adafruit Digital Multimeter | Electronics multimeter | Beginner-friendly continuity testing | Learning diagnostics |
| iFixit Pro Tech Toolkit | Precision tool collection | Tweezers and small tools | PCB access and probing |
| iFixit Essential Electronics Toolkit | Basic repair toolkit | Opening and precision tools | Beginner preparation |
How We Selected the Best Keyboard PCB Testing Tools
PCB testing requires separating software-level key registration from electrical troubleshooting. A keyboard can register keystrokes yet still contain intermittent joints, while a board that does not enumerate over USB may require checks involving power, connectors, controller components, or firmware.
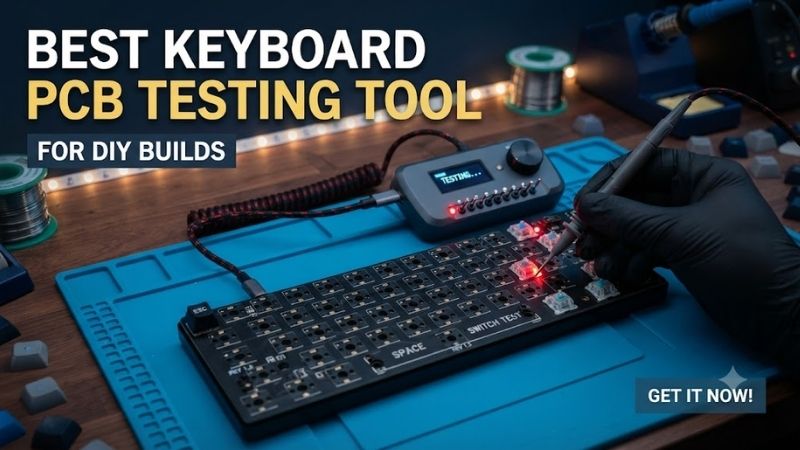
Key Registration and Electrical Continuity Are Different Tests
A key registration test checks whether the keyboard controller reports an intended keypress. Continuity testing checks whether two electrical points are connected. Both are useful, but neither establishes every aspect of PCB health or firmware correctness.
For a powered, assembled keyboard PCB, temporarily bridging the two switch contacts can imitate a switch closing.
When the firmware is functioning, suitable test software may show the corresponding key.
However, a missing response could result from firmware, matrix configuration, a diode, a damaged socket, or a trace fault.
A multimeter is useful for narrowing down the electrical cause.
Audible Continuity and Diode Modes
Audible continuity testing is valuable because it allows the builder to probe two points while listening for a connection rather than constantly checking the display. Diode-test functionality is also relevant because many mechanical keyboard matrices use diodes to control current paths.
A continuity beep does not automatically mean a circuit is healthy.
Parallel components and alternate conductive paths can affect the reading.
Likewise, a missing beep may be normal when measuring across a diode in the wrong direction.
Understanding the expected circuit is necessary before interpreting the result.
Probe Quality and Safe Testing Procedures
A precise probe makes it easier to contact small solder pads without accidentally bridging neighboring components. Sharp conductive tools can be helpful for momentary switch-pad testing, but uncontrolled contact can also short adjacent traces or damage delicate PCB surfaces.
Powered key-registration testing and unpowered continuity measurements should be treated as different procedures.
Disconnect power before resistance, continuity, or diode checks unless the instrument and procedure explicitly require otherwise.
Never use a multimeter’s current-measurement mode across two switch contacts.
That is not the same as checking continuity.
Best Keyboard PCB Testing Tools Reviewed
The seven tools below support different stages of keyboard assembly and troubleshooting. Some provide electrical measurements, while others help builders reach contacts or manage delicate components. The best purchase depends on which diagnostic capabilities are missing from the existing toolkit.
iFixit Digital Multimeter — Best Overall
The iFixit Digital Multimeter provides a broad set of diagnostic functions relevant to keyboard PCB work, including continuity, resistance, diode testing, and DC voltage measurement. Its compact design makes it suitable for hobbyists who want one instrument for keyboard projects and general electronics maintenance.
Best For: Builders who want a versatile electrical diagnostic instrument.
Verified Functions
The current iFixit Digital Multimeter supports AC/DC voltage and current measurement, resistance, capacitance, frequency, diode testing, and audible continuity.
It features an auto-ranging 9,999-count display.
The manufacturer also specifies a backlight and data-hold function.
For keyboard work, continuity and diode modes are generally more relevant than the instrument’s high-voltage capabilities.
These functions can help determine whether selected PCB traces are connected and whether a diode responds as expected.
Practical PCB Applications
A builder can use continuity mode to inspect suspected broken traces, damaged socket connections, or solder joints.
The diode mode can assist when checking a keyboard matrix diode.
However, testing a diode while it remains connected to the circuit can produce readings affected by other components.
The result should be interpreted according to the board’s circuit design.
Advantages
The meter is useful beyond mechanical keyboards.
It may also support troubleshooting of low-voltage electronics, cables, and hobby projects.
That versatility can justify the purchase for users who build several devices.
Limitations
A multimeter cannot independently confirm that the keyboard firmware assigns the correct keycode to every matrix position.
Software-level testing remains necessary.
Pros: Broad measurement functions, audible continuity, diode testing, auto-ranging, portable design.
Cons: More functions than beginners may need, not a complete keyboard matrix tester, requires careful probe handling.
Buy If: You want one instrument for keyboard PCBs and general electronics.
Skip If: You already own a reliable meter with equivalent functions.
Fluke 101 Digital Multimeter — Best Straightforward Electrical Tester
The Fluke 101 is a compact instrument designed around fundamental electrical measurements. Its clear emphasis on continuity, resistance, voltage, and diode testing makes it particularly appropriate for users who want dependable basic diagnostics without navigating an extensive set of advanced features.
Best For: Builders who prefer a compact, uncomplicated multimeter.
Technical Characteristics
Fluke documents audible continuity testing and a diode-test function.
The meter also measures resistance and AC/DC voltage.
Its published design emphasizes portability, automatic shutdown, and one-handed use.
These capabilities cover many ordinary keyboard PCB troubleshooting requirements.
PCB Diagnosis
The continuity buzzer can help trace selected conductive paths.
Resistance mode may help investigate unusual connections, although circuit context remains essential.
Diode testing is useful when examining individual components in a keyboard matrix.
The meter should not be used to infer the electrical health of an entire PCB from one reading.
Practical Value
The Fluke 101 makes sense for builders who primarily need basic electrical tests.
It is less attractive when advanced logging or high-resolution measurements are a major priority.
Pros: Audible continuity, diode mode, compact design, established instrument manufacturer.
Cons: Limited advanced functionality, cannot replace firmware testing, requires probe discipline.
Buy If: You want a straightforward diagnostic multimeter.
Skip If: You require advanced data capture and analysis.
Klein Tools MM400 — Best General-Purpose Workshop Multimeter
The Klein Tools MM400 provides auto-ranging measurement functions and a broad electrical feature set. It is a practical choice for keyboard builders who also maintain other electronic devices and want a meter that supports multiple troubleshooting workflows.
Best For: Users maintaining keyboards and other electronics.
Technical Specifications
Klein documents AC/DC voltage and current measurement, resistance testing, capacitance, frequency, duty cycle, temperature, continuity, and diode testing.
The MM400 uses a 4,000-count LCD.
It is designed as a general-purpose digital multimeter.
For keyboard PCBs, the relevant modes are continuity, resistance, diode testing, and selected low-voltage DC measurements.
Keyboard Applications
The MM400 can help investigate broken conductive paths and selected component faults.
Its audible continuity function is convenient for checking traces while looking directly at the board.
However, it cannot determine whether a particular keyboard firmware layout is correct.
That remains a separate software-level task.
Trade-Offs
The meter provides more capability than some beginners require.
Users should familiarize themselves with the correct probe sockets and measurement modes before testing.
Pros: Auto-ranging, continuity, diode testing, broad workshop utility, published specifications.
Cons: Larger feature set, unnecessary modes for simple key tests, requires correct setup.
Buy If: You want a multimeter for keyboard and general DIY repair work.
Skip If: You only need occasional pre-soldering key registration.
UNI-T UT61E+ — Best for Advanced PCB Troubleshooting
The UNI-T UT61E+ is designed for users who need more measurement resolution and advanced instrument functions. It is particularly relevant to frequent electronics work, although most beginner keyboard builds do not require its full capabilities.
Best For: Experienced hobbyists who regularly diagnose electronic circuits.
Published Features
UNI-T documents a 22,000-count display for the UT61E+.
The UT61+ family includes diode and continuity testing, True RMS measurement, USB communication, and additional measurement functions.
These capabilities make the meter suitable for more detailed electronics diagnostics.
However, high display resolution does not automatically make ordinary keyboard switch-pad tests more accurate or useful.
PCB Testing Applications
The UT61E+ can help investigate electrical faults requiring more than a simple connection check.
For example, a builder diagnosing a controller or power-related problem may benefit from additional measurement capabilities.
However, meaningful interpretation requires understanding the circuit.
Who Needs It
This is an appropriate tool for someone who builds, repairs, and modifies electronics frequently.
A beginner checking one hot-swap PCB may find it unnecessarily complex.
Pros: High-resolution display, continuity and diode functions, advanced measurement features.
Cons: Greater complexity, excessive capability for simple builds, higher learning requirement.
Buy If: Keyboard PCB work is part of a broader electronics hobby.
Skip If: You only need a simple continuity buzzer.
Adafruit Digital Multimeter — Best for Learning PCB Diagnostics
Adafruit’s beginner-oriented multimeter offerings are useful for hobbyists learning electrical measurements. The company’s educational materials clearly explain continuity, resistance, voltage, and diode testing, making the broader ecosystem especially helpful for new keyboard builders.
Best For: Beginners learning to diagnose low-voltage circuits.
Core Functionality
The most important features to confirm on the selected Adafruit meter are audible continuity, resistance, DC voltage, and diode testing.
These are the functions most likely to support ordinary keyboard PCB troubleshooting.
The exact specifications vary among Adafruit’s meter products.
Therefore, buyers should select a specific model rather than relying on the brand name alone.
Learning Benefits
Adafruit’s educational approach explains what continuity means and how to interpret common measurements.
This can be valuable for beginners who have never used a multimeter.
However, the educational resources do not replace familiarity with the actual PCB’s expected circuit.
Limitations
The exact product revision must be checked for included functions.
A basic meter without audible continuity may still measure resistance but be less convenient for rapid trace checking.
Pros: Beginner-oriented ecosystem, foundational diagnostic functions, learning support.
Cons: Specifications vary by model, less specialized than a dedicated keyboard testing system.
Buy If: You are learning electrical diagnostics alongside keyboard building.
Skip If: You already own a suitable meter and understand its functions.
iFixit Pro Tech Toolkit — Best Supporting Toolkit for PCB Inspection
The iFixit Pro Tech Toolkit is not an electronic measuring instrument. It is a collection of precision tools that helps builders open cases, handle small components, and reach PCB contacts. It complements a multimeter but cannot independently measure resistance or diagnose electrical faults.
Best For: Builders who need precision tools around PCB testing.
Included Equipment
The kit includes precision screwdriver bits, tweezers, opening tools, spudgers, and other electronics repair accessories.
These tools are useful when accessing keyboard PCBs housed inside compact cases.
ESD-conscious tweezers can also assist with delicate component handling.
However, a conductive pair of tweezers used to bridge switch contacts must be selected and handled appropriately.
Keyboard Applications
The kit can help remove case screws and expose the PCB for inspection.
It also supports controlled handling during troubleshooting.
However, users should not mistake opening tools for diagnostic instruments.
A multimeter remains necessary for electrical continuity measurements.
Pros: Extensive precision tools, useful case-access equipment, organized storage, broad repair utility.
Cons: No electrical measurement capability, higher cost than a basic probe, more tools than some beginners need.
Buy If: You regularly open and repair mechanical keyboards.
Skip If: You only need to check whether keys register.
iFixit Essential Electronics Toolkit — Best Beginner Repair Companion
The iFixit Essential Electronics Toolkit provides a smaller collection of precision repair tools. It is a useful companion for keyboard builders who need to open housings, remove screws, and work carefully around a PCB but do not need the full Pro Tech collection.
Best For: First-time builders preparing a basic electronics workbench.
Practical Contents
The Essential Electronics Toolkit is intended for general electronics disassembly and maintenance.
It provides a foundation of precision handling and opening tools.
The exact contents should be checked against the current package.
It is not sold as a dedicated keyboard PCB electrical tester.
When It Is Useful
A beginner may need to remove a keyboard’s case screws before reaching the PCB.
Appropriate tools reduce the temptation to use oversized screwdrivers or improvised metal objects.
However, electrical diagnosis still requires a suitable meter or another testing method.
Pros: Beginner-friendly tool collection, useful for disassembly, compact kit.
Cons: No dedicated voltage or continuity measurement, limited compared with a professional toolkit.
Buy If: You need basic tools to access and inspect keyboard electronics.
Skip If: You specifically need an electrical multimeter.
Buying Guide: Choosing Tools for DIY Keyboard PCB Testing
The most economical toolkit depends on whether you are assembling a functioning hot-swap PCB, diagnosing a board with missing key registration, or repairing a circuit that has failed electrically. Each situation requires different tests, and purchasing several expensive instruments is unnecessary for many first builds.
Test the PCB Before Installing Switches
For a supported powered PCB, connect it according to the manufacturer’s instructions.
Use appropriate keyboard-test software.
Briefly bridge the intended switch contacts with a suitable conductive tool when the manufacturer permits that method.
Record whether the expected keys register.
Use a Multimeter for Electrical Faults
Disconnect power before ordinary continuity and resistance checks.
Trace suspected open circuits using appropriate schematic information where available.
Check diodes in the correct mode.
Do not mistake normal diode behavior for a broken trace.
Distinguish Firmware Problems From PCB Damage
A key that does not register may have an electrical problem, but firmware or keymap configuration may also be responsible.
Before attempting hardware repair, confirm that the board is running the intended firmware and that the test software recognizes it.
Avoid Accidental Shorts
Do not bridge adjacent components indiscriminately.
Use appropriately sized probes.
Keep conductive debris away from powered boards.
Never test continuity on an energized circuit using a conventional meter.
Build a Practical Beginner Toolkit
A basic combination of conductive tweezers, an appropriate key-testing utility, and an audible-continuity multimeter covers many common problems.
Precision screwdrivers become important when accessing the PCB.
Soldering and desoldering equipment are only necessary for builds or repairs that require those operations.
Frequently Asked Questions
Keyboard PCB testing can be confusing because key registration, continuity, diode operation, and USB communication are different functions. These answers clarify which tools are required at each stage and how to avoid damaging a board during diagnosis.
Do I need a multimeter to test a keyboard PCB?
Not always. Basic key registration may be tested using appropriate conductive contacts and software, but electrical fault diagnosis often benefits from a multimeter.
Can tweezers test a keyboard PCB?
Yes, on supported boards, momentarily bridging designated switch contacts can imitate a closed switch. Follow the board’s testing instructions.
Is continuity testing the same as testing a key?
No. Continuity measures electrical connectivity, while key testing checks the keyboard controller’s response.
Should a PCB be powered during continuity testing?
Generally no. Disconnect power before ordinary continuity or resistance measurements.
Can a multimeter identify a broken diode?
Diode mode can help, but in-circuit readings require careful interpretation.
Do hot-swap keyboards still require PCB testing?
Testing is useful because damaged sockets, traces, or firmware issues can occur even without soldering.
Can testing damage the PCB?
Yes. Incorrect probes, accidental shorts, and inappropriate measurement settings can damage components.
Final Verdict
The iFixit Digital Multimeter is a versatile diagnostic choice for DIY keyboard builders, while Fluke 101 and Klein MM400 provide reliable alternatives. For pre-assembly key checks, software and a suitable conductive probe may be sufficient. Choose tools according to the fault you actually need to diagnose.