🛒 Best Price Today on Amazon
Prime members get fast, free shipping on everything above, plus member-only deals. New members get a 30-day free trial — cancel anytime.
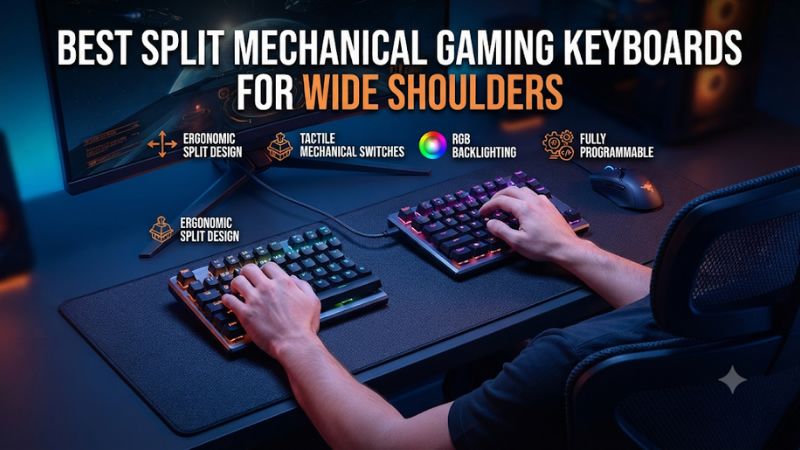
Choose the Kinesis Freestyle Edge RGB Plus for a wide wired split with familiar keys, or the Keychron Q11 Ultra 8K if you want wireless separation. The best split mechanical gaming keyboards for wide shoulders let you place the movement keys and mouse where your arms rest. Measure those positions before comparing switches or polling rates.
Which split mechanical keyboards give wide shoulders the most room?
How the shortlist compares
These six keyboards have two physically separate mechanical key modules. The most important differences are how far you can move the halves, whether the mouse can sit comfortably in the resulting gap, and how much of your familiar layout survives that arrangement. A split layout with a permanently joined case cannot offer the same independent placement.
The specifications in the table describe designs and supported modes. They do not tell you exactly how the board will fit your body or desk. Use the product that matches your preferred reach, then check the connection conditions, return options, and accessories for the exact package.
| Keyboard | Layout and connection | Best use | Main limit to check |
|---|---|---|---|
| Kinesis Freestyle Edge RGB Plus | Wired, traditional split TKL-style layout | Wide wired placement with familiar keys | Tethered bridge cable and a relatively large footprint |
| Keychron Q11 Ultra 8K | 75%, wireless link between halves | Broad cable-free positioning with a function row | Cost, charging, and wireless behavior |
| Keychron Q11 | 75%, wired with a bridge cable | Familiar and programmable desk setup | Reach of the supplied bridge cable |
| Dygma Raise 2 | 60%-style split with thumb keys; wired or wireless versions | Large mouse area and custom thumb bindings | No dedicated function or arrow cluster |
| ZSA Moonlander | Wired columnar split with thumb clusters | Left-half gaming plus fully custom layers | Columnar layout and thumb reach take practice |
| MoErgo Glove80 | Contoured split; wireless halves, USB or Bluetooth to host | Players who also want a sculpted mechanical typing layout | Large layout change and no assumed esports polling mode |
Kinesis Freestyle Edge RGB Plus is the best wired starting point
Kinesis lists up to 20 inches of split for the Freestyle Edge RGB Plus, with excess bridge cable stored in the keyboard. That gives a broad-shouldered player a useful amount of placement flexibility without needing to choose a wireless setup. It keeps familiar staggered rows and a function row close to what most gamers already know.
Buy the Plus version if you want the included Lift Kit and hot-swappable switches. Check the full listing because the older Freestyle Edge RGB and the current Plus can appear together.
Use the board flat first, then add a low tenting angle once you have found a comfortable distance. A high angle chosen on day one can make the keyboard seem harder to use than it needs to be.
For gaming, put the left half where your movement hand reaches comfortably and keep the right half outside the main travel of your mouse. The permanent bridge cable and larger halves give you less cable freedom than the premium wireless models. Plan where the extra cable goes so it does not enter the mouse path or pull a half out of position.
Keychron Q11 Ultra 8K is the best choice without a bridge cable
The Q11 Ultra 8K links its halves wirelessly and offers 2.4 GHz, wired, and Bluetooth host options. Keychron specifies up to 8,000 Hz on supported wired and 2.4 GHz modes. The more important reason to buy it for this use is that you can widen the split without routing an inter-half cable around your mousepad.
Its 75% arrangement keeps a function row and a familiar stagger. Start using the same movement and navigation keys you already know.
Once the halves sit properly, assign only the extra actions you actually need. Keychron identifies the Ultra as a ZMK-based design, which is worth checking if you expect the same firmware workflow as the older wired Q11.
Check the charge and reconnect routine on both modules. Put your receiver and keyboard where they will actually sit before using a wireless performance mode for matches. This is a premium purchase, and there is little reason to pay for the highest reporting mode if the no-cable split by itself solves the placement problem.
Keychron Q11 is the familiar 75% wired pick
The original Q11 offers a 75% mechanical layout, a bridge cable, and programmable support. It suits someone who wants a function row and arrow keys without learning columnar rows or moving frequently used keys under a new thumb cluster. The two halves can sit together or apart.
Measure with the original bridge cable before buying. A link that looks long enough on the spec sheet also needs slack to reach the ports and travel behind the mouse area.
Check Keychron’s guidance for compatible replacement connection cables if the supplied one cannot span your desk comfortably. You may find that angling the modules slightly gives you the desired reach with less total separation.
The Q11 is a good compromise if you want a large change in hand position and a small change in muscle memory. It is less appealing if you place the mouse in the center and the cable crosses your preferred sweep. Decide on the actual desk geometry before paying to move up to the cable-free Ultra.
Dygma Raise 2 lets you put more actions under the thumbs
The Raise 2 starts with a 60%-style split and adds thumb-accessible keys. Its thumb positions give a player places to move actions such as jump, crouch, or a layout change without reaching far with a pinky. The small footprint also makes it easier to leave mouse space between or beside the modules.
Choose the exact wired or wireless configuration and check whether tenting is included in the option you are buying. Dygma offers wireless connectivity and built-in tenting as configuration choices. If you want a wireless host link and fully free placement, confirm that you selected the appropriate version before comparing the total price.
The smaller layout has fewer dedicated navigation and function positions. If you use F-keys often while gaming or working, build a simple layer and practice using it before remapping everything. If your games depend on many conventional keys at once and you dislike layers, an ordinary split TKL or 75% can be easier to live with.
ZSA Moonlander is the deliberate choice for a left-half game layout
The Moonlander uses a columnar arrangement, detachable wrist rests, and a thumb cluster on each side. ZSA’s Oryx editor supports custom layouts. Its left side can run independently with USB, which lets you move the right side out of the game area when your bindings fit on the left.
The learning cost is real. Coming from staggered keys, you may hit neighboring columns when you expect a diagonal reach.
Keep one simple layout for typing and a clear gaming layer for the keys you use with a mouse. Test push-to-talk, modifiers, and Escape in a private session before using the arrangement under pressure.
Check thumb reach at the angle you plan to use. Tenting and the thumb cluster’s position can affect which keys feel natural. If maintaining the keyboard’s default thumb placement requires an uncomfortable stretch, assign essential commands to closer keys, or try a level position before evaluating the keyboard again.
MoErgo Glove80 is the sculpted option for gaming and typing
The Glove80 uses separated, contoured halves and low-profile mechanical Kailh Choc switches. It offers Bluetooth and a USB host path through the left half.
MoErgo documents that the two halves still communicate wirelessly with each other. Plugging the left side into the PC therefore solves a different part of the connection than changing the inter-half link.
Consider it if you spend a substantial part of the day typing and want the contour and split for that same desk. The ZMK-based layout editor lets you create a separate game layer. Confirm that important multi-key combinations work, and check MoErgo’s NKRO setting if your scenario needs it.
The transition is larger than with the Q11 or Kinesis. Go slowly if you switch between a broad split layout all day and ordinary keyboards elsewhere. For a gaming-first shopper whose only concern is widening the hands, a flatter model with familiar rows can provide the same placement benefit with less practice.
How should you measure the space before you buy?
Put your hands where they naturally land
Sit at the desk with the usual chair height and mousepad. Let your arms fall loosely near your sides, then bring your hands up where you would normally control the game.
Mark the position of the movement hand and mouse grip. For typing, mark where each index finger naturally reaches the home row.
The distance between the marks is more useful than measuring straight across your shoulders. Keyboard key clusters occupy space around each mark, and your mouse has to travel without hitting either case. A left hand at the side of the body and a mouse at the same natural distance on the right can consume considerably more desk width than the case dimensions alone suggest.
Keep the measured marks as a reference. Moving a module slightly inward can be more comfortable if the desk limits mouse travel. Treat separation as an adjustment and keep changing it in small steps until you can use the keys without reaching outward with either shoulder.
Leave enough space for the mouse to complete a normal sweep
Mock up the two modules with paper or folded cardboard. Put the mouse in your usual spot and make the largest sweep you regularly use in game.
Try it with your usual sensitivity and from the point where your hand normally returns to the mat. Check whether the thumb, mouse body, or cable hits the mock modules.
With the mouse between the halves, the right module may need to sit farther away than it does in a typing configuration. If you need keys from that half during play, map the essential ones to the near side or move the mouse back outside the keyboard. A larger split only helps when the placement supports the task.
Try a left-half-only arrangement only after checking the model’s connection and key requirements. Some boards can operate with the other half disconnected, while others are designed around both modules remaining attached or powered. You can usually move a connected half out of the way if the cable or link allows it.
Account for bridge cables, tenting, and desk depth
- Measure between ports. Check where the connection enters each module and add slack for turns behind the mousepad. A cable stretched straight across the desk is less usable than the same length with a safe route.
- Add space for palm supports. A module with a rest occupies room in front of its keys. Check whether it blocks the mousepad or makes you sit farther from the desk.
- Start with low tenting. Raise the inner edge only a little at first, then check wrist position and key reach. Higher tenting increases usable height even when separation stays the same.
- Keep the connection clear. On a wireless board, place both halves in their eventual positions and test them while the other wireless equipment on your desk is active.
A flat split with well-placed shoulder reach can be preferable to an aggressively tented one that makes you lift your forearms. Your chair and desk height affect that result. Compare the settings over time and favor the position you can maintain during concentrated play.
Treat shoulder width as one input. Arm length, available desk depth, and where you seat yourself all influence the final arrangement. Two people with similar measurements can prefer different distances around the same keyboard.
Which split layout is easiest to use with different games?
Keep the right module reachable for games with many commands
For a game that relies on number keys, function keys, or the navigation cluster, begin with both halves in a usable position. Try the left module straight ahead of the movement hand and put the right one beyond the mouse.
Check which keyboard commands you can reach with the mouse still on the mat. A wide typing split may need different spacing for a game that expects you to use both modules.
Use the layout you already know as a reference. A shooter with a short list of left-hand commands can give you room to move the other module very far away.
A strategy game or simulation can make a dedicated function row more useful. Choose the Q11 or Kinesis-style layout if you would otherwise rebuild a large number of commands from scratch.
Move the right module slightly forward if you have depth but limited width. Keep its front corner clear of the edge of your mousepad.
Try ordinary commands before saving a new arrangement. If the mouse collides at the end of a sweep or your shoulder moves every time you reach an important key, shift the layout again.
Make one-handed layers simple enough to use under pressure
If a left-only or compact layout appeals, list the keys you need before deciding how many controls can move to a thumb layer. Include Escape, push-to-talk, menus, modifiers, and any key for leaving the game or switching windows. Check that you can hold movement while invoking each command without falling into the wrong layer.
Test releases as well as presses. A layer key that changes what a held key does can make movement or crouch behave unexpectedly. Use a private session to reproduce the same sequence.
If the software supports a visible indication of the active layer, make its meaning easy to remember. Keep an uncomplicated base map as a backup.
Set a cable plan before paying for wireless halves
Dygma’s wired setup guidance documents a 50 cm cable for wider placement. That number is useful when you can reach your measured positions with slack.
Check the supplied cable for whatever configuration you choose. The longest cable in a box can serve the host connection and may not be intended to link the halves.
For a fixed desk, tape down the intended bridge route temporarily before buying an accessory. If it can stay off the mouse surface and still allow adjustments, the wired model may be the simpler purchase. If it has to cross the full width of your mousepad, a wireless inter-half link gives you a practical benefit independent of the host connection or polling rate.
What should you test before settling on a split gaming setup?
Start with familiar bindings and repeat a movement drill
Keep the main movement, interaction, and modifier keys where you expect them. In a practice area, move diagonally while holding crouch or sprint, then jump or interact. If the combinations fail, identify whether a key moved under a layer, the game sees a different mapping, or a connection is dropping.
Try your normal mouse motions while you hold those keys. A module can feel fine during typing and still shift when you hold movement keys and reposition the mouse repeatedly.
Add desk grip or adjust placement if the keyboard slides. Test again before changing the switches.
Use a stable connection for the initial comparison. Once the layout is comfortable, compare wired, receiver, or Bluetooth when your board offers them.
Advertised polling rate describes report opportunities under stated conditions. Switch processing, game sampling, and the machine still affect the response you feel.
Build two positions for typing and gaming
Some setups work best with one position for both tasks. Others benefit from sliding the right module farther aside during a match.
Mark the two placements lightly and verify that both fit without excess cable tension. This also helps other people return a shared keyboard to a known arrangement.
If you change devices frequently, confirm whether your favorite settings follow the board. Test important remaps and the default layer after a restart or receiver switch. A custom board that types normally but boots into an unexpected layer can be more disruptive than one with fewer settings.
For a first split, stop adding changes when the physical position already feels good. A familiar QWERTY layout is enough to assess separation. Add a thumb key, new layer, or steeper angle only when you can point to a movement it would improve.
Judge competitive use from stability and comfort
Try a complete match or practice session, including warm-up, voice chat, and whatever desktop controls you normally use between rounds. Check whether the modules remain where you put them and whether your shoulder position still feels natural after a long stretch. A comfortable setup should hold through ordinary changes in pace and attention.
If you frequently travel, repeat the trial on a smaller desk or with your travel mat. A large cabled split can be the best fit at home and impractical when space is limited. If you mostly play in one room, the weight and bulk of a stable module can be advantages.
A keyboard that makes movement inputs predictable and leaves the mouse enough room is doing the job. When two models both pass, compare learning cost, the accessories you actually need, and the ease of getting compatible switches or parts over time.
Conclusion
Choose the Kinesis Freestyle Edge RGB Plus for a wide wired split with familiar keys, or the Keychron Q11 Ultra 8K when cable-free spacing is the main requirement. The original Q11 is the straightforward 75% option, while the Raise 2, Moonlander, and Glove80 make sense if you want a different thumb or typing layout. Base the purchase on your measured hand positions and mouse sweep.