🛒 Best Price Today on Amazon
Prime members get fast, free shipping on everything above, plus member-only deals. New members get a 30-day free trial — cancel anytime.
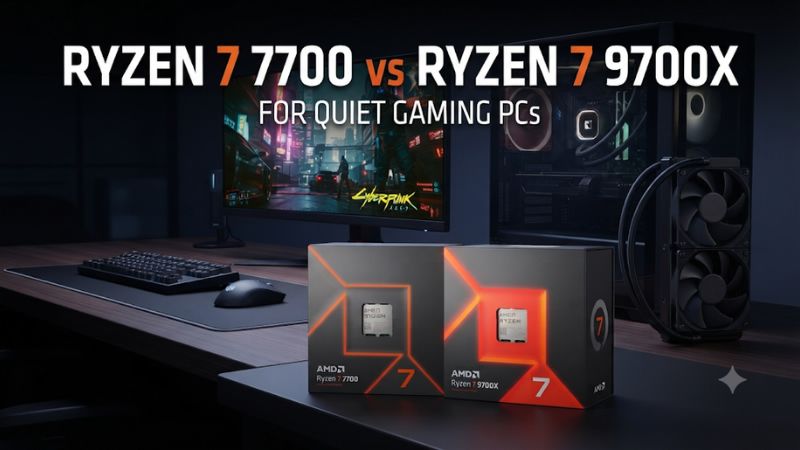
In Ryzen 7 7700 vs Ryzen 7 9700X for quiet gaming PCs, buy the 7700 when the lower total cost leaves room for a better cooler or case fans. Pick the 9700X at 65 W when your games or other workloads benefit from Zen 5. Compare both at the same frame-rate cap to judge the noise you will actually hear.
Choose based on installed cost and noise at your target FPS
The Ryzen 7 7700 is the value starting point if it costs less after cooling and can reach your intended performance. The Ryzen 7 9700X is also a good candidate at its default 65 W setting, especially if the total cost is close and your applications benefit from it. Either CPU can work in a quiet system. The result depends on cooling, graphics load, and how you configure the complete PC.
| Your priority | Best starting decision |
|---|---|
| Lowest total cost with a usable included cooler | Price a retail Ryzen 7 7700 box with its Wraith Prism |
| Same total cost after adding a cooler | Compare the 9700X’s measured gain in your games and tasks |
| Quiet 1440p gaming with a GPU near full load | Measure the GPU and case noise before paying more for the CPU |
| High-refresh, CPU-limited competition | Look up the exact title and compare at the required frame rate |
| Gaming plus frequent CPU-only production work | Compare completion time, sustained power, and noise together |
| Small case that sits near you | Choose around cooler clearance and airflow before selecting either CPU |
A quiet build is easier to assess after you set a target. If you mostly play at 120 fps, compare both processors at a stable 120 fps with the same graphics settings. An uncapped benchmark can drive different amounts of CPU and GPU work and can answer a different question.
Compare the specifications that affect the build
| Specification | Ryzen 7 7700 | Ryzen 7 9700X |
|---|---|---|
| Architecture | Zen 4 | Zen 5 |
| Cores and threads | 8 cores, 16 threads | 8 cores, 16 threads |
| Base clock | 3.8 GHz | 3.8 GHz |
| Maximum boost | Up to 5.3 GHz | Up to 5.5 GHz |
| L3 cache | 32 MB | 32 MB |
| Socket and memory | AM5, DDR5 | AM5, DDR5 |
| Default TDP | 65 W | 65 W |
| Standard boxed cooling offer | AMD Wraith Prism | Cooler sold separately |
| Integrated graphics | Basic onboard Radeon graphics | Basic onboard Radeon graphics |
The 7700’s bundled cooler can reduce the entry cost. Confirm the listing is the version that includes it. A tray chip, used listing, or prebuilt may come differently. The Wraith Prism can be useful for getting the PC running or for evaluating the noise you can tolerate before buying a larger cooler.
The 9700X normally needs a cooler in the parts budget. If you already own a suitable AM5 cooler with all the hardware, compare the chips on price and tested results without adding a replacement you do not need. For a buyer seeking a low noise floor, compare both on the same intended cooler where possible.
Read performance and power at the same operating point
Use 65 W against 65 W for the first comparison
In a TechSpot 14-game retest that compared both models at their default 65 W TDP settings, the 9700X averaged about 4% ahead of the 7700. The results varied by title. The test provides a useful scale for a buying decision, especially when the total price difference is larger than the gaming gap you can verify.
Pay attention to the model in benchmark charts. The Ryzen 7 7700 and 7700X have different default power classes. A review that compares the 65 W 9700X to the 105 W 7700X can be informative for those two processors. For a quiet build considering the non-X 7700, look for a direct comparison with that exact chip.
Verify how reviewers configured the newer CPU. A 9700X using an optional higher-power mode, PBO, or a motherboard performance profile can produce different temperatures and performance. For a quiet gaming purchase, start with the default 65 W setting. Higher-power results are useful only if you intend to run the CPU under those conditions.
Keep TDP, package power, and noise separate
TDP is a thermal design rating. CPU package power shows an estimate of what the processor consumes at a given time. A wall meter includes the graphics card, motherboard, storage, power supply losses, and anything else powered through the measured connection. Fan speed and acoustics depend on the cooling system and the heat it has to dissipate.
Check these in pairs:
- Compare CPU package power and temperature to see how the processor and cooler behave.
- Compare GPU load, temperature, and fan RPM to see whether the graphics card dominates the sound.
- Compare whole-system power at the same frame rate if overall energy use matters.
- Compare noise from the same listening position after the system settles.
A higher CPU temperature by itself does not identify the louder build. One system can target a lower temperature with a more aggressive fan curve. Another can run somewhat warmer at a slower, quieter fan speed while staying within its supported limits. Use the temperature, fan behavior, and workload together.
Treat the 9700X’s higher-power mode as optional
On supported configurations, the 9700X can offer a 105 W mode. That mode is relevant mainly if sustained CPU work gains enough performance to justify extra cooling and power. In gaming tests covering several titles, raising the power limit did not necessarily improve performance meaningfully. Your own workload decides whether changing it is worthwhile.
Leave the mode off for the first acoustic test. If you later enable it, repeat both an actual game and the application you hoped to speed up. Record the time required, fan speed, and sound after the cooler has warmed. A gain in a long render can be useful even when the game result is unchanged.
Before calling a motherboard setting “default,” confirm what it applies. Some setup screens offer board-specific profiles at first boot. Use a documented stock configuration for the comparison. If the existing system has PBO or custom CPU limits, record those separately. This makes it possible to tell whether a result belongs to the processor or to a board setting.
Find what is making the PC loud
Listen during idle, gaming, and a sustained CPU load
Run three repeatable conditions. Start with a quiet desktop, then play a game at your usual settings and frame-rate cap, and finally run a sustained CPU-only workload. Compare which fans react in each case. Keep the case panels, room, and listening position consistent.
| When the sound appears | What to inspect first |
|---|---|
| At the desktop or during small tasks | Minimum fan speeds, background CPU activity, and pump tone |
| When an uncapped game menu opens | Menu FPS, GPU fan response, and electrical whine |
| During normal GPU-heavy gameplay | GPU temperatures, GPU fan speeds, and case airflow |
| During CPU rendering with the GPU mostly idle | CPU cooler, fan curve, and CPU power profile |
| After the case has warmed during a long session | Intake restrictions, exhaust path, and accumulated heat |
A single noise reading is less useful than knowing when the sound begins and which component changes at that moment. A case fan that oscillates every few seconds can be more distracting than steady airflow at a similar loudness. Include the character of the sound in your notes.
If a high-pitched noise follows very high frame rates and appears before fans change speed, investigate which component it comes from. A frame cap can be a useful diagnostic. Electrical noise, fan resonance, and a large airflow sound call for different fixes. CPU selection alone offers little control over a graphics card that becomes audible at your usual settings.
Use the graphics card as part of the quiet-build calculation
At typical 1440p High settings, a discrete GPU can dominate both the heat inside the case and the sound you hear. Test the graphics card and its fan behavior before paying a premium for a CPU. If the GPU fans accelerate halfway through a long session, check whether the case can feed the card with unobstructed cool air.
If you are building from scratch, keep GPU model and cooler design in the budget comparison. Two graphics cards based on the same GPU can have different fan speeds and thermal behavior. Pairing the less expensive CPU with a graphics card or case cooling arrangement you know is suitable can be a better acoustic decision than spending all of the budget on the newer processor.
Try the same in-game cap and visual quality in any A/B comparison. A processor running a game at a higher uncapped rate can ask more of the rest of the system. If one machine is quieter at a lower frame rate, bring both to the same useful performance before attributing the result to a component.
Set a frame cap that matches the game and monitor
Decide how much performance you want for each game. A frame cap can reduce unnecessary work in situations where the machine renders more frames than you need. In a competitive game, choose a cap or uncapped mode based on your latency and consistency preferences, then verify the result. A demanding single-player game may use a lower cap for smoother behavior and less noise.
Test the cap in game, including any separately configurable menu or background behavior. A quiet match followed by a loud menu is common enough to check directly. If the game runs on a variable-refresh display, use a cap and display configuration that works within the monitor and graphics settings you use.
Compare results after several minutes rather than just at launch. A brief game scene can leave the case cool enough for all fans to stay slow. A longer run reveals whether a cap meaningfully lowers component temperatures and sound once the machine reaches ordinary gaming conditions.
Choose cooling and airflow for the exact case
Pick a cooler that fits and can run at a steady speed
Check the height limit, AM5 mounting, memory clearance, and airflow direction. A capable tower air cooler is a practical choice when the case has room. A low-profile cooler can suit a small case, with fan noise depending strongly on the intake layout and how close the fan sits to a panel or vent.
When comparing prices, account for the cooler you will actually keep. For example, a cheaper 7700 with its Wraith Prism can lower the initial cost, but if your acoustic target requires a different cooler, price that part into both options. If you already have a tested AM5 tower, the processor price difference becomes more directly relevant.
Install the cooler according to its instructions and verify contact and fan response with a short workload. Check cables are clear of the blades. Compare stable temperatures and noise after warming up. A cooler sitting against a restrictive panel can need much higher fan speed than the same model in a more open layout.
Tune the fan curve around temperature changes the cooler can absorb
Start from a safe working configuration. Observe typical idle and gameplay temperatures, then adjust the fan curve gradually using the board’s supported settings. If available, use an appropriate ramp delay or hysteresis to reduce sudden changes caused by brief CPU temperature spikes.
Give the upper part of the curve enough speed for sustained loads. Test each adjustment with the case closed and the fans at the settings you will use. If a shallow curve causes rising temperatures during a long game, increase the relevant fan response or improve airflow. A good daily curve should be stable through short bursts and capable of controlling longer heat buildup.
For case fans, choose a control source that makes sense on your board. A sensor near the relevant area or a supported control utility can help the case respond to a warmed GPU. Keep the arrangement simple enough to verify after restarting. Some software-controlled curves do not take effect until a service or profile loads.
Improve the airflow path before replacing a working CPU
Check whether air can reach the intakes and leave the case. A cabinet wall, clogged filter, dense cables, or a case foot pressed into carpet can restrict airflow. A fan that sounds reasonable on an open bench can become louder once mounted behind a restrictive panel.
When troubleshooting, note the normal fan and temperature readings with the case assembled. Then temporarily compare a configuration with a clear intake path or the panel removed, when practical. If the results improve sharply, investigate the case or shelf arrangement. The open-case test identifies a likely direction. It does not by itself tell you which fan or panel to change.
If you use liquid cooling, listen for pump tone as well as fan speed. Follow the cooler’s supported pump settings and verify CPU temperatures under sustained work. A pump or fan with a distracting tone near your seat can matter more than a slight difference in CPU package heat.
Make the final purchase based on the complete machine
Compare installed prices and verified game results
Write down the CPU, required cooler, board, memory, and any fan upgrades. A boxed 7700 can be the lower-cost way to start. A 9700X at a comparable installed price can be worthwhile if your games or work show an advantage you care about. Both can share much of the same AM5 parts list once BIOS support is confirmed.
For example, suppose buying the 7700 instead of the 9700X leaves enough money for a suitable cooler and you can already meet your 120 fps target. That is a case for the 7700. If you already have the cooler and a benchmark shows that the 9700X makes a recurring workload materially faster without pushing your acoustic limit, the case for the newer chip improves.
If you already own the 7700, isolate the noise before upgrading within the same socket. A sudden GPU fan surge or a case fan reacting to every small temperature change can persist after a CPU swap. Correcting the actual cause can produce the result you want while keeping the current processor.
Run a short acceptance test when the build is finished
Record your desktop sound, typical game sound, and warmed load behavior. Keep the same listening position and normal room setup. If you use a sound meter, use the same device and distance each time. An uncalibrated meter can still help with a careful relative comparison, while exact absolute values need better measurement control.
Save the GPU and CPU readings, fan settings, and frame cap that passed. If you change games or move the machine into a cabinet, test again. A quiet configuration is specific to the space, workload, and noise you find acceptable. Verify those conditions on the final build.
Conclusion
Choose the Ryzen 7 7700 when the lower installed price lets you meet your gaming target with good cooling. Choose the Ryzen 7 9700X at its default 65 W setting when it offers useful extra performance at a reasonable total cost. Verify noise at the same frame-rate target and with the whole case warmed. GPU cooling, airflow, and fan behavior often determine what you actually hear.