🛒 Best Price Today on Amazon
Prime members get fast, free shipping on everything above, plus member-only deals. New members get a 30-day free trial — cancel anytime.
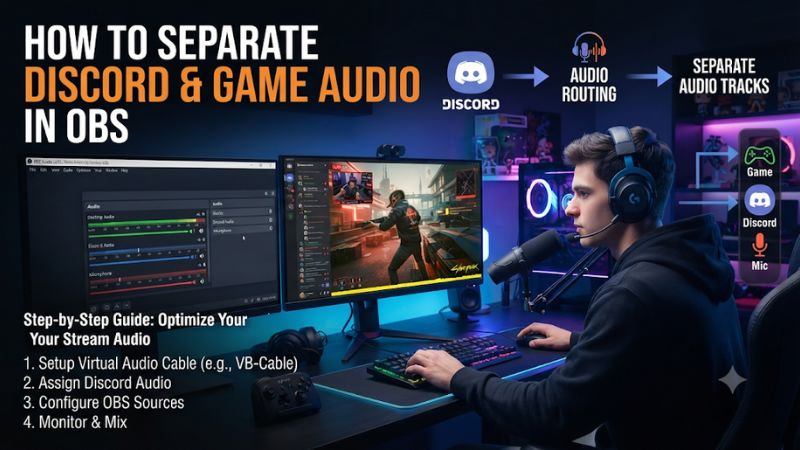
Add one Application Audio Capture source for Discord and one for your game, then disable any duplicate Desktop Audio capture. That is how to separate Discord and game audio in OBS for independent mixer control. To edit the two later, also assign them to separate recording tracks and confirm the result with a short recording.
How do you give Discord and the game separate mixer controls?
Check which capture source your OBS setup supports
On Windows 11 and Windows 10 version 2004 or newer, OBS Studio 28 and later support the dedicated Application Audio Capture source. The source may appear as Application Audio Capture (BETA). OBS Studio 30.1 and later also let supported Game Capture and Window Capture sources include the application’s audio.
These are two ways of getting a game’s audio into the mixer. Use one per game.
Open Discord and the game before configuring sources. Join a voice channel with someone who can help you test, or have a Discord notification or other known playback ready to trigger.
In the game, load a scene that gives you a predictable sound such as footsteps or a menu effect. Keep the OBS mixer visible while configuring each source.
These instructions use the standalone application sources on Windows so you can identify game and Discord audio by name. If you have an existing stream setup, use a duplicate scene collection for the first test. Give the duplicate a name that makes it easy to switch back while you check other scenes and their audio.
Add Discord as its own source
- Create the source. In the target scene, click the plus sign in Sources, choose Application Audio Capture, and name it Discord Voice. Select the desktop Discord window in the source properties.
- Verify the meter. Have another person speak while the game is quiet. The Discord Voice meter should move. The microphone you use to talk to Discord needs a separate OBS input if your recording should include your own voice.
- Recheck the window if it stays silent. Bring Discord to the foreground, confirm you can hear the call, and reopen source properties to select the current Discord window. If different window titles are making it drop, try the executable-matching option when appropriate.
The standalone Discord app makes it easier to identify the source. If your voice chat runs in a browser, an audio source matched to that browser may capture other browser audio as well. Move the call to the desktop app, or dedicate a different browser executable to the call and test that it really stays isolated from alerts and other tabs.
OBS captures Discord playback in this setup. Speech from friends is usually on that path, and notifications or other sounds from the chosen application can be there too.
If you only want voice, suppress unwanted app notifications in Discord and test a second time. Keeping sound output from unrelated programs out of the scene also makes troubleshooting faster.
Add the game’s audio by one method
- Create Game Audio. Add another Application Audio Capture source and select the running game window. If the game has a launcher, pick the actual game process while an audible scene is open.
- Check the existing video source. If you use Game Capture or Window Capture for the picture, open its properties. Turn off its Capture Audio setting for this workflow if Game Audio already captures the same stream.
- Watch for independent activity. Make a sound in the game during a quiet moment in Discord. Only Game Audio should react for that test. Then silence the game and have someone speak to test Discord Voice again.
You can use the built-in Capture Audio option on a compatible Game Capture or Window Capture as the single game-audio path. Rename that source clearly so that its meter is easy to identify.
It is useful when your video and audio should always come from the same application and scene. Verify what happens when you hide, replace, or switch that source during a broadcast.
When a game relaunches into a different executable or displays different titles, source matching can fail. If a menu moves the meter and a match stays silent, open the source properties with the match running.
Some titles also need a fallback route because OBS application capture is incompatible with their audio path. Test that fallback after you confirm the correct process and app output.
Remove the Desktop Audio duplicate
Go to Settings, then Audio, and look under Global Audio Devices. Set Desktop Audio and any unused Desktop Audio 2 entry to Disabled if either captures the same playback device and duplicates your separate sources.
This is a global change within the active configuration. If another scene depends on it, give that scene the audio sources it needs before you use the collection live.
A dedicated Audio Output Capture source pointing at your headset can duplicate the same mix, even after the global Desktop Audio entries are disabled. Check Sources for it, including nested scenes. A game source and a headset loopback can both carry the same sound without using names that make the overlap obvious.
- Test Discord mute. With a friend talking, mute Discord Voice in the OBS mixer. Discord should disappear from OBS output while still being audible to you through your headphones.
- Test game mute. Repeat with a predictable game sound. If you can still hear it on the recording when Game Audio is muted, a second OBS source is carrying it.
- Check the mic last. Speak while your headphones are on and the other sources are quiet. One microphone meter should move. A global mic and a scene-level copy of the same mic can create their own duplicate.
If another scene really needs a whole-device capture, add it as a scene-specific Audio Output Capture for that scene. Avoid placing it in a nested scene also used for gameplay.
Switch through your normal scenes and verify the routing in each. A correct mixer in the starting scene is only half the job if the gameplay scene restores the duplicate.
How do you keep separate recording tracks and a usable stream mix?
Create a track map before changing output settings
Each mixer source has its own volume and mute control as soon as capture is separated. Recording tracks decide which sources are grouped together in the output file.
A standard live mix and separate editor tracks can coexist. A simple arrangement keeps track 1 as the full mix and assigns a clean recording track to each of the three main sources.
| Mixer source | Track 1 full mix | Track 2 game | Track 3 Discord | Track 4 mic |
|---|---|---|---|---|
| Game Audio | On | On | Off | Off |
| Discord Voice | On | Off | On | Off |
| Your Mic | On | Off | Off | On |
Track 1 is convenient for normal playback and live output. The isolated tracks make it possible to remove a Discord call from a clip, reduce the game beneath commentary, or clean up your microphone as its own layer.
If you want Discord out of the live stream while keeping it in a local recording, leave Discord off track 1 and on track 3. Keep Discord Voice unmuted in the mixer for that setup.
The matrix is easiest to maintain when each track has a single purpose. If you later add alert sounds, decide explicitly whether they belong in both the full mix and an isolated recording track. With limited track slots, making one shared effects track can be easier to maintain than recording everything individually without a plan for editing it.
Assign the matrix in Advanced Audio Properties
- Open the track checkboxes. In the Audio Mixer, open Advanced Audio Properties from the mixer menu. Find the Game Audio, Discord Voice, and microphone rows.
- Check the planned boxes. Assign each source to track 1 and its isolated track as shown above. Clear the boxes that would put Discord on the game track, the game on the mic track, or your microphone on the Discord track.
- Confirm the live mix. If you stream, open Settings, then Output. In Advanced mode, confirm the Streaming audio track matches the mix you want, usually track 1. A separate Twitch VOD track, when used, has its own selection.
- Confirm recording output. In the Recording tab of Advanced output settings, enable tracks 1 through 4 and choose a format that supports multiple tracks. MKV is a common choice for an OBS recording. If your editor needs MP4, check import and remux compatibility with a short sample first.
Track assignment has two parts. Advanced Audio Properties decides whether a source feeds a track.
Output Settings decides whether OBS writes that track to the file. If a source meter is moving and the source is assigned to track 3 but the file contains only track 1, check the Recording tab first.
Use the stream mix to set levels before depending on the recording. Play game audio and Discord dialogue together, then speak.
Lower individual OBS sliders until you can follow each voice and important game effects together without obvious overload. If a source is too loud before OBS receives it, check the application or input gain before relying on a mixer fader.
Keep monitoring from creating a second copy
During the initial tests, leave OBS audio monitoring off for sounds you can already hear directly through Windows. Most players already hear the game and Discord from the apps, so OBS is capturing those sounds for its output while your headset receives them through the usual system route. Turning on OBS monitoring can add a delayed copy in your headphones.
If you genuinely need to monitor an OBS-only source, check the monitoring device and its relationship to any Audio Output Capture sources. Sending monitored audio into an output that OBS also captures can put it back into the mix. One common symptom is a voice repeating after a delay or shifting level when you change a monitor setting.
In Advanced Audio Properties, Monitor Only sends the source to the OBS monitoring device and excludes it from OBS output. Monitor and Output sends it to both.
If a meter moves but the recording is silent, check this setting along with the track boxes. If the recording is correct and only your headphones sound doubled, turn monitoring off before changing the track layout.
Record a test that reveals each track
- Record identifiable sounds. Start a brief recording. Trigger a distinctive game sound first, ask a friend to say a short phrase second, then say a different phrase into your own microphone. End with a little overlapping sound to evaluate the combined mix.
- Inspect the full mix. Open the file in a player and choose track 1 if needed. You should hear all sounds intended for the full mix in the expected order. A player often plays one track at a time.
- Inspect each isolated track. Open the clip in an editor that supports multiple audio tracks. Solo track 2, track 3, and track 4. Each should contain its own test sound and stay quiet during the others.
- Correct and repeat. If tracks exist but contain the wrong sound, fix Advanced Audio Properties. If the file has fewer streams than expected, check Recording output selections and the file format. If there are no meters in OBS, return to source capture.
When you import the test into your editor, mute track 1 if you are using the isolated tracks to build the final mix. Using track 1 and all the solo tracks together doubles the signals. If the levels sound right in the player but too loud on the timeline, check which audio streams your editor added automatically.
Give a Twitch VOD its own mix if you use one
Use a VOD track only if you want the Twitch archive to have a different mix from what viewers hear live. Keep the example’s isolated game, Discord, and mic tracks on 2 through 4.
Select a free track such as 5 for the VOD, then use Advanced Audio Properties to put the intended sources on that track. For a live call that should be omitted in the archive, assign Discord to track 1 and track 3 while leaving it off track 5.
Look in Settings, then Output, for the Twitch VOD Track option when the Twitch streaming setup supports it. Enable it and select track 5 in this example.
If the software defaults to track 2, change the selection so the archive receives a full intended mix instead of the isolated game audio. Leave the live stream on its intended track.
Verify the archive mix locally by enabling track 5 on a short test recording, then inspect its contents just as you would the isolated tracks. A local clip confirms the OBS track assignment. When you next use the streaming profile, verify the actual live mix and the resulting archive, since the service receives whichever tracks are selected in Streaming settings.
Check that scene transitions keep the same sources
Switch from your starting scene to gameplay and back with the mixer visible. Use a controlled test sound on each route to see which sources remain active, particularly if your audio lives in a nested scene or follows the game’s video source. If the signal disappears partway through a transition, inspect the source in the destination scene before adjusting levels.
When two scenes need the same capture and settings, use OBS’s existing source where appropriate. Giving separate sources the same display purpose can leave you with different levels, filters, or track assignments. Verify a recording of the transition once both scenes sound right individually.
What should you do when one source still fails or both sound together?
Fix silent meters and sounds that move the wrong meter
Start with the application that is silent. Confirm it is actually playing and that you can hear the sound from the selected output. Then make sure OBS points to the application window or device that carries that specific sound.
Discord input, Discord output, and the OBS mic input are three different settings. Changing one only affects the corresponding path.
| What you see or hear | What to check first |
|---|---|
| Game meter stays still during play | Check the active game executable, current source, and capture compatibility |
| Discord meter stays still during a call | Check audible Discord playback and reselect its desktop window |
| Game is on the Discord track | Inspect track checkboxes and any shared device capture |
| Both sounds are doubled | Disable duplicate desktop, device, or game capture |
| Meters move but recording is missing a track | Check enabled recording tracks, monitoring, and recorded file import |
| Stream is missing a source that the recording has | Check the track selected in Streaming settings and that source’s assignment |
If talking into your mic unexpectedly moves Discord Voice, look for audio from a mic test, Discord’s playback of your test voice, or sound from another local session. Stop the mic test before validating the final setup. If game audio moves the microphone meter with all Discord playback stopped, compare headphones with speakers to rule out acoustic pickup.
Use separate playback devices when app capture is incompatible
Start with a working physical output for the game and a separate available output path for Discord. Set Discord’s Output Device explicitly.
If your game does not offer a device selector, use the Windows per-app output setting where available or set the intended device as the default before launching it. Give OBS one Audio Output Capture source for each relevant route.
If you want to hear both devices in one headset, a hardware chat/game split or a compatible virtual audio route can provide the two outputs. Follow the device’s routing workflow and confirm how you hear each feed before recording. Keep global Desktop Audio disabled if it captures those same routes, and avoid putting OBS monitoring back into either output that you capture.
- Verify the game device. Play game audio alone and check the device-specific game meter. If both meters move, inspect whether the routes share a mix upstream.
- Verify the Discord device. Ask someone to speak while the game is silent. If the meter stays quiet, double-check Discord’s chosen output and whether the output route exists after reconnecting the headset.
- Repeat after a restart. Open the setup again in its normal order and check the meters. A source that depended on a default playback device can end up pointing elsewhere after a dock or headset change.
A device-based fallback works only if the two apps are actually isolated at the device level. Two OBS sources set to the same endpoint will still capture the same combined sound. Name the sources after their role and include the device name in your setup notes so a later driver update or headset swap is easier to diagnose.
Use the capture method that matches macOS or Linux
On macOS 13 or newer with OBS Studio 30 or later, add a macOS Audio Capture source for each application and choose single-application capture. macOS Screen Capture may already capture audio, so verify that its audio does not duplicate your application sources. OBS Studio 28 and 29 on recent macOS can capture audio through the macOS Screen Capture source, which has different behavior when hidden. Give OBS the permissions it requests for the chosen source and retest it.
On Linux, the Windows Application Audio Capture instructions do not apply. Source availability and device routing depend on your OBS build, desktop, and audio stack.
If you can route Discord and the game to different outputs that OBS can capture, use one source per route and apply the same recording matrix. Verify routing before setting up any multitrack editing.
Conclusion
Create one OBS mixer source for Discord and one for the game, then remove duplicate desktop or device capture and verify the meters with one sound at a time. Use a full mix for ordinary viewing and dedicated tracks for game audio, Discord, and your mic when editing. A short recording with identifiable sounds tells you whether the capture, track assignment, and recorded file all match your plan.