🛒 Best Price Today on Amazon
Prime members get fast, free shipping on everything above, plus member-only deals. New members get a 30-day free trial — cancel anytime.
Buy the Nautilus 240 RS ARGB if you want motherboard-controlled lighting and your case fits its 276 mm radiator. This Corsair Nautilus 240 RS ARGB cooler review explains who benefits from the slim fan stack, how to check clearance before you order, and when a larger radiator or a cooler with telemetry makes more sense.
Is the Corsair Nautilus 240 RS ARGB worth buying?
A 240 mm Nautilus makes sense for a gaming PC that has usable radiator clearance and already controls its fans through the motherboard. The ARGB version adds lighting to the pump cap and both radiator fans.
- Buy it if Your case fits its 276 mm radiator and you want motherboard-controlled PWM fans and addressable lighting.
- Check your board The lighting uses a keyed 5V three-pin ARGB header. The pump and fans use separate motherboard cooling connections.
- Consider a different cooler if You need an onboard liquid-temperature reading in iCUE, or long high-power workloads leave too little headroom at the noise level you want.
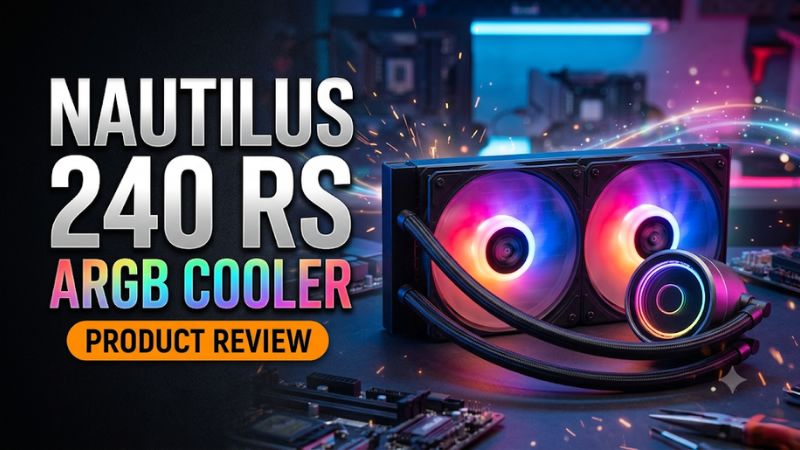
What you get with the ARGB model
The kit consists of a sealed pump and radiator assembly, two 120 mm RS120 ARGB fans, socket hardware, and the leads required to connect the fans and lighting. The radiator is aluminum and the cold plate is copper.
Corsair puts thermal compound on the plate at the factory, so a straightforward first installation needs no separate tube of paste. The sleeved tubes are 400 mm long.
Each radiator fan and the pump cap has eight addressable LEDs. Check the SKU and photos at checkout if color matters to you.
The black unlit Nautilus 240 RS, the black and white 240 RS ARGB variants, and the 360 mm members of the same family can appear close together in a retailer’s search results. Picking the wrong variant changes the lighting or mounting plan before the first screw goes in.
Corsair lists a five-year warranty for the cooler. For a build you intend to upgrade in place, keep the invoice and the spare socket hardware.
The radiator fans are ordinary replaceable components. The sealed pump and radiator are serviced as an assembly. That distinction becomes useful if you hear a worn fan after a few years, since replacing one fan generally involves much less work than replacing the entire loop.
Who should buy the Nautilus
Look for a case that already gives a 240 mm radiator a sensible home. A roof mount can keep the socket clear of a tall air cooler while leaving the front intake open to the video card. That can make the 240 RS ARGB particularly convenient in a mid-tower with a long GPU and a front bay that gets crowded quickly.
Choose the lit model when the case shows off both the fan faces and the pump. If the radiator fans disappear behind a solid panel and lighting adds little to the build, check the price of the plain 240 RS. For a build using an existing cooler that already manages the same CPU quietly, the strongest reasons to switch are case layout, socket support, or a preference for the Nautilus wiring and appearance.
For a heavier production PC, first check the sustained CPU power in your actual software and how much fan noise you can tolerate at the desk. A large radiator offers more heat-exchange surface when it fits.
A capable tower air cooler can also be the economical choice if the case gives it enough height and your priority is straightforward service. Buy the 240 RS ARGB when its compact radiator and ordinary connectors solve an actual build constraint.
Where the cooler reaches its limits
The Nautilus delivers PWM and 5V ARGB control through the motherboard. It has no native coolant sensor for iCUE and the 240 mm radiator offers less surface area than a comparable 360 mm design.
The cooling evidence here supports a fit and feature assessment. Published component ratings can describe the stock fan’s operating range, but the noise you hear depends on the case and your fan curve.
- For a long CPU render check sustained processor power, fan speed, and room temperature before you decide whether a larger radiator is worth the space.
- For native iCUE monitoring choose a compatible sensor-equipped cooler and verify which controller will manage your radiator fans.
Will the radiator and fans fit your case?
Think of 240 mm as the class of mounting holes. The radiator measures 276 × 120 × 27 mm, and the included 25 mm fans bring the nominal stack to about 52 mm. The fittings, bracket, screw heads, and cable bends need room as well.
Check the roof near your motherboard
Start by looking at the clearance between the roof rails and the board’s tallest features. Check the upper VRM heatsink, RAM, CPU power connector, and any cables that cross the same plane. Some cases offset the radiator to the side, which can make the difference between clearing a memory module and pressing directly against it.
A simple mock-up helps if the case documentation gives only a nominal support size. Hold a flat 276 × 120 mm piece of cardboard under the rail with the system off.
Measure about 52 mm down from that plane and add a little room where the hoses and screws sit. If the roof uses a removable bracket, check its path into the case as well as its final position. A fully assembled bracket can catch on the memory or the end of a cable during insertion.
The 240 mm roof position can preserve the front bay for cool air entering the case. It can also place the radiator in the path of air leaving a busy graphics card.
If you prefer top exhaust, consider the GPU cooler design and how the rear or front case fans support that airflow. When access is tight, connect the CPU power cable and route the radiator fan leads before you fasten the bracket.
Measure the front with the graphics card installed
A front radiator usually takes its space from the graphics card area. Case specifications often quote a maximum GPU length with front fans, but a radiator can reduce that allowance further. Check the exact reference point in the case diagram and measure with the card, power connector, and any support bracket in place.
A front intake can feed the radiator relatively cool air and send the radiator’s exhaust toward the graphics card. Allow enough extraction from the top and rear to carry that air away. If the case already has a warm GPU or a restrictive front filter, compare CPU and GPU behavior after the build so you can see which component sets the noise level during a game.
With a front mount, keep the pump lower than the top of the radiator. Orient the tube connections down when the routing fits naturally.
A comfortable bend takes precedence over pulling the tubes tight to reach a position. Check for stress near either fitting and leave the hoses clear of fan blades. Close the side panel during a dry fit so you can see whether the panel touches a hose or pushes the cable bundle into the radiator fans.
How does the Nautilus connect to your motherboard?
The supported desktop sockets are AM4, AM5, LGA1700, and LGA1851. The Intel and AMD hardware follow different mounting steps, and the pump, fans, and lighting each have their own connections.
Assemble the block and radiator without stressing either
- Match the bracket and standoffs to your socket before exposing the pre-applied thermal paste.
- Confirm fan airflow direction and use the screw length shown for the radiator mounting location.
- Check that the hoses reach the block with relaxed bends and the fan wires stay outside the blades.
Match the standoffs and backplate to your socket before opening the cold plate’s protective cover. For supported AMD installations, follow the manual’s instructions for using the motherboard backplate with the supplied hardware.
For the Intel sockets, use the Corsair backplate and standoffs specified for the kit. Seat the block evenly, starting its fasteners before tightening diagonally in stages.
If you discover a cable trapped under the block and lift it after the paste has contacted the CPU, clean the mating surfaces and use fresh thermal compound for the final mount. A neat visible edge does not tell you how the paste has spread beneath the plate. Take your time with the remount if the pump’s orientation or hose path needs changing.
Use the screw lengths the manual assigns to the radiator and fan stack. An overly long screw can reach the radiator core and damage it.
Check airflow direction using the fan frame markings, and face the fan cables toward the nearest access point if that direction also keeps them clear of the blades. Before closing the case, make sure the radiator is secure and the tubing has a relaxed path from the block to the fittings.
Connect pump, fan, and lighting leads
Corsair’s installation guide puts the pump’s four-pin lead on CPU_FAN and the daisy-chained radiator fans on a separate motherboard fan header. Confirm the header layout, current rating, and control options in the motherboard manual. A design with limited headers may require more planning for case fans if you already use several.
Set the radiator fan header to PWM where the firmware needs a manual choice. Note the header name after you find it in the monitoring screen.
On a shared fan connection, a single RPM number can describe the fan reporting the tach signal. Look at both fans when checking a noisy or underperforming radiator. Seeing one RPM on a screen is useful for tracking a curve, while seeing both fans turn verifies airflow across the whole core.
Use a keyed 5V three-pin ARGB connection for lighting and match its orientation marks. A 12V four-pin RGB header uses a different voltage and interface.
A board without a 5V header can still run the pump and fans through PWM. Add a suitable 5V lighting controller if illumination is part of your plan, and make room for any power or data leads it needs.
Verify cooling on the first boot
- Expected Both radiator fans spin, the pump reports RPM where available, and the CPU temperature settles at light load.
- If the temperature climbs quickly Shut down and check pump power, mounting, and cooler connections before testing again.
- If fan speed surges during brief workloads Adjust the radiator curve or supported response delay after verifying the pump.
Start with the board’s working cooling settings. After the first power-on, confirm a pump tach reading where available, verify both fans spin, and check that the CPU temperature settles at light load. If the temperature climbs rapidly and the pump appears stopped, shut the system down while you inspect the connection and mount.
Once operation looks stable, open the firmware fan controls and identify which adjustment moves the radiator fans. Keep the pump on a setting supported by the cooler and motherboard. If the board offers a delay before raising or lowering fan speed, it may help keep the radiator from responding abruptly to short CPU temperature spikes.
The supplied fans can stop under supported control, but the choice belongs to the board’s curve and minimum speed behavior. Test run-up from a cold start and any stop state before choosing a stopped profile.
A steady low speed can feel quieter than frequent starts, especially on a machine used for a mixture of browsing, game launches, and downloads. If the radiator provides much of the case’s exhaust, ensure the rest of the system still gets the airflow it needs at low load.
What cooling and noise can you expect in games?
A 240 mm cooler can make sense for many gaming loads, especially where the graphics card determines frame rate and CPU power is moderate. The actual result depends on the processor, room temperature, radiator position, and how long the workload holds its power.
Measure sustained gaming temperatures
The CPU can heat up within a short burst, while the coolant responds more slowly. That is why launching a game can briefly show a high temperature even if the fan speed and the radiator’s load settle into a reasonable range several minutes later. The long session is the better way to tell whether the radiator can reject the heat quietly.
Use a representative game with the side panel closed. For the first run, keep the frame cap, graphics settings, and fan profile you normally use.
Note CPU temperature, radiator fan speed, and GPU behavior after the first few minutes and again late in the session. If you play a CPU-heavy competitive game at high frame rates, include it alongside a GPU-heavy title. They can make the same cooler feel different in daily use.
For render or encoding workloads that run for an extended period, assess them separately. A board with permissive CPU power limits may drive enough heat into a 240 mm system to need higher fan speeds.
A larger radiator can be attractive in that case, provided it fits and gets good airflow. If your work is mostly gaming and the system is steady under the same real session, cooler size alone is a poor reason to upgrade.
Identify fan, pump, and case noise
The stock RS120 ARGB fans have a published maximum of about 2,100 RPM. Corsair also provides airflow, pressure, and noise figures for the individual parts.
Those numbers help identify the supplied fans and compare their rated operating range. Your assembled PC adds a grill, radiator, panel, and seating distance that can change what you hear.
If you notice a tone, keep the pump setting steady and test a small change in radiator fan speed. A tone that moves with the fans may point to a fan or panel resonance.
Check cable contact and filter spacing. For a persistent pump-area noise, confirm the block is mounted correctly and the loop’s orientation keeps the pump below the highest part of the radiator. Stop if a pump reading drops or CPU temperatures rise abnormally.
A conservative middle section of the fan curve often gives a quiet PC more benefit than chasing the lowest attainable idle RPM. Start with a stable floor.
Increase fan duty where a sustained game requires it. Preserve a stronger ramp near the temperature range where performance could be affected. When changing settings, leave one other variable fixed and repeat the same game so you can hear what the adjustment actually did.
When should you choose a different cooler?
Before deciding, compare the Nautilus to a tower cooler or a larger radiator at the positions your case actually supports. A 240 mm unit in the right slot can be easier to live with than a physically more capable option that compromises GPU clearance or cable access.
Choose between a compact radiator and a tower cooler
Moving the main heat exchanger away from the socket can make access to memory or the graphics card latch easier. It also changes where the heat enters the airflow path. A tower cooler moves air across its own fins near the CPU and can be a sensible fit for a case with room above the socket and a good rear exhaust.
The Nautilus makes more sense when a tall tower would conflict with memory, socket-area access, or a preferred layout and the roof offers enough clearance. An air cooler is attractive if you want the simplest service path and have an open side-to-side route through the case. In a build with a thick front dust filter and little space at the top, an easy-to-fit tower may be quieter at the desk than a radiator that spends its life starved for air.
For a fair comparison, look at the complete package cost and how each would mount. If your preferred cooler changes the position of a case fan or leaves the GPU with less intake, that can matter more than the headline CPU temperature. Choose the layout that fits the whole system you plan to run.
Decide if motherboard control covers the features you need
The 240 RS ARGB gives you a PWM fan curve and motherboard lighting. An iCUE Link cooler is more appropriate when you specifically want a liquid-temperature sensor in iCUE, integrated control of several Link devices, or a compatible modular cap. Include the controller and wiring requirements in that comparison.
With the Nautilus, you can keep conventional fan and lighting hardware working independently. That flexibility is a practical advantage when you replace a fan later or transfer the cooler to a different compatible board. If mixing fans on the same PWM chain, verify that both start reliably at the curve’s minimum and face the same direction through the heatsink.
The case, graphics card, and workload still settle the purchase. If you have room for the roughly 52 mm stack, want the LEDs, and need a standard motherboard-controlled cooler, the 240 RS ARGB delivers those features directly.
If you need stronger sustained headroom or cooler telemetry, buy for those needs up front. Also leave enough room in the budget for case intake fans if the radiator’s chosen position changes system airflow.
Conclusion
Buy the Corsair Nautilus 240 RS ARGB if you want a slim 240mm cooler with motherboard-controlled lighting and your case fits its full radiator, fan stack, and tube bends. Judge its cooling capacity against the games and sustained CPU loads you actually run. A roomier radiator or a sensor-equipped cooler makes more sense when extended heat loads or liquid-temperature control drive the purchase.