🛒 Best Price Today on Amazon
Prime members get fast, free shipping on everything above, plus member-only deals. New members get a 30-day free trial — cancel anytime.
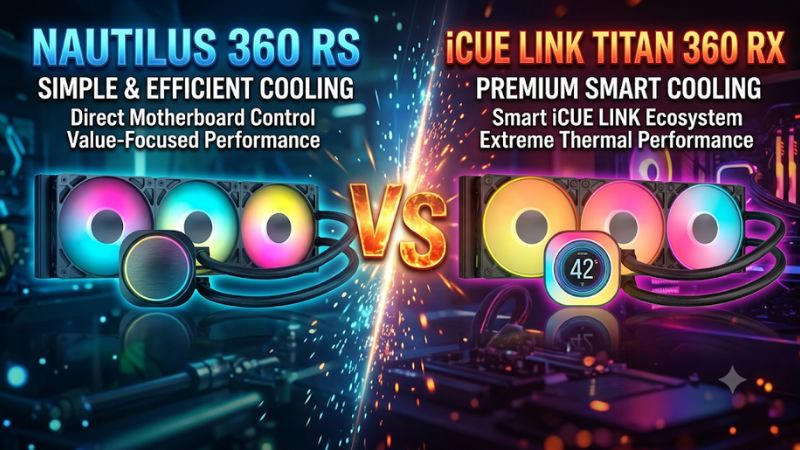
Choose the Nautilus 360 RS for standard motherboard PWM control. Choose the Titan 360 RX RGB if you want iCUE coolant monitoring, RGB, and a Link hub. This Corsair Nautilus 360 RS vs iCUE Link Titan 360 RX comparison covers the wiring and cooling trade-offs and shows how to check fit for either 396 mm radiator.
Which Corsair 360 mm cooler should you choose?
The price premium for the Titan buys a different control system and more features. Start with the connections and sensor options you will actually use.
- Choose the Nautilus 360 RS for a dark build, standard motherboard PWM, and easier replacement with conventional fans.
- Choose the iCUE Link Titan 360 RX RGB for a coolant-based radiator curve, integrated Link lighting, and control through the included hub.
- Measure before buying Both use a 396 mm radiator. The Titan also needs room for the hub and access to internal USB and compatible PSU power.
| Feature | Nautilus 360 RS | iCUE Link Titan 360 RX RGB |
|---|---|---|
| Radiator | 396 × 120 × 27 mm | 396 × 120 × 27 mm |
| Tubing | 450 mm | 450 mm |
| Fans | Three RS120 PWM fans | Three iCUE Link RX120 RGB fans |
| Fan and pump connection | Motherboard fan headers | Included Link System Hub |
| Additional hub connections | None | Motherboard USB 2.0 and dedicated PSU PCIe power |
| Lighting | None on the plain RS | RGB fans and pump cap |
| Coolant temperature in iCUE | Unavailable in the stock setup | Available through the cooler |
| Socket support | AM4, AM5, LGA1700, LGA1851 | AM4, AM5, LGA1700, LGA1851 |
| Cooler warranty | Five years | Six years |
Match the retailer listing to the intended cooler
The Nautilus 360 RS here is the black, unlit model. The 360 RS ARGB is a separate product with lighting controlled through a compatible motherboard or 5V ARGB controller.
The Titan here is the RX RGB kit with the standard lit pump cap. Titan kits that ship with an LCD are separate configurations.
Retail listings often put multiple colors, radiator sizes, or editions under a single page. Confirm the product name after selecting the variant and again in the cart.
If a Nautilus listing shows a lit pump cap, verify that you have intentionally selected the ARGB version. If a price comparison uses a Titan LCD bundle, the amount includes a feature outside this pair of configurations.
Both listed coolers fit the same four desktop sockets, but a particular build can still rule out one kit through its wiring. For the Titan, check for a usable internal USB header and a suitable PSU cable before comparing the purchase price.
For the Nautilus, check board headers and any existing fan splitters. Picking a product page with the correct variant is only the first check. The available connectors determine whether installation is straightforward.
How do motherboard PWM and iCUE Link differ?
The Nautilus keeps fan management with the motherboard. The Titan introduces a controller that provides power and communication for its compatible devices. The value of that change depends on the hardware already installed in your case.
Control the Nautilus from the motherboard
Corsair’s quick-start guide routes the pump lead to CPU_FAN and the daisy-chained RS120 fans to another PWM header. The three radiator fans can share a control signal when the motherboard header supports the combined current. The board’s manuals and firmware tell you how that header is configured.
Pick the radiator fan source, minimum duty, and response settings in the board’s UI. Write down the header assignment so a firmware reset is easy to recover from.
If the CPU temperature makes the fans rise and fall too often with short bursts, use the board’s supported response delay or hysteresis if available. A stable minimum speed and a gradual ramp are useful even on a board with basic tuning options.
You can replace an RS120 fan with a matching unit or another pressure-oriented standard PWM fan with suitable dimensions and current draw. If you use different models on one PWM chain, their RPM and start behavior can differ at the same duty.
Verify each fan after replacement and confirm the new unit faces the same direction. A good tach number from the chain gives only a partial check when multiple fans share the header.
Connect the Titan’s System Hub
The Link hub handles the supplied RX RGB fans and the pump. It connects to a motherboard USB 2.0 header for communication and uses a dedicated compatible six-pin PCIe power connection from the PSU through the supplied hub adapter. The board’s CPU_FAN header gets a separate tach lead in the installation layout.
This architecture works well when several compatible Link devices are grouped together. It reduces the number of separate motor and lighting leads you route from those fans.
You still need a place for the hub, room for its connectors, and a clear cable path to the cooler. With a small number of conventional case fans, a separate Link network can add connections you otherwise would not have.
Make a short list of the connections already in use. Front USB accessories, a lighting controller, or an LCD module can occupy internal headers.
A long GPU can also affect the way PCIe power cables route behind the case. Standard case fans already installed can continue to run independently through the motherboard. Include the split in control when deciding whether the Titan simplifies the complete build.
Use the Titan’s coolant sensor
The Titan can report liquid temperature in iCUE. Assigning the radiator fans to that sensor lets them react to accumulated heat in the loop. It works particularly well when CPU temperatures jump briefly at launch but the loop warms gradually during an actual game.
Watch CPU temperature along with coolant while creating the profile. A lower fan floor may be comfortable during games yet leave less headroom while a sustained CPU job begins.
Save and test the supported startup behavior separately if the device offers Device Memory Mode. If a normal operating profile requires iCUE to load, a verified fallback takes care of the interval before the application starts.
The Titan’s modular CapSwap design supports compatible optional caps. Consider it if you expect to change the pump’s appearance or add an available feature.
Verify the height of the intended cap against your side panel. The included RGB cap is enough for ordinary lighting. When an optional cap is the primary reason to buy, compare its complete cost with the price of a kit that already includes the feature you want.
What do the available cooling tests show?
Both coolers use a 27 mm aluminum radiator of the same external dimensions and a copper cold plate. They use different fans and pump designs.
Corsair equips the Titan with its three-phase FlowDrive pump. The performance observed in a finished PC also depends on control settings, case airflow, and CPU load.
Read each cooler’s published test results
PC Gamer evaluated the non-RGB Nautilus 360 RS alongside other 360 mm coolers. Its review found the unit adequate during an extended Cinebench R23 run, with a slower return to idle than some of the other products it tested. That offers context for the Nautilus on that site’s setup.
Tom’s Hardware measured the Titan 360 RX RGB and found strong noise-normalized performance on its test platform. Its load points and comparison set were different.
The two sources show how each product behaved in a described test. A shared temperature ranking between this exact pair would require both coolers on the same bench with the same CPU settings, radiator position, ambient conditions, and acoustic methodology.
Published fan ratings help explain the stock components. They are a poor way to predict the acoustic result of a complete case because restrictions and the speed profile matter.
The PC Gamer and Tom’s Hardware coverage is more informative for context than plucking two temperature readings from separate graphs and comparing their difference. If you want a quantitative tie-breaker, look for a like-for-like comparison at an acceptable noise level.
Compare fan behavior during gaming
A game that loads the GPU heavily can warm the air inside the case even when the CPU’s average power is mild. A roof radiator using that air as exhaust can see different input conditions from a front radiator taking in room air. This is one reason two systems with the same cooler report different results.
When comparing for gaming, specify the exact frame cap, resolution, and scene. An uncapped lightweight game can ask the CPU for many more frames, even though it looks less demanding. A GPU-heavy game may use more GPU power and still affect a roof radiator through the temperature of the air passing over it.
The Nautilus gives you the sensor and smoothing options exposed by the board. The Titan gives you the option to follow the loop’s liquid temperature, which is often a smoother way to control radiator fans.
If the PC already meets your noise goal with a motherboard curve, the difference is mainly convenience, telemetry, and wiring. If fan speed surges several times per minute during the titles you play, a calmer configuration or a different temperature source can be worth pursuing.
Evaluate sustained rendering loads
For rendering, encoding, and mixed workstation use, look at sustained clocks, CPU package power, temperature, and noise together. A brief CPU spike can occur even before the radiator has warmed up. A cooler that holds normal performance late in a job is more useful than a cooler that briefly posts a lower number at the start.
Use repeatable settings and compare at a similar room temperature. If a test raises processor power halfway through or changes motherboard boost behavior, you have changed the cooling requirement. If the CPU uses similar power but slows down in a closed case, confirm pump speed and effective airflow through the radiator before judging the cooler.
With a coolant-driven curve, a lower fan floor can work well for gaming and still need an earlier ramp for a long CPU job. Holding the pump on its usual supported preset while adjusting the radiator fans makes the effects easier to observe. For both coolers, pay attention to the portion of the run when the system has finished warming and the workload is still active.
Will either cooler fit your case and budget?
Both kits occupy roughly the same radiator space. The hub, lighting, standard fan connectors, and replaceable fan choices make the practical differences more visible once you lay out the case.
Measure the bay using the real radiator dimensions
- Roof mount Check the RAM, VRM heatsink, CPU power plug, and the bracket’s path into the case.
- Front mount Check graphics card length, power-cable clearance, and tube routing.
- Either position Start with the full radiator dimensions and the fan stack, then allow room for screw heads and fittings.
The 360 mm class describes three 120 mm fan positions. Both radiators measure 396 mm long, so the end tanks need space beyond the nominal fan footprint.
With a 25 mm fan layer, budget about 52 mm of depth before hardware or protrusions. Check the bracket’s installation path as well as the finished stack.
At the top, look for interference with the upper VRM heatsink, tall DIMMs, and CPU power plugs. In the front, use the card’s real length, nearby cables, and any GPU support bracket. A chassis can advertise support for a 360 mm radiator and still reserve different clearances depending on where it is mounted.
The 450 mm tubes support different layouts, though the socket position and width of the case affect which orientation you can use. Keep the pump lower than the highest point of the radiator, and allow a relaxed bend at the fittings.
In a front mount, place the tubes low when that combination fits. A smooth route and reliable clearance make the completed system easier to service and less sensitive to moving the side panel.
Compare what you will actually pay to build and maintain
- Include optional Link cables or modules only when your build needs them.
- Check whether an existing motherboard fan header removes the need for another controller.
- Compare warranty coverage and the types of replacement fans you can use with each system.
The Titan includes its System Hub, and the stock RX fans are part of the cooler package. Additional Link cables, caps, and case fans affect total cost only if you intend to use them. The Nautilus can reuse many ordinary PWM parts, while a fan that remains in the Titan’s integrated Link network needs compatible hardware.
Corsair lists a five-year cooler warranty for the Nautilus and six years for the Titan. Check the seller and local handling of service before placing an order.
Keep the packaging or hardware bag if you intend to move the cooler to a future compatible board. Save the invoice and the product label. A pump or sealed loop fault is handled differently from swapping a fan.
Compare actual checkout prices for the same time and market. Count a new part only when it solves something in your build.
A Nautilus owner with spare PWM fans might save time and money over the cooler’s life. A Titan owner with other Link devices may find that integrated fan management is worth more than those savings. The premium is easiest to justify when you can name the function you will use often.
Choose for your existing build or a new one
For a new blacked-out PC with three standard case fans, the plain Nautilus gives you a consistent appearance and straightforward firmware controls. It is also an easy fit in a system that has a spare fan header but limited internal USB connectivity. Put the radiator fans on their own curve and keep a record of the pump header.
For a new build with several Link case fans, the Titan keeps cooling control in the same ecosystem. Its liquid reading is useful when you want to tune the radiator separately from case intake and see whether a warm GPU affects the loop during gameplay. Confirm the available preset, the sensor, and the fallback while the machine is stable before you spend time fine-tuning the curve.
If you already own the Nautilus and it meets your CPU and noise goals, an upgrade to the Titan is most compelling for features the first one does not provide, such as direct coolant telemetry and integrated Link lighting. If the issue is an aggressive fan curve or limited intake, correcting that may improve the system already on your desk. For a new purchase, weigh the case’s connections, maintenance preferences, and cooling goals together.
Decide whether a 360 mm radiator makes sense in the first place
A case that supports 360 mm up front and 240 mm on the roof gives you two arrangements with different trade-offs. The larger front cooler can receive air directly from the room, but it takes room from the graphics card and sends warmer air into the case.
A roof-mounted 240 mm cooler leaves the front intake open. Which fits better depends on the GPU, case airflow, and workload as well as the processor.
Look at the tasks that keep the CPU busy for more than a few minutes. For a gaming PC that spends most of its time in GPU-limited titles, a smaller AIO or an appropriately sized air cooler might match the processor’s actual needs.
If the machine runs long CPU renders and the fan noise already bothers you, a larger surface can be worthwhile. Give the radiator enough unobstructed air to use that extra area.
If replacing a functioning cooler, first log the current CPU temperature, radiator fan RPM, and performance in the same workload you hope to improve. A GPU fan, pump tone, or restricted case intake can still dominate the noise after a larger radiator upgrade. A diagnosis gives the upgrade a measurable target and makes the comparison more useful than the nominal radiator length alone.
Compare the fan profiles before assigning case airflow
Different fans can serve different purposes in one case. Radiator fans respond to the cooling requirement of the processor and loop.
Front or bottom intake fans may be primarily supplying the GPU. Tying every fan to the same signal is convenient, but the game that heats the graphics card most heavily may leave liquid temperature comparatively steady for several minutes.
For the Nautilus, check which source the board can use for each group. For the Titan, check which channels belong to the Link network and keep any motherboard fans on an appropriate separate profile.
Test each group at a stable load before making a broad change to the case’s airflow. This avoids raising the noise of every fan to solve a problem confined to one area.
A roof exhaust and a front intake can benefit from coordinated minimum airflow, particularly with a long GPU underneath. During a normal game, observe the fan group that produces the most noise and identify whether it changes with CPU temperature, liquid temperature, or GPU demand. Use that evidence when choosing whether iCUE’s extra control is worth the price in your particular build.
Conclusion
Buy the Nautilus 360 RS if you want readily replaceable PWM fans and a simple motherboard-controlled build. Choose the iCUE Link Titan 360 RX RGB if its coolant sensor, integrated cooling profiles, RGB, or Link network will make a difference in your setup. Measure for the full 396 mm radiator and confirm the case and motherboard connections before you order either.