🛒 Best Price Today on Amazon
Prime members get fast, free shipping on everything above, plus member-only deals. New members get a 30-day free trial — cancel anytime.
Open the cooler in iCUE, select Cooling, and create a Temp Curve using the AIO’s liquid-temperature sensor. Assign it to every radiator fan. This guide explains how to set a coolant temperature fan curve in Corsair iCUE, choose points from actual readings, and verify the fan response during a full game and at startup.
Which sensor and fans should you select in iCUE?
A coolant curve needs two working pieces: a liquid-temperature reading from the AIO and radiator fan channels that iCUE can control.
Confirm your hardware exposes the liquid sensor
- What to do Open the detected device’s Cooling view and identify the AIO’s named liquid-temperature reading.
- Expected result The reading belongs to the intended loop and changes gradually with load.
- If the check fails If it is absent, verify that the cooler exposes a native coolant sensor and that its controller is detected.
iCUE may call the sensor Liquid Temp or show it under the cooler’s name. If your system has more than one loop sensor, match the reading to the device you are tuning.
The Titan RX reports coolant temperature and provides iCUE control through the Link System Hub. A different supported Corsair cooler may keep its radiator fan channels under a separate cooler or controller tile. The relevant Cooling view is the one that can issue commands to the fans you actually want to change.
A fan plugged into a normal motherboard header follows the board’s controls. A compatible controller can give that fan software control if you move it to a supported channel, but the temperature source needs to exist in its own right.
A stock Nautilus RS or RS ARGB connects to the motherboard and offers no native iCUE coolant-temperature readout. Check both the source and the destination before trying to recreate this setup on a different cooling system.
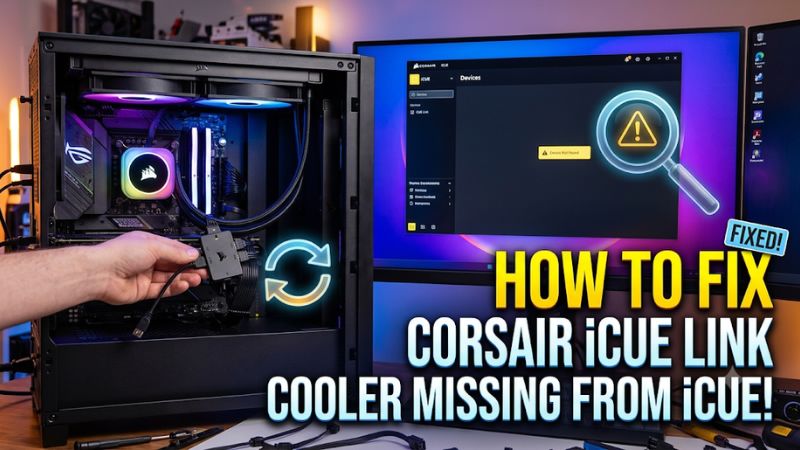
Identify the radiator fan tiles before assigning a curve
- What to do Trace the radiator fans to their controller and change one known channel briefly to a moderate supported speed.
- Expected result Only the intended fan or group responds, while the pump remains on its usual setting.
- If the check fails If a fan does not respond, restore the preset and confirm which controller actually owns it.
Radiator fans, case intake, and exhaust can appear as similar RPM tiles. Rename the channels where supported, or write down which channel controls each physical fan.
If you cannot tell two channels apart, change one fan to a known safe, moderate speed temporarily and watch which physical fan or RPM tile responds. Work with the PC idle and keep the remaining cooling devices active. Restore the normal preset after identifying the channel, then make the same check for the other radiator fans.
Leave the pump on its supported setting during this tuning pass. Raising pump speed changes coolant circulation.
Raising fan speed changes airflow through the radiator. Adjusting one of those variables at a time helps you understand the effect on temperatures and sound. A pump tile with its own preset should keep it while you verify the new fan curve.
What temperatures and minimum fan speed should you measure?
Coolant often moves through a much narrower temperature range than the CPU sensor. Start from a working stock profile and measure idle, gameplay, and cooldown before choosing points. Use the actual case configuration and room conditions.
Establish an idle and gaming baseline
- What to do Record room temperature, idle coolant, fan RPM, and the readings near the end of a repeatable game.
- Expected result You can identify the coolant range at idle and after the loop warms up.
- If the check fails If the coolant is still climbing, keep the run consistent and continue until it settles, provided CPU temperatures remain normal.
Use the case with its panels closed and compare the early readings with those near the end. Around 20 to 30 minutes is a reasonable starting interval if the liquid reading has time to slow down.
The CPU sensor may rise almost immediately when the game loads. The liquid temperature usually takes longer to follow.
Record that delay, and check whether the CPU comes close to a limit before the coolant-based curve makes a large fan change. A tune can feel quiet after it settles and still need a stronger starting floor for the first few minutes of a heavy workload.
Find the lowest reliable continuous fan speed
- What to do Test a conservative minimum duty during idle and after a cold start.
- Expected result Every radiator fan starts and runs consistently at the chosen floor.
- If the check fails If one stalls, jitters, or cycles on and off, raise the minimum and repeat the test.
The percentage in iCUE is a command. The actual RPM and the duty needed to get a stopped fan moving depend on the fan and controller.
Treat Zero RPM as a separate test if the controller and fans support it. Verify that the fans reliably resume as the liquid warms, and leave the pump operating on its supported setting.
When the radiator fans provide much of the case exhaust, a complete fan stop can reduce airflow around other components. Check the effect on the whole system before using that setting every day.
Check the temperature of the air feeding the radiator
- What to do Record ambient conditions and check whether the radiator draws room air or air warmed by the GPU.
- Expected result The measurements explain changes in liquid temperature between comparable runs.
- If the check fails If the loop runs hotter after a case or GPU change, inspect intake and exhaust before raising the entire curve.
A radiator at the roof often draws air that has passed through the case and warmed near the graphics card. A front intake sees air closer to room temperature, while the GPU and other parts receive air after it crosses the radiator. The same loop can need a different curve after moving the radiator.
Record room temperature next to the liquid readings. A curve created in a cool room can spend more time near its upper points on a hot day.
A change to the GPU, dust filter, or case intake fans can also shift the liquid baseline. Retest if the same game starts producing more fan noise after a case change.
When the loop warms in a particular game, inspect the intake and exhaust path before raising fan speed everywhere. If a front filter has clogged or a cable bundle is choking intake, restoring airflow can help both coolant and GPU temperatures. Preserve the curve’s useful quiet range while correcting the part of the system that changed.
How do you build and assign the coolant fan curve?
Use the live liquid reading to pick an idle point, a gradual middle range, and an upper ramp strong enough for demanding loads. Start from your own measurements or a known working cooler preset.
Pick the sensor and enter the points
- What to do Create a Temp Curve, choose your AIO’s liquid sensor, confirm Celsius or Fahrenheit, and enter points based on your baseline.
- Expected result The live value in the graph matches the intended liquid reading.
- If the check fails If the value looks like CPU package temperature or belongs to another cooler, correct the sensor before applying the preset.
In Cooling Presets, use the plus button and name the profile. The sensor selector is usually near the curve graph.
Here is an example for a PC that idles around 29°C coolant, usually games between 34°C and 37°C, and uses fans that can start and run reliably at 30% duty. The points illustrate a gradual shape for that system. For your own build, follow the device’s operating guidance and choose values that reflect your measurements.
| Example liquid temperature | Example fan duty | Purpose |
|---|---|---|
| 29°C | 30% | Continuous airflow at idle |
| 33°C | 40% | Early ramp after idle |
| 36°C | 55% | Typical game speed |
| 39°C | 75% | Extra airflow during a prolonged load |
| 42°C | 100% | Full duty in this example |
Avoid abrupt ramps inside the normal gaming range
- What to do Spread the everyday ramp across several degrees and keep a stronger upper response for sustained heat.
- Expected result Fan RPM changes progressively as the coolant warms.
- If the check fails If the fans surge around one temperature, flatten the curve near that point and repeat the same gameplay run.
A steep step becomes audible when the liquid repeatedly crosses one temperature. Move the ramp earlier or spread that change over a wider range.
For example, a large jump around 36°C can be noticeable every time the coolant moves around that point. Moving the start of the ramp a little earlier and flattening the middle can help keep operation steady. Track actual RPM and noise from your desk because the controller’s percentage steps may yield different behavior across fan models.
A low and nearly flat idle range can be comfortable as long as the fans actually start. Keep a visible upper section that increases to an appropriate level for heavy use.
Compare that section with a known working device-specific preset when you are unsure where to place the higher points. Test one change at a time so you can tell which part of the graph determines the result.
Apply the preset to every radiator channel
- What to do Select the named custom preset from each radiator fan tile’s cooling dropdown.
- Expected result Every intended channel displays the new preset while the pump and unrelated fans keep their settings.
- If the check fails If a game switches your profile, verify the same assignments with that game running.
A visible graph can exist while all the fans are still on Balanced. The selected preset on each tile is the assignment that matters.
Case fans can stay on a separate curve if they serve another part of the build. For instance, front intake may primarily help the graphics card, while the radiator fans affect the AIO.
Follow the supported sensor options for those devices. Begin with the radiator alone and test other fan adjustments separately.
Confirm that the expected iCUE profile is active. If a game automatically switches to another profile, check the assignments with that game running.
Give the preset a clear name that is easy to recognize among stock entries. After a reboot, reopen the device page and confirm that the named preset is still attached to the intended fan channels.
What controls the fans before iCUE starts?
Device Memory Mode can provide a hardware-side cooling configuration on supported models. Its sensor list may differ from the one offered while the software runs. Verify the available settings on your exact device.
Store a supported onboard configuration
- What to do Open Device Memory Mode if supported, assign a verified preset or onboard liquid curve, and save it.
- Expected result The fans operate normally at startup and with iCUE fully closed.
- If the check fails If the liquid sensor or custom points are unavailable there, use a supported hardware preset and validate it separately.
The firmware may offer fewer presets, sensors, or control points than the Windows software. Use the save control available in that mode and check the actual behavior at boot.
A hardware-side profile needs access to its sensor without Windows software. If the software graph uses a reading that disappears in Device Memory Mode, choose a supported onboard sensor or a device-specific preset that gives safe cooling. Keep a note of the software curve and the onboard setup, since their assignments may be shown in separate views.
Test the fallback with the system idle and iCUE fully closed. Use an independent reading when available, check for a stable CPU temperature, and observe that the fans are running as expected.
Reboot and check the startup behavior before iCUE loads. If you cannot verify the custom memory curve, use a working supported preset in that mode.
Account for software and firmware differences
The location of the sensor menu, save control, and available presets can vary with the controller and iCUE version. Start from the features you can see on the detected device. A missing option can mean that the exact cooler, fan controller, or memory mode lacks support for that combination.
If the liquid reading exists in the normal software view but is absent in hardware mode, keep the software curve for when the app runs and validate a separate hardware preset. If the reading is absent everywhere, confirm the cooler hardware and the hub connection before reinstalling software or repeatedly resetting profiles.
For a result you can reproduce, record the iCUE profile, hardware-mode setting, and firmware version where they matter. A profile change or update can alter which controls appear. Before making major adjustments after an update, check whether the cooler has retained the intended curve and whether it still responds as expected at idle and on a short known load.
How do you validate the curve and correct poor response?
Use the same game or route from your baseline and compare the warm-up, the steady period, and the time after the game ends. Repeat the relevant part after you change a point.
Compare CPU and liquid readings under load
- What to do Repeat a game or render with the same starting conditions and compare the warm-up, steady readings, and cooldown.
- Expected result Fan RPM increases at the expected points while temperatures and performance remain stable.
- If the check fails If the CPU heats quickly or the liquid continues rising late in the test, check mounting, pump behavior, and airflow before adjusting the appropriate range.
High CPU temperature at the start of a task while coolant remains relatively cool can warrant a larger fan floor or earlier ramp. Check pump operation, mounting, and whether the result is normal for the processor before relying on fan speed alone. If both coolant and CPU temperatures continue to rise late in the test, inspect radiator airflow and increase the upper response where the curve calls for it.
For a mixed-use PC, test a game and a long CPU-heavy render separately. A game can feed warm GPU air through a top radiator.
A render can produce an immediate increase in CPU power even with the GPU idle. A tune chosen from the first workload can behave quite differently in the second.
Watch fan speed after shutting the workload down. If the fans remain loud because the liquid is still warm, check whether the upper-middle portion is more aggressive than necessary.
If fan speed repeatedly changes near a stable reading, smooth that region. Return to the known working profile if temperatures or performance deteriorate. Check each revision against the same starting conditions.
Diagnose a curve that seems to have no effect
- What to do Check the channel assignment and the live liquid reading, then try a small fixed-speed change on the intended fan.
- Expected result The fan responds to the fixed setting and later follows the assigned temperature curve.
- If the check fails If it ignores the command, trace the cable to its controller and check for a mismatched iCUE profile or competing utility.
Begin by checking the fan assignment, the live sensor value, and the temperature region the curve currently occupies. Two points that run at nearly the same duty can make a healthy curve look fixed, especially at idle. Test a controlled move across points instead of relying on a single value.
When everything works, note the measured idle and load temperatures, the RPM near the most audible part of the test, and the fallback preset that works at boot. That record helps when a future fan or GPU upgrade changes the system’s behavior. It also makes it easier to recover the tuning after a software or firmware update.
Check the curve again after a hardware change
- What to do Repeat the baseline after changing fans, filters, graphics cards, or controller connections.
- Expected result The minimum speed and upper response are appropriate for the rebuilt system.
- If the check fails If startup or cooling has changed, recheck the minimum duty and confirm the correct hardware fallback.
Changing fans can alter the RPM you get from the same duty setting. A new video card can raise the temperature of the air entering a roof radiator.
Even a clean replacement filter can affect how much air passes through a front intake. Reuse the same test scene after any such change.
Review the saved Device Memory Mode profile if the change affected fan channels or the controller. Compare the fan speed you see on a reboot with the profile that loads once Windows starts. A change that looks correct after opening iCUE can still leave the hardware profile assigned to the wrong channels.
Conclusion
Create a temperature preset in iCUE using the cooler’s liquid sensor, then assign it to the radiator fans. Start from measured coolant temperatures, keep a reliable fan floor, and verify the curve in gameplay and after the computer starts. Save a supported hardware fallback if your cooler offers Device Memory Mode.