🛒 Best Price Today on Amazon
Prime members get fast, free shipping on everything above, plus member-only deals. New members get a 30-day free trial — cancel anytime.
Keep your Hall effect controller if it holds center and tracks smoothly in your game. Buy a TMR model when that specific controller offers better aim behavior, fit, or tuning. In TMR vs Hall effect sticks for competitive shooters, dependable small movements and a stable return to center matter more than the sensor label.
What changes when you switch from Hall effect to TMR?
Both sensors read stick position without sliding contacts
A Hall effect stick measures changes in a magnetic field through the Hall voltage generated in its sensing element. A TMR stick uses tunneling magnetoresistance, where a stack of materials changes electrical resistance with the relative orientation of its magnetic layers. The sensors read the changing relationship between the moving magnet and the sensing element as you tilt the stick.
Both designs avoid the sliding electrical contact used by a traditional potentiometer to report position. That removes one way a signal can degrade with use.
The rest of the stick assembly still includes a moving shaft, a centering system, and mechanical interfaces. Firmware must also translate the sensor signal into a useful controller output.
For a shopper, the better first question is whether the model reports small movements consistently. A conversion that feels coarse near center can have several causes even when the sensor itself is sensitive. A smooth stick with a reliable spring and good calibration can feel more predictable than another controller with a more impressive sensor claim.
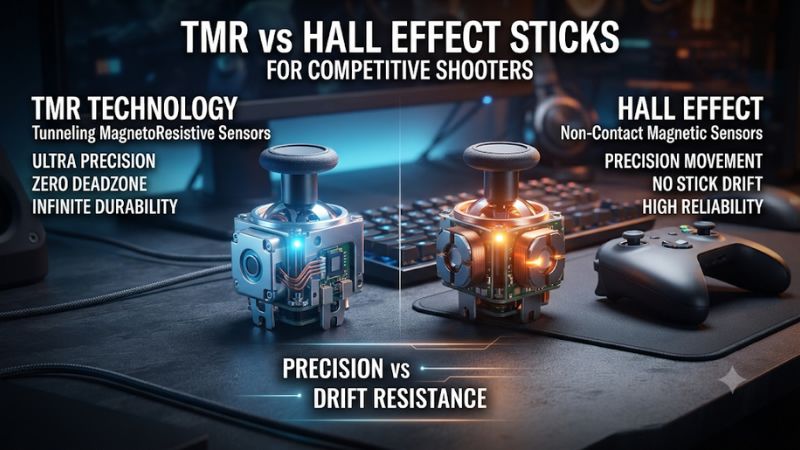
TMR and Hall can differ at the component level
TMR sensors often have strong sensitivity and can offer low current consumption in suitable designs. Hall sensors can also be built for low-power operation, and the relevant comparison depends on the devices and their circuits. Texas Instruments distinguishes those properties in its magnetic sensor material rather than treating one technology as a guaranteed replacement for the other.
A controller may use that additional sensor sensitivity to get a stronger signal for small movements. Its useful accuracy still depends on magnet geometry, mechanical play, calibration, and the processing used to report the axes. A manufacturer can filter noise, rescale a portion of the motion, or intentionally broaden the region reported as center.
Treat power claims in the same way. A stick sensor uses only part of the controller’s energy.
A wireless radio, lights, vibration, display, and microcontroller can account for much of the difference you observe after a charge. Compare battery life with the same features and connection mode before paying for a sensor upgrade on that basis.
| Comparison point | TMR stick | Hall effect stick | What to check on the complete controller |
|---|---|---|---|
| Position sensing | Magnetoresistive readout | Hall voltage readout | Smooth response in the aiming range you use |
| Contact wear at the sensing element | Contactless | Contactless | Stability after repeated returns to center |
| Power | Can be low, depending on circuit | Can be low, depending on circuit | Runtime at the intended connection and feature settings |
| Deadzone | Depends on firmware, game, and mechanical behavior | Depends on firmware, game, and mechanical behavior | Smallest setting that remains repeatably stable |
| Latency | Depends on the full input pipeline | Depends on the full input pipeline | Independent measurements in the relevant mode |
Separate real position accuracy from resolution
Resolution describes the number of values the system can represent. Accuracy describes whether those values correspond to the stick positions you actually used.
Repeatability describes whether the same movement produces a similar result again. A bit-depth claim can tell you something about representation without establishing the other two properties.
Look for smooth increments during a slow sweep. A graph should not skip a large section near center or suddenly reach maximum before your stick reaches a sensible point in its travel. A test tool can reveal obvious steps and flat areas, but the game can still transform a smooth controller output with a separate deadzone or acceleration curve.
Compare both directions on each axis. If one direction always starts sooner or reaches maximum earlier than its opposite, the model may be calibrated unevenly or use a transform you need to understand. If the behavior appears only after one game profile loads, inspect that profile before attributing the asymmetry to the sensor.
Which stick is better for aiming in a competitive shooter?
Choose a stable center before chasing a zero setting
A deadzone is the region around center that the controller or game ignores. Players often want to reduce it because it affects how soon a small input moves the camera. A setting of zero is useful only if the stick consistently settles within a region that the game treats as neutral.
Mechanical centering can differ depending on which direction the stick returns from. Gently let it settle after slow movements, then release it after quick turns, and watch the result.
A pad can look still during a single sample and then creep to one side after a larger release. This is why a repeated in-game check is more useful than one photograph of the test screen.
If you need a slightly larger inner deadzone to prevent creep, test how much small-input control you actually give up. A stable low deadzone can be a better setting for competition than an impressive zero setting that moves the camera when you release your thumb. Ask whether another controller reaches a smaller stable region consistently instead of comparing the names on the box.
Check smooth tracking and micro-corrections
Small aiming motions are where implementation differences can be easiest to feel. Try a steady horizontal trace on a fixed object, then follow a target that changes direction gradually. If you overshoot at the start of every movement, compare curve, sensitivity, and stick resistance before changing the controller.
Firmware may use filtering to control noise. A stable readout can be useful, while excessive smoothing may make a new small motion feel delayed.
The game can create a similar feeling through its own aim or acceleration settings. Change one layer at a time and write down the one you changed.
Repeated stop-and-start movement is particularly informative. Track from the left, stop near a marker, and return slowly to a target on the right.
If the stick behaves well in steady movement but feels inconsistent just after passing center, compare centering and the deadzone on each axis. A clean center affects both first aim and corrections after a fast turn.
Buy for fit and feedback as well as sensor behavior
Spring tension, cap height, grip width, and the force you use to move the stick can affect aim even with identical output curves. A taller cap changes leverage at the thumb.
A firmer spring can help some players find the center and can make small movement more tiring for others. Neither property follows automatically from a Hall or TMR designation.
Check whether you can make a small adjustment while holding your normal trigger or bumper. You may squeeze the pad more when sprinting or using an ability. If the aim changes only with your grip under pressure, investigate comfort and button reach before replacing the stick technology.
Platform support can settle the purchase early. An Xbox-compatible Hall pad can be the better option if the TMR model you are considering only offers the relevant mode on PC. A supported wired mode, usable rear controls, and a stable firmware profile can be more important than a technology advertised on both models.
Read measured latency in the intended connection mode
The sensor’s response is only one part of the input path. The controller scans and processes the signal, reports it over USB or wireless, and the game samples it.
The game and display then produce the visible update. Higher polling can reduce the wait for a report while leaving other delays in the system.
Gamepadla lists the GameSir Cyclone 2 as a TMR controller and the original Xbox-compatible Wolverine V3 Pro as Hall. Its selected wired results do not put the products in order simply by sensor technology.
That comparison is useful as a counterexample to a blanket claim. The products have different firmware, mechanics, and test entries, so it cannot isolate the sensor’s contribution.
Check whether a review measured analog stick motion or just a digital button. A useful button test tells you about one route through the device.
For aim, look for tests that state how stick motion was detected, the threshold used, the connection, firmware, and operating system. Only compare numbers that describe a similar setup.
How can you compare two controllers on your own setup?
Match the game settings before testing
- Use the same platform and game. Hold the frame-rate target, display settings, controller layout, and practice area steady between runs. Use wired modes on both if your first goal is to reduce connection differences.
- Reset both profiles. Start from each controller’s ordinary mapping and default curve. Write down the game’s inner and outer deadzones and sensitivity so that you can return to the same combination.
- Measure the first stable setting. Find a common game deadzone that holds center for both, then test each at its own lowest stable setting in a separate pass. These two passes answer different questions.
- Keep grip variables visible. If one pad has a taller cap or firmer spring, note it. The physical difference is part of the experience, even when your reason for initially comparing the two is the sensor.
Aim assist can affect a moving-target drill. Keep it in the same state on both controllers and note the input mode the game reports. If one controller enters a different device mode or sends keyboard commands through software, correct that before comparing aim.
Use a repeatable start position and the same target arrangement. A difficult run after a long break can look like a controller problem when it mainly reflects warm-up. Give each pad practice time and alternate the order on another day if you are close to a purchase decision.
Test center, diagonal motion, and the usable outer range
Open a controller tester and let the stick rest with your hands off. Move toward each side, release, and observe where it returns. Repeat from diagonals.
A small offset that stays within your usable deadzone can be harmless in practice. A drifting center that regularly crosses the deadzone deserves more attention.
Next, move slowly through a diagonal. The tester can show whether the output traces smoothly or snaps toward one axis.
Then apply the same motion in the game. Some games expect different input geometry, and their own processing may change how a good raw trace feels in a live match.
At the outer edge, verify that the controller reaches the speed you need for a quick turn. If maximum camera speed arrives too early, check the outer deadzone and curve.
If full stick movement cannot reach your intended turn speed, verify the mapping and calibration before altering the game settings. Keeping the two checks separate prevents a fix for the edge from changing your small-input baseline.
Run matched aiming drills and record concrete errors
- Do a slow tracking pass. Follow a target across a consistent path. Notice whether the crosshair settles, oscillates, or repeatedly catches up after you change direction.
- Do a small correction pass. Move between close targets without large flicks. Count overshoots, undershoots, and times when a tiny movement gives no response.
- Do a fast turn and stop pass. Move through a large angle, then settle on the target. Note whether a quick release produces accidental input in the opposite direction.
- Repeat under load. Use an ordinary trigger or a mapped secondary action while you track. If one grip makes your aim less steady, test a different position before changing the stick curves.
For a simple record, write the active deadzone, connection, profile, and number of recurring errors for each pad. Check which difference comes back on a second day. A strong run when you first try a new stick can mean you like it, and a repeated result gives you more reason to make the purchase.
A controller test utility can help diagnose a failure. The game’s own response remains the deciding evidence for a competitive setup. If two pads draw different traces at the outer edge but both let you turn and stop reliably, give the actual game behavior more weight than a chart score.
Read circularity and snapback results in context
A circularity test shows how the reported axes behave as you rotate the stick around its outer edge. It can reveal asymmetry or an output that reaches the edge unexpectedly early. The percentage alone says little about small corrections near the center and does not establish that the controller uses an appropriate range in your game.
Snapback is a brief signal in the opposite direction after a fast release. To check it, move the stick firmly toward one side and let it return without helping it, then repeat in the other directions.
Observe whether an opposite pulse is large enough for your actual game and settings to turn the camera. Its impact depends on centering, filtering, and the deadzone along that path.
A pad with a smoother outer trace can still give you less confidence if its center return changes between directions. Give the failing motion priority in that case. Buy based on the movement pattern you repeat in play, with the tester as a way to understand the result.
Retest wireless after the basic comparison
If you intend to play wirelessly, switch each candidate to the connection you will actually use. Keep the settings from your wired comparison and play a normal session. Check for intermittent missed movement or larger changes after the controller sleeps and reconnects.
A receiver can behave differently depending on placement, distance, and nearby devices. If an issue appears only with the dongle, move it to a clearer port and repeat with that setting alone changed. If wired input is steady, treat the connection as the first thing to diagnose.
Save a usable baseline before tuning extra features. After a firmware update, revisit center, the first movement threshold, and the intended connection. This gives you a reproducible way to tell whether the controller changed or the game has loaded different settings.
When should you upgrade, keep your controller, or consider a retrofit?
Keep a Hall model that already meets the goal
There is little practical reason to replace a Hall effect pad if the center holds, the small movements are repeatable, and the grip works for your competitive games. You may gain more from identifying a mismatch between the game’s curve and your thumb motion than from shopping for different sensing hardware.
When something feels off, identify the failure first. Sudden center creep, a sticky physical return, and a noticeable wireless delay require different checks.
Compare a standard profile with your custom one, then switch the connection mode if the symptom looks intermittent. A difference that disappears during that short check may have a more direct fix than purchasing another controller.
If two controllers feel equivalent after a real test, decide based on price, software, support, and how your hands fit the pad. Repair choices and replacement availability can matter more over years of use than a small difference you only notice in a controlled drill.
Choose a TMR model when the complete package is better
A TMR controller is a sensible purchase if it has the better center behavior, control range, and comfort at a price you can justify. Look for reports on the exact version and mode you intend to buy. A newer model can also have better rear buttons or a useful connection option, which might be your real upgrade.
Check the differences between model revisions before comparing. Related products can change sensors, add a new dongle, or use another configuration utility. Platform compatibility is especially important when the listing promises high polling on a particular PC mode but you mainly play on console.
If your current controller has a drifting potentiometer or inconsistent input that survives a calibration check, either good magnetic design can be a reasonable replacement. Choose the candidate that lets you verify your target deadzone and mapping during the purchase window. A return option is useful if you have never held that grip.
Treat a sensor retrofit as a separate project
Replacing the module in a controller is different from buying a pad engineered around that sensor. A retrofit can involve soldering, mechanical fit, axis orientation, calibration, and firmware behavior. Confirm that the exact module and controller revision are compatible and that the calibration route is documented for them.
A sensor replacement also cannot fix every mechanical or software fault. If an existing Hall controller has a worn centering assembly, start with the part that is actually failing. If the original game configuration is the cause, opening the controller adds work without improving the setting that matters.
Budget for the total project, including a working module and any service or tools it requires. A supported complete controller can be easier to choose if you cannot test the result before a competition or need your setup to stay reliable across platforms.
Conclusion
Choose the controller that holds center at a low usable deadzone, tracks smoothly, and responds consistently in your actual platform and connection mode. TMR is a worthwhile upgrade when the specific model improves those results or offers a better fit. Keep a good Hall effect pad when it already meets them, and judge any replacement with matched settings and repeated aiming drills.