🛒 Best Price Today on Amazon
Prime members get fast, free shipping on everything above, plus member-only deals. New members get a 30-day free trial — cancel anytime.
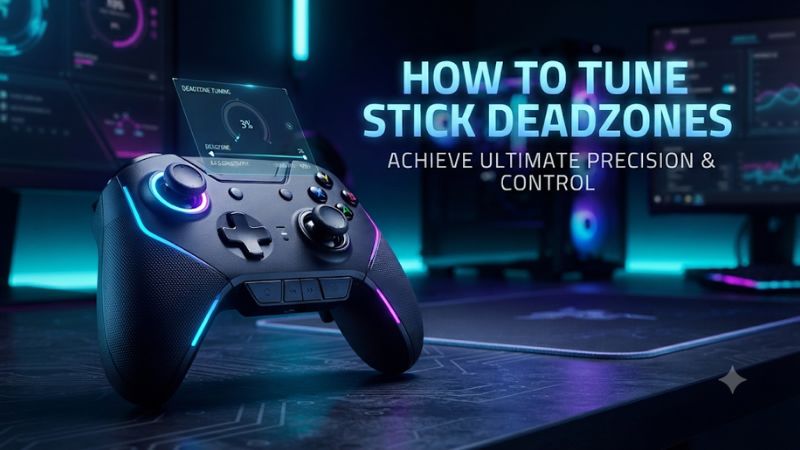
Learn how to tune stick deadzones on Razer Wolverine V3 Pro by setting the left and right sticks separately in the Razer app. Find the lowest stable setting with repeated releases, then test it in your game. If small inputs still feel delayed, check the game’s deadzone and any active Steam Input layout.
Start with the Razer controller profile
Set each inner deadzone to the smallest value that keeps the stick stable after it returns to center. Use the right stick’s camera behavior and the left stick’s movement as separate tests. A stick can return to center cleanly from one direction and settle slightly off-center from another. Checking multiple releases gives you a more reliable starting value than a single reading while the controller sits on a desk.
This guide covers the Xbox-compatible Wolverine V3 Pro, model RZ06-0520. Razer directs Xbox and Windows users to Razer Controller Setup for Xbox. On a supported Windows installation where Synapse 4 recognizes the controller, Razer’s guide documents a Thumbsticks tab and a separate Calibration tab. Labels can vary between the companion app and Synapse, so use the stick settings in the utility that recognizes your model.
Record the settings you already use
Open the active controller profile and record both stick values before making changes. A screenshot is enough. Also note which profile the app reports, which physical stick caps are installed, how the controller is connected, and which game you will use for testing. On Windows, record whether the game uses Steam Input. If you later return to your starting settings, that lets you restore the whole input chain.
Pick one game with a training area or a consistent scene. Use a stationary object with a clearly visible edge to judge small camera movement. For the left stick, use open ground where walls, collision, and movement assistance are unlikely to mask short inputs. Match your usual connection and controller mode, especially if you normally switch between Xbox and PC.
If you recently changed a stick cap, seat it securely before testing. A taller cap can make the same aim speed feel different by changing leverage. If your goal is to compare deadzone values, hold cap height and your usual grip constant.
Open the independent left and right stick controls
- Connect the controller and open Razer Controller Setup for Xbox, or open the Wolverine V3 Pro device page in Synapse 4 where supported.
- Select the profile you want to edit. Leave a known-good profile available if you can.
- Open the thumbstick or stick sensitivity settings. In Razer’s Synapse guide, the section is labeled Thumbsticks.
- Find the separate left and right Deadzone sliders.
- Change one slider by the smallest available increment. Apply the edit as required by the app.
- Return to the game or the controller test view and check the changed stick before adjusting the other one.
A deadzone tells the input chain how much near-center movement to ignore. Lowering it can make the first useful movement occur sooner. Once the stick is outside that zone, sensitivity and the response curve play a bigger role in how quickly the crosshair or character moves. If the problem affects your entire aim range, you may also need to examine sensitivity after finishing the center test.
Choose a baseline with intentional adjustments only
Keep Sensitivity Clutch released during the test, or temporarily disable its assignment if you are unsure which control activates it. The clutch changes output while its assigned control is held and can make an aim test hard to interpret. Keep the current circularity setting until you have chosen stable inner deadzones. You can test diagonal and outer-stick behavior afterward.
Keep the game’s usual aim acceleration, sensitivity, and field of view fixed while testing center behavior. If the game offers an aim trainer or input meter, use it to see small movements. When comparing camera motion, aim away from targets that may trigger aim assist or slowdown. A wall edge or stationary grid is easier to reproduce across runs than a moving enemy.
If the controller has an available firmware update and is behaving inconsistently, apply the update for the exact model using Razer’s supported route. Record your setup beforehand so you can check it again afterward. Firmware can change behavior or available options, which is why the same slider number alone is insufficient to establish a before-and-after baseline.
Find the lowest stable deadzone on each stick
Tune the right stick for small aim corrections
Point at a fixed mark, lift your thumb, and watch the crosshair for several seconds. Move the stick left and release it. Repeat from the right, top, bottom, and the diagonals. Try both a gentle release and the way you normally let the stick spring back in play. Occasional drift after release matters even when the crosshair stays still during an untouched desk test.
If the crosshair remains stable, lower the right deadzone one step and repeat. When you find a value that produces repeatable unwanted movement, raise the deadzone to the previous stable step. Then do another round after several minutes of normal play. A small margin above the first unstable step can be worthwhile if your thumb typically rests on the stick between movements.
Finally, try a gentle correction toward the mark. The aim should begin when you intend it to and stop when you release the stick. If it remains still through a substantial push, record how it behaves in the controller test view. A clear response in the utility with delayed movement in the game points you toward a setting later in the input chain.
Tune the left stick for reliable starts and stops
Use the same procedure with a character on flat ground. First confirm the character stays still with your thumb clear of the left stick. Then walk briefly in each direction and release. Use several release speeds, because a strong flick can return to center differently from a soft movement. Watch the character or movement indicator for a repeatable creep in any direction.
For a shooter, add several alternating strafes. You want a clean start for a small intentional direction change and a clean stop when you release. A left deadzone that works well for digital-feeling strafes might feel too sensitive in a game that expects precise walk speeds. If a title uses movement for stealth, test the transition from standing still to its slow walk.
Tune the left slider independently of the right. Matching percentages can look tidy while producing a poor result for one stick. Left-stick movement generally has different gameplay consequences from right-stick camera motion. A small camera shift may be easier to see than early walking input. Judge each adjustment in the action it controls.
Use repeated releases to choose between two close values
| Test | Pass condition | If it fails |
|---|---|---|
| Hands off after each release | No sustained camera or movement input | Raise that stick’s deadzone one step |
| Small deliberate input | Action starts consistently | Check downstream deadzones if the controller test already responds |
| Rapid direction changes | Stick returns to a usable center every time | Retest several directions and keep a stable margin |
| Normal grip | Resting thumb causes no unwanted action | Add a little margin or review how much pressure you apply |
| Warm controller after a play session | Behavior remains stable | Repeat the tuning after several minutes of normal use |
| Full-stick sweep | Usable output reaches the expected limit | Check circularity, calibration, or game input settings |
A slider value is useful only alongside the test that produced it. If you decide between two adjacent values, keep the lower one when it survives repeated returns and your usual grip. Keep the higher one when the lower setting introduces occasional movement. A slight difference in first motion is easier to accommodate than an intermittent camera drift that appears mid-fight.
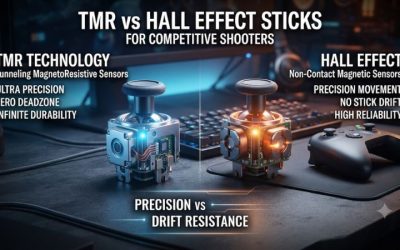
There is no universal percentage for Hall-effect sticks. The hardware still uses a mechanical assembly that has to return to center, and the controller, software, and game can process the input differently. Tune the individual controller and the profiles you actually use.
Check for an additional deadzone in the game or Steam
Identify which part of the input chain creates the delay
A PC game can receive stick output that has passed through the Razer controller profile and, where enabled, Steam Input. The game can then apply its own deadzone or response curve. Xbox users should compare the controller profile with the game’s settings. If small movements register in Razer’s test view but produce a delayed camera response in only one game, the next place to investigate is that game’s input processing.
Start by writing down the values in each active place. On PC, verify the Steam layout for the affected game and check which stick behavior is assigned. A stick mapped to mouse movement responds differently from a stick mapped as a joystick. Use a standard gamepad layout as the comparison point if the title supports it. Change one layer and repeat the same movement against the same visual target.
For a simple illustration, imagine that the controller filters a tiny initial movement. The game then requires a larger reported output before it starts moving the camera. The physical movement needed to overcome both can feel larger than either slider suggests. The percentages may use different shapes and scales, so adding the two slider numbers gives you no reliable measurement.
Choose a primary place to tune each game
If you play mostly one shooter with detailed per-stick options, try keeping the controller at a small stable base setting and make game-specific corrections in the game. This gives you useful defaults when you change titles. If your games have limited adjustment, the controller profile may be the most convenient place to handle drift and first movement.
On Steam, leave the layout alone unless it is responsible for the behavior or provides a feature you need. If the game works natively with the controller, a temporary test with Steam Input disabled for that game can help isolate where the change comes from. Restore it afterward if you rely on its layout or game support. Run the test with the same connection and controller profile so the comparison has meaning.
One setting is not necessarily best across a PC and Xbox setup. A different title, game build, or controller route can change what you feel at center. Reuse the stable controller baseline where it works and record the game-side adjustments you use on each platform.
Test Prevent Double Deadzones as a separate change
Razer’s Synapse guide documents a Prevent Double Deadzones option in the Thumbsticks tab. If your software and firmware expose it, leave your newly chosen stick values in place and compare the same small movements with the option off and on. Watch for both reduced delay and any change in how movement begins.
Record which game, controller profile, and Steam Input setting you used. The option can affect the output the game receives, and games or remappers may still have their own input processing. An A/B check in the affected title tells you whether the switch gives the result you want on that setup. Test slow movement, a return to center, and a diagonal correction before committing to the change.
If the option is absent, check the current Razer app, exact model, and firmware. You can still reduce accumulated filtering by starting with a stable hardware value and inspecting the deadzone in the game or active Steam layout. Recheck all three only if all three are in use.
Leave circularity and outer range for a second pass
Where available, Circularity Mode changes how the controller handles the stick’s output boundary. Compare the available modes by rotating the stick slowly near its edge and by producing diagonal movements in the game. This test addresses a different part of the stick’s travel from the inner deadzone.
Check outer-threshold options in the game if you cannot reach full turn speed or full movement speed. Some games expose a maximum input threshold, a saturation setting, or a differently named outer deadzone. Change it only after confirming that the stick reaches its expected edge in the controller test view. A corner discrepancy and a drifting center deserve separate measurements.
Also keep software response curves distinct from stick tension and cap height. A more gradual curve can help with movements just outside the deadzone. A taller cap changes physical leverage. Making all three changes at once can yield a different feel without showing which setting fixed the original problem.
Calibrate or diagnose a stick that remains unstable
Recalibrate the affected stick and retest it
If one stick still settles noticeably off-center in the Razer test view, open Calibration in supported software and select the affected stick. Follow the utility’s own sequence. It may ask you to move the stick through its range and release it. Use a normal grip and avoid pressing the controller against a surface that interferes with the stick.
After calibration, repeat the center checks from all directions. Verify range at the edge as well. A calibration result that behaves well in the software can still need a small deadzone in your game. Record the new value and test again under the connection mode you normally use before changing the healthy stick.
If the companion app lacks calibration on your setup, consult the support instructions for model RZ06-0520 and the supported Windows utility. Avoid borrowing firmware or calibration instructions from the V3 Pro 8K PC or another Wolverine just because the names are similar. Those listings can point to different devices and tools.
Recognize symptoms that deserve a hardware check
A repeatable off-center pull across games and platforms, or a stick that sometimes fails to reach full travel after calibration, is worth investigating with Razer support. Try the controller over a known-good USB connection, use a clean profile, and check whether the behavior is confined to one physical stick. Those comparisons help separate game settings from a controller issue.
A large deadzone can hide a small region of unwanted output, but it also removes useful movement near center. If the required setting keeps rising or the stick jumps unpredictably instead of returning consistently, record the behavior in the calibration view and include the firmware, app version, and connection type in your support request.
For an aim complaint that appears only with a specific cap, reseat it and repeat the same test with another supported cap. Check that it moves freely around the full gate. A recorded example showing the direction of the release that causes drift is more informative than a screenshot taken while the stick happens to be centered.
Save a repeatable setting for your main games
Write down the left and right values, the game’s own settings, the active Steam layout if relevant, and whether Prevent Double Deadzones is enabled. Test after closing the configuration app and restarting the game. On a setup that moves between Xbox and PC, verify which profile is active on each before assuming the settings follow the controller identically.
Begin your next normal session with a quick hands-off check and a few deliberate small movements. The right stick should allow a controlled correction and settle immediately afterward. The left stick should allow intentional movement and remain still when released. If both pass, use the setup for a full session before chasing a smaller slider number.