- Top Pick: ASRock B860M Pro A DDR5 8666 MHz 256GB M.2 LGA1851 B860 Micro ATX Motherboard Intel Core Ultra BIOS Flashback SATA3 6.0 Gb/s PCIe 5.0
- Best Value: ASUS TUF Gaming B550-PLUS WiFi II AMD AM4 (3rd Gen Ryzen™) ATX Gaming Motherboard (PCIe 4.0, WiFi 6, 2.5Gb LAN, BIOS Flashback, USB 3.2 Gen 2, Addressable Gen 2 RGB Header and Aura Sync)
- Premium Choice: ASRock B860 Pro A WiFi 6E Intel Core Ultra DDR5 8666 MHz 256GB M.2 LGA1851 ATX Motherboard BIOS Flashback SATA3 6.0 Gb/s PCIe 5.0
Updating your motherboard BIOS in 2026 is faster and safer than ever, but it still carries risk if you rush it. A BIOS update can add support for new CPUs like Intel Core Ultra Series 2 on LGA1851, improve DDR5 stability at 6000+ MHz, patch security vulnerabilities, and fix compatibility issues with PCIe 5.0 and NVMe drives.
- Watch: How to Update Your Motherboard BIOS — Video Review
- 1. Do You Actually Need to Update?
- 2. What to Prepare Before You Flash
- 3. Method 1: Update From Inside the BIOS (Recommended)
- 4. Method 2: Update With BIOS Flashback (No CPU Needed)
- 5. Verify and Reconfigure After the Flash
- Tips
- Frequently Asked Questions
- Conclusion
- Related Articles
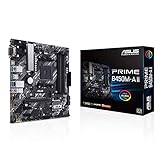
This guide walks you through exactly when to update, what to prepare, and the two proven methods to flash your BIOS — from inside the BIOS and with BIOS Flashback without a CPU installed. Whether you are on a modern board like the ASRock B860 Pro A WiFi 6E or an AM4 classic like the ASUS Prime B450M-A II, you can do this in under 15 minutes with the right prep.
As an Amazon Associate we earn from qualifying purchases at no extra cost to you.




⚡ Save on Your Next PC — Amazon Prime
Prime members get fast free shipping on the systems above, plus early access to Prime Day & Black Friday PC deals. New members get a 30-day free trial.
Watch: How to Update Your Motherboard BIOS — Video Review
1. Do You Actually Need to Update?
Do not update just because a new version exists. Update if you have a clear reason. On gaming PCs in 2026, these are the valid triggers:
- New CPU support: You bought an Intel Core Ultra 200 series CPU for an ASRock B860M Pro A or ASRock B860M Pro A WiFi 6E and need the latest BIOS for microcode support. Same for dropping a Ryzen 5000 CPU into an ASUS TUF Gaming B550-PLUS WiFi II.
- Memory or stability fixes: Your DDR5 XMP/EXPO profile at 6000 to 7200 MHz will not boot, or you get random WHEA errors.
- Security and bug patches: The changelog mentions AGESA updates, Intel ME fixes, or TPM/Secure Boot improvements. If you use a discrete chip like the Anu Limen TPM 1.2 Security Module, updated BIOS firmware ensures proper detection and Windows 11 compliance.
- New feature support: Resizable BAR, PCIe 5.0 drive compatibility, or improved PBO and fan curve logic.
If your system is stable and the changelog only lists support for CPUs you do not own, leave it alone. Always read the exact changelog on the support page for your specific revision before downloading.
2. What to Prepare Before You Flash
Preparation prevents bricks. A BIOS chip is small (typically 128Mb to 256Mb / 16-32MB) and the flash process takes 3 to 8 minutes. Any interruption can corrupt it.
- Identify your exact model and revision: Check the box, board silkscreen, or BIOS main page. An ASUS Prime B450M-A II is not the same as a B450M-A, and an ASRock B860M Pro A DDR5 is different from the WiFi 6E variant. Download only from the official support page.
- Use a reliable USB drive: 8GB to 32GB, USB 2.0 or 3.0, formatted to FAT32 with MBR partition. NTFS and exFAT will not be recognized in BIOS Flashback on most boards. Format it clean and put only the BIOS file on it.
- Stable power is mandatory: For desktops, plug directly into wall power or a UPS. Do not flash during a storm. For laptops, charge to at least 60% and keep the AC adapter connected. Close all background apps if flashing from Windows, though BIOS-based flashing is preferred.
- Back up and reset: Note your current BIOS version, and screenshot or photograph your BIOS settings (XMP, fan curves, boot order). Load BIOS defaults before flashing if your manual recommends it, and disable BitLocker or suspend it if enabled.
3. Method 1: Update From Inside the BIOS (Recommended)
This is the safest method for most users with a working system and is called EZ Flash on ASUS, M-Flash on MSI, and Instant Flash on ASRock.
- Download the latest BIOS .ZIP from the motherboard support page, extract it, and rename the file if the instructions require it. For example, ASUS often provides a BIOSRenamer.exe tool. Copy the .CAP or .ROM file to the root of your FAT32 USB drive.
- Insert the drive into a rear USB port connected directly to the motherboard. Avoid front-panel or hub connections.
- Reboot, press Del or F2 to enter BIOS, and open the tool: On the ASUS TUF Gaming B550-PLUS WiFi II go to Tool > ASUS EZ Flash 3 Utility. On the ASRock B860 Pro A WiFi 6E go to Tool > Instant Flash.
- Select the USB drive and the BIOS file, confirm, and wait. Do not touch the keyboard, mouse, or power button. The system will reboot automatically when finished. First boot after a flash can take 60 to 120 seconds for memory training — this is normal.
If you use Windows-based utilities like ASUS Armoury Crate or ASRock Live Update, only use them as a last resort. BIOS-level flashing has far fewer failure points.
4. Method 2: Update With BIOS Flashback (No CPU Needed)
BIOS Flashback lets you update without a CPU, RAM, or GPU installed. You need it when building new and your board needs a newer BIOS to POST with your CPU. All the boards featured here — including the ASRock B860M Pro A series, ASRock B860 Pro A WiFi 6E, ASUS TUF Gaming B550-PLUS WiFi II, and ASUS Prime B450M-A II — include BIOS Flashback.
- Prepare the USB as above, FAT32 and empty except the BIOS file. For Flashback you MUST rename the file exactly as the manual states. ASUS typically requires B550P2.CAP or similar, ASRock often uses creative.rom. Check the manual PDF — the name is case-sensitive on some boards.
- Plug the drive into the specific USB port marked BIOS or Flashback on the rear I/O shield. It is usually outlined in green or labeled.
- With the PSU switched on and the 24-pin and 8-pin EPS power cables connected, press and hold the BIOS Flashback button for 3 seconds until the LED starts blinking. It will blink for 2 to 6 minutes. When the LED stays solid or turns off, it is done.
- Do not remove the drive or cut power while the LED blinks. If the LED blinks 5 times and stays solid, the file name or format is wrong — reformat and rename.
This method is also how you recover a failed BIOS flash on supported boards.
5. Verify and Reconfigure After the Flash
A successful flash does not mean you are done. You need to verify and restore settings.
- Confirm the version: Enter BIOS and check the main page or use CPU-Z in Windows. The build date and version string should match what you downloaded.
- Load optimized defaults, then reapply: Load defaults, save and reboot, then re-enable XMP/EXPO, Resizable BAR, fan curves, and boot order. DDR5 boards like the ASRock B860M Pro A WiFi 6E at 8666 MHz (OC) will often reset to JEDEC 4800 MHz after an update until you re-enable the profile.
- Re-enable security features: Check that TPM is detected, Secure Boot is enabled if you use it, and that your Anu Limen TPM 1.2 Security Module shows as active if installed on its 20-pin header.
- Test stability: Boot into Windows, run a quick 5-minute Cinebench and a game load. If you updated for memory fixes, run TestMem5 or Karhu for 30 minutes to confirm stability.
Tips
- Never interrupt a flash. If the progress bar freezes for more than 10 minutes, wait. Only force a shutdown as an absolute last resort and prepare to use Flashback to recover.
- Update incrementally if you are many versions behind. Some vendors require you to install a bridge BIOS first if the changelog says so — especially on B450 boards moving to Ryzen 5000 support.
- Keep the old BIOS file on the USB drive for a week. If a new BIOS introduces a bug, you can often flash back to the previous stable version.
- Use a wired keyboard and rear USB port for EZ Flash. Wireless keyboards and front-panel USB can disconnect or not be detected in the tool.
Frequently Asked Questions
Will updating my BIOS delete Windows or my files?
No. A BIOS update only rewrites firmware on the motherboard chip. Your SSD, Windows install, games, and files are untouched. You will need to reconfigure BIOS settings like boot order and XMP, but you will not lose data. Still, suspend BitLocker before flashing to avoid a recovery key prompt.
How long does a BIOS update take?
Downloading and preparing the USB takes 2 to 5 minutes. The actual flash takes 3 to 8 minutes depending on the board, plus another 1 to 2 minutes for the first reboot and memory training. In total, budget 10 to 15 minutes undisturbed.
What happens if power goes out during a BIOS update?
If power is lost mid-flash, the BIOS can be corrupted and the board may not POST. That is why stable power matters. If your board has BIOS Flashback, you can usually recover by retrying the Flashback method with a correctly named FAT32 drive. Boards without it may need an RMA or a CH341A programmer.
Should I update BIOS for Windows 11 and TPM?
Only if you have an issue. Most 2024-2026 BIOS versions for LGA1851 and AM4 already support fTPM and discrete TPM correctly. If Windows 11 reports TPM not found for a module like the Anu Limen TPM 1.2 Security Module, or you need Secure Boot defaults for Valorant anti-cheat, then a BIOS update that lists TPM or Secure Boot fixes is worth installing.
Conclusion
A BIOS update in 2026 is a routine maintenance task when you follow the correct sequence: verify your exact motherboard model, use a clean FAT32 USB drive, flash from inside the BIOS or via the dedicated Flashback port, and verify the version afterward. Done correctly, you get new CPU support, better DDR5 and PCIe 5.0 compatibility, and a more stable gaming system with minimal risk.