🛒 Best Price Today on Amazon
Prime members get fast, free shipping on everything above, plus member-only deals. New members get a 30-day free trial — cancel anytime.
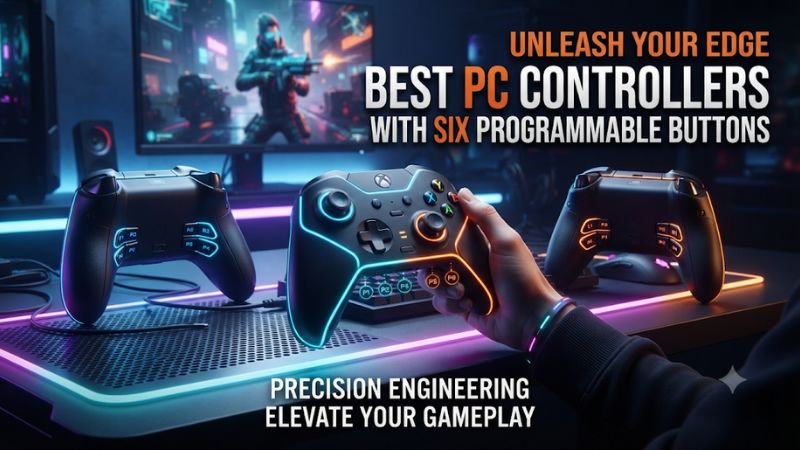
Buy the wired Razer Wolverine V3 Tournament Edition 8K PC for four rear paddles and two extra bumpers, or the Flydigi Vader 5 Pro if you want more placement choices. The best PC controllers with six programmable buttons give you six usable extras beyond the standard layout. Check where they sit and what they can send to your game.
Which PC controllers give you at least six remappable extras?
The useful starting point is six physical controls in addition to the normal controller layout. Standard ABXY, triggers, bumpers, and stick clicks stay out of the count.
Each extra counted here can be assigned a different function through a supported mapping mode. A mapped button often duplicates a conventional controller input, and the game may identify it by that input’s name.
Look at placement before ranking controllers by the total. Four rear inputs and two shoulder-area buttons keep six controls under fingers other than your aiming thumb if the shape works for you.
Four rear inputs and two face extras cover a different need. For a player who wants to switch equipment during a quiet moment, face buttons may be easier to reach and remember.
| Controller | Extra physical inputs | Windows connection to consider | Mapping system |
|---|---|---|---|
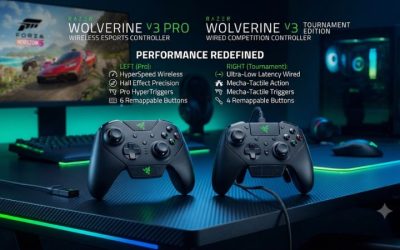
| Razer Wolverine V3 Tournament Edition 8K PC | 4 rear paddles + 2 extra bumpers | Wired USB | Razer Synapse 4 |
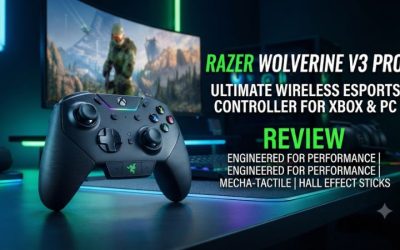
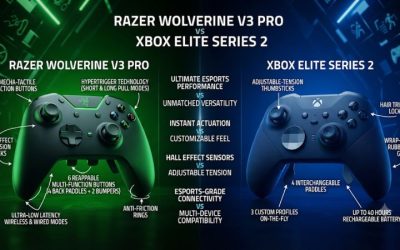
| Razer Wolverine V3 Pro 8K PC | 4 rear buttons + 2 extra bumpers | USB wireless receiver or wired | Razer Synapse 4 |
| Razer Wolverine V3 Pro, original | 4 rear buttons + 2 extra bumpers | USB wireless receiver or wired | Razer Controller app |
| Flydigi Vader 4 Pro | 4 rear buttons + C and Z face controls | USB wireless receiver or wired | Flydigi Space Station |
| Flydigi Vader 5 Pro | 4 rear buttons + 2 extra bumpers + C and Z | USB wireless receiver or wired | Flydigi Space Station |
| SCUF Envision, original wired | 4 rear paddles + 2 SAX side buttons, plus 5 G-keys | Wired USB | Onboard controller mapping and iCUE |
| SCUF Envision Pro, original | 4 rear paddles + 2 SAX side buttons, plus 5 G-keys | USB wireless receiver or wired | Onboard controller mapping and iCUE |
Razer Wolverine V3 Tournament Edition 8K PC is the wired first pick
Choose the PC-specific Tournament Edition 8K if your priority is six extras with a conventional Windows controller layout. Razer documents four mouse-click back paddles and two additional bumpers designed for a claw grip. A cable suits a fixed desk and keeps receiver placement and charge level out of the setup.
Those two top controls are a reason to buy the model only if you can reach them while you hold the triggers as you usually do. With relaxed hands, try all four rear paddles and both top buttons before assigning critical actions. If two paddles feel hard to distinguish in motion, use the easiest pair for frequent actions and reserve the others for lower-pressure inputs.
Open Synapse 4 and establish your six mappings before experimenting with stick curves or report rate. A stable base profile is easier to diagnose.
Buy by the full 8K PC name. The original Xbox-compatible Tournament Edition has a similar layout and belongs to a different compatibility and configuration path.
Razer Wolverine V3 Pro 8K PC is the wireless Razer option
The Pro 8K PC retains the six-control arrangement with four rear buttons and two extra bumpers. Choose it if you like that layout, use Windows, and want receiver-based gaming with the option to plug in. The premium over the wired edition makes the most sense when the cable is a daily inconvenience.
The receiver setup is part of the purchase. Position it where it works reliably with your PC and test what happens when the controller sleeps or returns from a wired connection.
Confirm profile changes in Synapse 4 over the mode you actually plan to use. If a game works on USB and drops wireless inputs, fix the connection before changing its bindings.
A high advertised report rate describes the supported mode. It does not guarantee a particular delay through every game, driver, and wireless environment. The test that matters for this purchase is whether the six buttons remain reachable and reliably execute their assigned controls in the titles you play.
Razer Wolverine V3 Pro is the original cross-platform option
The original Wolverine V3 Pro supports PC and compatible Xbox consoles, with four rear buttons and two extra bumpers. It is the better Razer pick in this group if you actively use both a Windows PC and an Xbox.
Its setup route is the Razer Controller app for the original family. Check that the seller’s listing shows the console-compatible model before buying.
Plan to verify your profile on both devices. Start with a few conventional controller mappings so the receiving game has recognizable inputs and you can see whether the selected profile follows you. A label on the controller and a prompt in the game can refer to different things when an extra button is assigned to an existing input.
This is a case where compatibility can matter more than the highest reported polling rate or the newest revision. If your use is Windows alone, compare its local price and controls with the PC-specific models. If an Xbox is central to the setup, confirm the exact bundle and wireless method you will use there.
Flydigi Vader 4 Pro offers a four-rear and two-face layout
Vader 4 Pro gives you four rear controls and two extra face controls, C and Z. You can configure those six buttons through Flydigi’s mapping tools.
The layout suits a player who wants aim-critical actions on the rear and occasional actions near ABXY. It also gives you adjustable stick tension without requiring that you pay for a newer generation to get six extras.
Map the easiest rear locations first, then put a less urgent action on C or Z. Moving your thumb to the front of the pad can interrupt right-stick aim, so a face extra often makes more sense for a menu, item, or secondary action than it does for a jump you use during a fight. Then check that C and Z do not cause accidental presses when you reach for the standard face cluster.
Confirm what the game receives in your selected mode. If you map Z to a standard controller input, the game generally treats it as that input.
The location adds another way to press the assigned action. A PC game that can accept keyboard and controller input together may support a different arrangement if the mapping software offers the output you want.
Flydigi Vader 5 Pro gives you a choice of eight positions
The Vader 5 Pro is the clearest pick in this group if six positions could be enough but you want more choice about where they sit. Flydigi’s specifications list four rear buttons, two extra bumpers, and C and Z face controls. You can build a six-button layout around the reachable controls and leave the other two unused or give them occasional tasks.
Flydigi’s product page has a six-button heading alongside a detailed eight-input specification and an explanation of the eight. Count the physical controls by location when checking the exact unit. A seller’s description or a single promotional banner is less useful than the diagrams and mappings for the controller you are ordering.
Flydigi Space Station is the place to verify each of the eight buttons and save a known profile. Start over USB if you are configuring a new unit and check the profile again with your receiver afterward. Buying eight makes sense if differences in finger reach or the way you hold the controller make six fixed positions less practical.
SCUF Envision is the wired choice for side inputs and G-keys
The original wired Envision includes four remappable rear paddles and two side action buttons, which SCUF calls SAX. It passes the six-button requirement with those controls.
Five G-keys provide additional shortcuts through the supported iCUE workflow. This model suits PC players who want to keep frequently used controller actions near their grip and occasional desktop commands at the front.
SCUF documents hardware mapping for supported controller inputs on the paddles and SAX controls. Use that path for ordinary gamepad bindings you want to use without iCUE running.
If you assign a software action to a G-key, check its requirement for iCUE to remain open. Test your hardware profile independently of those additional functions.
Side buttons feel different from shoulder extras. Check whether your index fingers naturally brush them while you pull the triggers. If you hit a side button unintentionally while gripping the controller, reserve it for a safe action, change the grip, or compare the Razer layout during your purchase window.
SCUF Envision Pro adds a receiver to the original six-button layout
The original Envision Pro keeps four paddles, two SAX buttons, and five G-keys while offering wireless through its receiver as well as wired use. Pick it if you want that particular distribution of controls and prefer a desk without a controller cable. Its grip and placement are more useful buying criteria than the maximum number of iCUE actions you could theoretically assign.
Decide how much of your workflow needs to work without its configuration app open. With the controller in the intended operating mode, verify that a hardware-mapped paddle and SAX button still work when iCUE is closed.
Open the app again before checking software-dependent G-keys. Save a short list of what every extra does so swapping profiles is less error-prone.
Buy by version and check the included receiver if you are shopping used. Envision revisions and different stick options can show up under very similar names.
The product here is the original Pro and its documented mapping workflow. Verify your exact unit’s software and connection options when comparing it with another revision.
What does a programmable button actually add to a PC game?
Six physical buttons do not automatically create six new gamepad inputs
Start by distinguishing the physical control from the command it sends. A rear paddle mapped to A sends the assigned standard controller input. If you press the ordinary A button and then that paddle, a game using that mapping will usually report A both times.
The benefit is the new finger position. Your aiming thumb can stay on the stick while a rear finger performs the action.
A conventional XInput gamepad has a defined set of controls. A hardware profile that mirrors those controls generally does not expand that set for the game. If you want distinct actions beyond the standard inputs, verify that the device or its software sends usable distinct buttons or keyboard commands in your chosen mode, and that your game can bind them.
Some games accept simultaneous mouse, keyboard, and controller input smoothly. Others change prompts, interrupt stick behavior, or have separate input-mode rules.
Test a keyboard assignment in an actual match mode or training area before mapping your entire setup around it. Verify any competition’s input rules before using specialized functions there.
Choose hardware profiles or software actions on purpose
A hardware profile works best for repeatable controller-to-controller bindings and for moving between supported machines. A software action can be appropriate for a desktop shortcut or a game that accepts the needed alternate input. Check which mode is selected and whether the changes are saved to the controller or just applied by its Windows software.
- Pick an ordinary control first. Assign one extra to a face input and check it with the software open. Close the app and repeat if you expect an onboard profile to handle it.
- Verify special actions separately. Test any supported keyboard assignment or shortcut with the required software active. Check what happens in the game and on the Windows desktop.
- Name profiles by use. A dedicated shooter, action, and general profile is easier to recognize than a row of identical custom names. Keep one familiar mapping as a recovery point.
- Use one translation path for initial tests. If mappings look doubled or inconsistent, temporarily remove an extra input translation layer, such as a conflicting Steam Input configuration, and test again.
If you depend on Steam Input for a particular game, restore it after you understand the controller’s output and check whether combining the two systems is useful. A binding that works with the vendor app and fails only when another layer is enabled suggests a translation or profile conflict. Make one change per test so the result tells you what to fix.
Which six-button layout will you actually use?
Put high-pressure actions under fingers that already rest on the pad
Start with two actions that regularly pull your right thumb off the stick. Assign them to your easiest rear inputs and practice for a few sessions.
Add the next two functions once the first pair feels familiar. Save the most awkward reach for an action that can wait until you are out of immediate danger.
A shooter setup might use rear controls for jump, crouch, reload, and interact, with extra bumpers for equipment and ping. The specific example depends on the game’s normal bindings.
If interact and reload share one command in that game, assigning two separate buttons to it gives you two locations for the same command. Keep only the positions that solve a real reach problem.
In a racing or flying game, rear and top extras can be useful for camera or sequential shifts if your fingers can hit them without disturbing throttle or steering. You might keep face extras for a menu or a display mode. If a grip change alters trigger pressure, prioritize comfortable control before using all available buttons.
Check fit, accidental presses, and fatigue
Hold the controller as you normally play, with index fingers where they usually rest. Press each extra three times while moving both sticks. If the thumb or index finger moves off an important control each time you use an extra, treat that button as a secondary option for your grip.
Test under pressure after the first setup. A hand can tighten during fights, and that is when closely spaced rear paddles are easiest to hit by mistake.
If you boil the layout down to five usable extras during the busiest parts of a game, that still tells you what to map to the sixth. Reserve it for a lower-pressure option you can reach deliberately.
Check the fit during a normal session as well as in a short unboxing test. The cheapest useful layout is the one you can operate without hand repositioning or extra correction. Buy for the shape and allocation of controls before paying for a more ambitious software suite or a higher advertised report rate.
Compare the layouts with games that ask for different inputs
Start with the game that makes you reach for extras most often. In a shooter, note which action you hesitate to use because it interrupts aiming or moving.
In an action game, look at the controls you press together, such as a modifier and a face button. Make two lists and compare the overlapping actions before building a shared profile.
A four-rear and two-bumper layout works well when the two top controls sit within easy reach of your index fingers. If you already hold both bumpers with your index fingers and use your middle fingers on the triggers, try the extras while all those conventional controls are occupied. Placement can matter more in that test than the advertised force or speed of the switches.
With four rear controls and two C and Z buttons, keep the inputs that protect thumb-stick use at the back. Place tasks that happen between fights on the front, where the exact physical position is easier to find on purpose. If you can afford a model with eight, test the top extras against the face extras and ignore the pair that contributes the least.
Diagnose profile failures between games
If an extra works in one game and fails in another, check the assigned input in a tester and then review how each game binds it. A game may reserve that input for a menu, ignore it while a modifier is held, or be listening to a different controller slot. Confirm whether the corresponding standard button shows the same behavior.
If all six work until you reboot, check which profile loads by default and whether the vendor app must launch. Reapply the working profile, save it in the supported location, and repeat a restart test. If only one or two bindings fail after an update, compare those buttons individually before resetting the entire controller.
Verify all six in one repeatable test
- Map and document six controls. Record the physical position and its assigned command. Use six different observable outputs where the mapping system and game permit them.
- Check one at a time. Open a compatible controller tester or a training area. Press each extra and verify that it performs the assigned action once. Observe whether it duplicates an expected standard input.
- Test the intended connection. Repeat over the receiver or cable you normally use. If a profile appears to disappear after sleep, verify the selected hardware profile and reconnect.
- Test inside the game. Use combinations you perform under pressure. Move both sticks, hold a trigger, and press the selected extra. Check for accidental presses, missing actions, or unexpected input-mode changes.
- Fix one variable and retest. Return to the standard profile or connection if several inputs misbehave at once. Once the baseline works, reintroduce custom mappings individually.
Conclusion
Choose the wired Wolverine V3 Tournament Edition 8K PC for four rear paddles and two extra bumpers, or the Vader 5 Pro if you want to pick six usable positions from eight. The wireless Wolverine models, Vader 4 Pro, and SCUF Envision options fill different connection and grip needs. Confirm that the extra buttons fit your hands, verify what they send in your target game, and buy the model that keeps your most frequent actions within reach.