🛒 Best Price Today on Amazon
Prime members get fast, free shipping on everything above, plus member-only deals. New members get a 30-day free trial — cancel anytime.
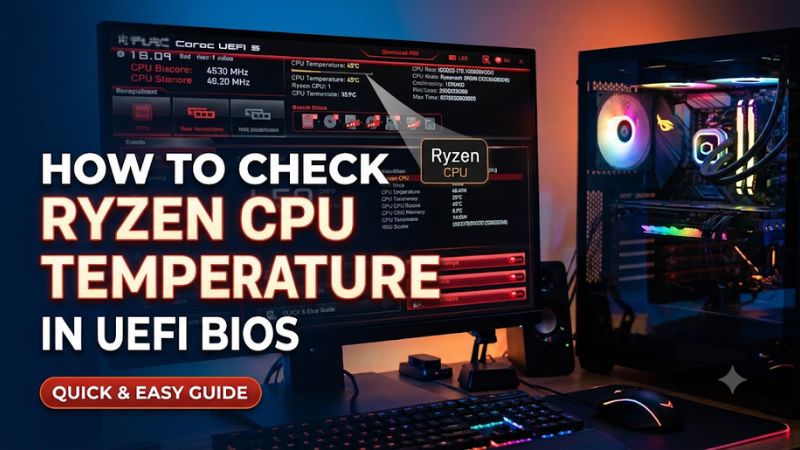
Here’s how to check Ryzen CPU temperature in UEFI BIOS after a new build or cooler change. Enter setup during startup, open the hardware monitor, and read the CPU temperature alongside fan or pump speed. Watch whether it levels off or keeps climbing. That trend is more useful than a single reading.
Open UEFI and find the CPU temperature
Enter setup during startup
Restart the PC and tap the motherboard’s setup key as soon as it begins to power back on. On many DIY desktops, that key is Delete or F2. Prebuilt systems and laptops may use another key. Follow the startup prompt or the motherboard or system manual if neither key works.
For the first pass, leave the current settings as they are. The temperature is a live reading. You can observe it without changing the CPU multiplier, fan curve, memory profile, or boot order. When you finish, use the option to exit without saving if the firmware asks whether to apply changes.
If the machine starts Windows too quickly, use this route on a supported Windows 11 system:
- Save open work.
- Open Settings → System → Recovery.
- Select Restart now under Advanced startup.
- Select Troubleshoot → Advanced options → UEFI Firmware Settings → Restart.
If that option is missing, try the startup key with a wired keyboard. A keyboard connected through a hub, a wireless connection that initializes late, or a monitor that wakes slowly can make the startup prompt hard to catch. Connect the keyboard directly to a rear USB port and turn the display on before restarting. On systems with a graphics card, use a video output that already shows the startup screen.
When the PC repeatedly shuts down within moments of startup, skip repeated attempts to catch the setup key. Power it off and inspect the cooler and its connections first. A reading is useful only when the machine can stay on long enough to observe it without approaching its thermal limit.
Find the hardware monitoring menu on your board
Many boards show a CPU reading on the first screen, often called EZ Mode. The main hardware monitoring page is usually better for troubleshooting because it puts temperature and fan speeds together. Menu labels can vary with the motherboard and BIOS version.
| Motherboard brand | Where to start | What to look for |
|---|---|---|
| ASUS | EZ Mode or Advanced Mode → Monitor | CPU temperature, CPU package if offered, CPU fan and pump readings |
| MSI | EZ Mode or Hardware Monitor | CPU temperature and individual fan headers |
| GIGABYTE | EZ Mode or Smart Fan 6 on supported boards | CPU temperature and the selected fan header or temperature input |
| ASRock | EZ Mode or H/W Monitor | CPU temperature, motherboard temperature, and fan speeds |
| Prebuilt or laptop | System Information, Hardware Monitor, or onboard diagnostics | A CPU or processor temperature, if exposed |
Open the monitor and find the row labeled CPU Temperature, CPU Package, or a similar processor label. On a fan-control page, check the selected temperature source. The chart can be following a motherboard or external sensor even though you opened the CPU fan control.
If the firmware shows only fan speeds, confirm that you are on the hardware readings page. Some systems expose fewer sensors or keep a temperature reading in a separate diagnostic. If the exact model’s manual lists no temperature view, use its onboard diagnostics if available. A supported operating-system utility is another route when the PC can run safely. Firmware access by itself does not ensure the device exposes every sensor.
Identify which temperature your board is showing
A motherboard can report several values at once. The processor reading, socket area, chipset, voltage regulator, and an external probe can all move at different speeds. Write down the label next to each value you plan to compare. That matters especially when you later open a Windows monitor that uses different names.
| Sensor label | What it usually describes | How to use it |
|---|---|---|
| CPU Temperature or CPU Package | A board-reported processor reading or an on-die package/control reading, depending on implementation | Start here for the CPU temperature trend |
| Tctl/Tdie in some monitoring utilities | CPU thermal control and die sensor information, with naming that depends on the model and tool | Compare the same reading when repeating tests |
| Motherboard, System, or Socket | A board or socket-area reading, as defined by the manufacturer | Use for context and record separately |
| VRM or MOS | The CPU power delivery components | Use when investigating motherboard airflow or power delivery temperature |
| Chipset or PCH | The chipset area | Use for chipset cooling, separately from CPU troubleshooting |
| T_Sensor or External | A connected probe if the board supports one | Useful only when you know where the probe is mounted |
On some Ryzen models, a control value and a physical die temperature can differ. An offset documented for one processor generation does not apply universally. There is little value in subtracting a number found in a forum post unless it applies to your exact chip and sensor. For a practical first check, use the same board sensor across readings and note the exact CPU model.
Measure the trend and interpret the result
Record the temperature at consistent checkpoints
Let the PC cool naturally before starting a fresh baseline if it has just been under heavy load. Enter UEFI promptly and open the same monitoring page each time. Note the first reading you can see and the corresponding fan or pump speed. If the system is stable and comfortably below the CPU’s published limit, check again after roughly one minute and again after a few minutes.
Record these details:
- The exact CPU model, including any suffix.
- The motherboard model and BIOS version.
- The name of the temperature sensor.
- CPU fan speed and pump speed where a tachometer signal is available.
- Approximate room temperature and whether the case is open or closed.
- The initial reading, later reading, and whether it is settling or climbing.
As an example, a machine that opens setup at 42°C, rises to 49°C, and then remains near that level is showing a different pattern from one that reads 55°C and moves into the 80s within a short interval while the temperature keeps rising. These are illustrative measurements. Use your own CPU specification and the observed trend to decide what to do.
If you are close to the CPU’s documented maximum and still rising, shut down and inspect the cooling hardware. There is no need to wait for the final checkpoint. If you have no idea where the limit is, look up the processor from another device or confirm the model in the firmware overview before attempting a longer test.
Use the model’s thermal limit correctly
AMD publishes a maximum operating temperature, often labeled Tjmax, for specific processor models. For example, AMD lists 89°C for the Ryzen 7 7800X3D and 95°C for the Ryzen 7 9800X3D. Verify the model and suffix. A rule copied from another Ryzen chip can give you the wrong reference even when both processors belong to the same product family.
Tjmax describes a thermal operating limit. In firmware, the useful question is whether the temperature stabilizes with cooling that appears to work. A reading moving rapidly toward the limit while the system is sitting in setup deserves investigation, especially after a cooler installation. An operating-system stress test puts the CPU in a different situation, with workload-dependent boost, power, and fan behavior. Evaluate that separately.
UEFI also provides an imperfect comparison with Windows idle. Firmware may use different power management behavior, and a vendor utility may later read a different sensor. If BIOS reports a stable 49°C and a Windows monitor reads 41°C at the desktop, compare the sensor names and operating conditions before deciding one of them is wrong. A difference can be expected if the processor spends more time sleeping in Windows or the tools show different temperature points.
Likewise, two otherwise similar builds can stabilize at different temperatures because of room temperature, case airflow, cooler size, fan curve, or prior workload. When diagnosing a change to your own PC, a repeatable before-and-after comparison is usually more informative than another owner’s screenshot.
Read the fan or pump value alongside temperature
Open the fan header list and identify what is physically connected to each relevant header. Start with CPU_FAN for a conventional air cooler. An AIO may report pump speed on AIO_PUMP, CPU_FAN, a controller, or another header depending on its design. The cooler’s wiring instructions are the reference for your specific setup.
A zero or N/A reading has several possible causes:
- The selected header has nothing attached to it.
- The fan is set to stop at low temperature.
- A hub reports only one connected fan’s RPM.
- The pump gets power independently and does not send its tachometer signal to that header.
- A fan or pump is disconnected, stalled, or unpowered.
Look at the hardware and the trend together. An air cooler fan that stays visibly motionless while the CPU temperature rises continuously is worth investigating. An RPM field showing N/A on an empty pump header is expected when the cooler uses a different connection. A spinning radiator fan establishes airflow through part of the system. An AIO can still have a separate pump power or control problem.
Use the published header mode or cooler instructions before changing PWM, DC, or pump settings. An arbitrary fan-profile change can hide the original condition. If you need to change one setting, record the before value, change only that setting, and observe the same sensor and RPM again.
Troubleshoot a high or unavailable reading
Check the cooling installation in the right order
Power the system down before reseating connections or touching components. If you are checking a desktop cooler you installed, start with the fan and pump cable routing. Verify the plug is seated and that any required controller power lead is connected. Then check mounting pressure, bracket orientation, standoffs, and whether protective film was removed from the cooler’s contact plate.
Inspect the assembly using the cooler’s instructions. A mounting bar screwed down evenly but fitted to the wrong spacers can leave the cold plate with inadequate contact. A tower cooler can also end up slightly tilted if one mounting screw is tightened fully before the other engages. Remount with the correct hardware and tighten in the prescribed sequence. If you remove the cooler, clean the mating surfaces and apply fresh thermal paste before reinstalling it.
For an AIO, trace the pump and radiator fan connections separately. A cable labeled fan may only carry a speed signal while SATA power or a proprietary connection powers the pump. Compare the actual wiring with the manual rather than inferring pump operation from radiator fan noise. Visible leakage or physical damage calls for shutting the system down and dealing with the cooler before another powered test.
On a laptop or sealed prebuilt, use the manufacturer’s diagnostic and service procedure. Fan behavior, access, and cooler mounts differ from retail desktops. If the BIOS omits temperature and the machine shuts off consistently, onboard diagnostic codes and service guidance are more useful than repeatedly trying to log a temperature.
Check whether airflow or a recent change explains the result
A temperature issue that begins after a part change is easier to investigate when you list everything that moved. A new graphics card may obstruct an intake. A reoriented fan may reverse airflow. A cable may stop a fan blade. A firmware reset may alter fan control. Inspect the last changes before replacing a cooler that previously worked.
For a representative test, keep the same room conditions and fan settings. Once the cooler is confirmed to be mounted and functional, compare the trend with the case panel installed and temporarily removed. A large improvement with the panel removed suggests case airflow deserves attention. It does not identify the exact obstruction, so check intake filters, fan direction, clearances, and the amount of space behind the PC or inside the cabinet.
Allow time for heat buildup when diagnosing a problem that appears after extended use. A BIOS reading immediately after a cold boot is a quick installation check. It cannot recreate the heat produced by a graphics card during gaming or a sustained CPU workload. If UEFI stabilizes normally, gather data under the condition where the problem occurs. Keep the baseline and the loaded test in separate notes.
Handle a blank, frozen, or implausible sensor
Return to the main monitoring page and check whether the rest of the values update. Look for a second CPU-labeled reading, particularly if the board has a hardware monitor sidebar. If the number stays fixed at an implausible value while fan RPM changes, verify the sensor name and BIOS version against the manual. An unused external input, an unsupported reading, or a display issue can explain an odd value.
Avoid flashing firmware solely because one screen uses an unexpected label. If the board supports the CPU, the remaining sensors work, and the system is stable, verify the result with a supported monitoring utility in the operating system first. If the board lacks CPU support or a firmware issue is documented for your exact configuration, follow the vendor’s update procedure after resolving power or cooling instability. A firmware update needs a machine or supported update mechanism that can complete it reliably.
A firmware reading followed by a sudden shutdown is more important than a blank value in a healthy system. If the shutdown repeated after a recent cooling change, power the PC off and trace the cooling installation directly. If the machine never completes POST, the motherboard may be unable to report a CPU temperature through UEFI. Diagnose the boot stage before relying on a sensor you cannot access.
Confirm the repair and keep a baseline
Repeat the same UEFI check before testing a workload
After reseating a connector or remounting a cooler, start with the same board page and checkpoint sequence. Confirm the fan or pump behavior that you expected to change. Look for a temperature that settles and a normal response from the cooler. Repeating the same test gives you a clear basis for deciding whether your repair helped.
For example, suppose the original test showed a rapidly rising CPU temperature with the air cooler fan stopped. After reseating CPU_FAN with the PC off, the firmware reports fan speed and the processor reading stabilizes. That is a stronger indication of a corrected connection than merely seeing a lower number once. Check the next startup as well if the original fault was intermittent.
Once UEFI is stable, boot the operating system and use a supported monitoring utility to check temperature during your actual workload. Begin with a short run and observe the trend. Record the workload, sensor name, and elapsed time. If the problem only occurs during gaming, consider the heat the graphics card adds to the case. If the problem only appears in a CPU-heavy workload, examine CPU temperature, power behavior, and cooling together.
Keep a reference for the next rebuild
Save a simple record showing the sensor, approximate room temperature, fan or pump RPM, case position, and stable UEFI reading. Include the cooler, motherboard, and CPU models. If someone changes a fan, adds a graphics card, or moves the machine into a cabinet, the record helps you compare the new behavior against your own system.
The same notes are useful for support. A description such as “CPU Package rises from 53°C to 84°C during setup while the CPU fan remains at zero RPM” is more actionable than “the BIOS is hot.” Add whether the system was cold at startup, how quickly the change happened, and whether the pump or fan is physically connected to the header you inspected.
If the temperature is stable and your workload runs normally, the UEFI check has done its job. You now have a pre-OS reference and a way to separate a basic cooler installation fault from problems that appear only after the operating system and games load.
Conclusion
Enter UEFI with the startup setup key, open the hardware monitoring page, and record the CPU sensor alongside the fan or pump RPM. Compare readings from the same sensor and check the temperature limit for your exact Ryzen model. If the reading climbs rapidly toward that limit in setup, shut down and inspect the cooling system. Once it stabilizes, verify the repair during the workload you actually run.