🛒 Best Price Today on Amazon
Prime members get fast, free shipping on everything above, plus member-only deals. New members get a 30-day free trial — cancel anytime.
To learn how to use Ryzen Master Curve Optimizer per core, start with a stable baseline and set one small negative offset at a time. Compare benchmark results, test each core under light and sustained loads, and check idle and sleep recovery. If a change causes errors or lowers performance, back it off.
Start with a stable CPU and one small change
The simplest first test is to set one core to a small negative offset, leave the other cores at zero, and keep the rest of the CPU and memory configuration fixed. Check that the setting takes effect, then run the same workload you used at baseline. This gives you a direct way to test the cause if the system starts behaving differently.
Check that your CPU and Ryzen Master version support per-core tuning
Open Ryzen Master and confirm the exact processor it detects. Support depends on the processor, firmware, system, and Ryzen Master release. AMD has changed the layout across releases, so the same controls may sit in the CPU tuning page, the Curve Optimizer page, or an advanced profile view.
Look for three separate controls:
- Curve Optimizer scope. Choose Per Core to assign separate offsets.
- Curve Optimizer method. Choose Manual to enter values yourself or Automatic if your version exposes AMD’s optimization routine.
- CPU control mode. Keep a supported automatic boost mode. Ryzen Master’s separate fixed-frequency Manual control mode can disable Curve Optimizer.
That last distinction often explains a missing setting. You can enter Curve Optimizer values by hand while retaining automatic CPU boost. Enabling fixed-frequency CPU control to get a setting called Manual leads to a different tuning workflow.
If Per Core is unavailable, check the supported Ryzen Master version for your processor and your motherboard’s current BIOS. AMD also documents parked cores as a condition that can block Curve Optimizer in its current interface. Close the game or workload involved, return to an ordinary desktop session, and recheck. If the feature stays unavailable, use the documentation for your exact system before trying to force a control that the application does not expose.
Record a baseline you can reproduce
Start from a system that already passes normal use at its current settings. If it has unexplained crashes, memory errors, or failed boots, establish a stable baseline before adding a CPU curve. Memory instability can look like a bad core offset, especially during game loading or a large application launch.
Write down the following before changing anything:
| Baseline item | What to record |
|---|---|
| Platform | Exact CPU, motherboard, BIOS, and Ryzen Master version |
| CPU settings | CPU control mode, existing offsets, power limits, boost override, and scalar where applicable |
| Memory | EXPO or XMP state and the profile you use |
| Cooling | Cooler, fan behavior, and approximate room conditions |
| Performance | Single-thread and sustained multi-thread results from the same benchmark versions |
| Stability | Existing errors, crashes, idle behavior, and sleep or resume behavior |
You can keep a known-good memory profile active if it is already well tested. If an error appears and its source is unclear, temporarily returning memory to supported defaults can help isolate it. Change that variable in a separate test so you can tell which setting affected the result.
Save your current Ryzen Master profile if supported. Also keep a written record or photos of relevant BIOS pages. A saved profile is useful, but you may need the written values if Ryzen Master fails to open or if the board changes what it can restore after a firmware update.
Understand what a negative offset changes
Curve Optimizer shifts the processor’s voltage-frequency curve. A negative value requests a lower-voltage shift in the curve. Ryzen’s boost logic continues to choose its operating points based on the workload, temperature, power limits, and other conditions.
An offset is a tuning step. It does not specify a fixed reduction such as five millivolts for every core at every frequency. A core can tolerate one setting while another core on the same CPU becomes unstable at that value. Results from a friend’s processor are useful as examples of the method, with little predictive value for your particular silicon.
The benefit can take different forms. A workload might finish slightly faster at similar power, use less power at comparable performance, or show almost no change because another limit dominates. Decide what you are trying to improve. If your goal is lower heat at the same throughput, measure package power and temperature alongside the score. If you want better gaming, measure the game and its frame times.
Set and apply a per-core offset
Enter the first offset in Ryzen Master
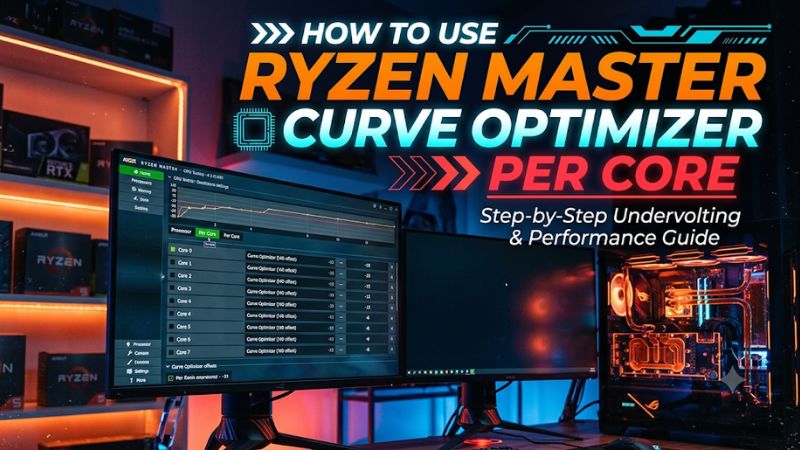
Save open work. Then open the CPU or Curve Optimizer tuning view and select Per Core. Switch the Curve Optimizer method to Manual if the application offers that choice. Set the other cores to zero for your first trial, then enter a small supported negative value for one core.
A value such as negative five is an example of a modest first trial on a system that exposes that option. Every CPU can react differently, including at small offsets. Treat zero as the reference, keep a rollback path ready, and avoid choosing the slider limit as a starting point.
Before clicking Apply or Apply & Test, inspect the pending changes. Some control modes also prepare changes to power limits, boost override, or other parameters. If the dialog shows something you did not intend to change, cancel and review it first. Testing a core offset is easier when the application applies just the variables you are trying to measure.
After applying the change, return to the readout that lists the values against the individual cores. Record what the application shows as active. Saving a profile and seeing an applied setting are separate events. If Ryzen Master requests a restart, allow it to finish and verify the result again after Windows loads.
Choose a sequence you can reverse
Start with one core or a small group you can identify unambiguously. Work in small increments and give each test a name. You can begin with a core that frequently handles light boost, but keep in mind that a preferred core may need more voltage margin at its highest boost points. The core that reaches the highest frequency is not automatically the one that accepts the largest negative offset.
A simple log might look like this:
| Trial | Change | Result | Next action |
|---|---|---|---|
| Baseline | All tested core offsets at zero | Light test, sustained test, and idle pass | Save results |
| A | Core 2 at negative five | Short core test passes | Check real workloads and idle |
| B | Core 2 at negative ten | Repeatable error on the same test | Move Core 2 closer to zero and retest |
| C | Core 2 at negative five | Repeated tests pass | Record as a candidate and continue |
These are example outcomes. If a change fails, reverse the most recent adjustment and repeat the same test. A failure disappearing when you reverse one variable gives you stronger evidence than a system that starts working after several settings were reset together.
On a high-core-count processor, short screening passes can save time. Test each candidate for obvious instability before investing in a longer run. Then validate the collection of offsets together. A series of individual passes does not prove that the final configuration will behave the same when the scheduler moves work between cores and several cores share package power.
Use AMD’s automatic optimization as an optional starting point
Where supported, select Per Core and choose the Automatic method. Ryzen Master may offer options such as a maximum offset and stress-test duration. AMD describes the optimization as a process that can restart the machine, so save work and close other applications first. Let it finish according to the version-specific instructions.
Inspect the values it produces. Confirm which values were suggested, which were applied, and which are saved. An optimization result reflects the workload and time the routine used. A core that passed that routine can still fail during a light burst, a game menu, or a return from sleep.
If the automatic routine stops repeatedly, record the failure stage and recover the last working configuration. A less aggressive maximum or a manual one-core-at-a-time approach may make the problem easier to isolate. Before retrying, confirm that memory and the rest of the platform remain stable at the baseline.
Avoid combining the automatic run with a new memory profile, an increased boost override, or a new thermal target. Each can affect which operating points the CPU uses. Do those comparisons separately if you need them.
Test the cores and check actual performance
Use a targeted workload to screen individual cores
Run a workload that can target a logical processor or cycle through cores. A tool such as CoreCycler can exercise cores individually, using the test application and configuration you select. Check its instructions and keep any features that automatically change tuning settings out of a manual validation run unless you specifically intend to use them.
Record the displayed core and thread mapping. Ryzen Master, HWiNFO, Windows, and a test utility can number logical processors differently. If a log names a core or thread, use the tool’s topology information before editing an offset.
Start with a manageable screening run. Look for calculation errors, worker failures, freezes, or restarts. Then use a longer run with more than one workload type on candidate settings. A light or moderate instruction mix can allow higher boost than a heavy workload, so it can reveal instability a high-power all-core test misses. An all-core test is still useful for package-wide behavior and sustained cooling.
Keep any benchmark score separate from the pass or fail result. A pass says the process completed under the test conditions. The score says how much work the system did. If the test completes but the machine is consistently slower than the baseline, check effective clocks, power limits, and configuration before keeping the change.
Test light work, idle, and transitions
Some marginal offsets fail during the transition between a sleeping core and a rapid burst of work. A system can finish a long render and still restart when a browser opens after a quiet period. Use the computer normally between targeted tests.
Include the following in a candidate validation run:
- Brief application launches followed by periods of idle.
- Several repetitions of a lightweight single-thread benchmark.
- A game launch, loading screen, and a normal play session.
- A warm restart and, if you use it, a sleep and resume cycle.
- A period of idle long enough to cover the circumstances of any earlier crash.
- The sustained CPU workload that represents how you actually use the system.
Do not equate a fixed number of minutes with guaranteed stability. The purpose of longer testing is to expose more operating conditions. A computer used for work where a restart or a calculation error matters may be better left on its known stable stock configuration.
If the system fails only after sitting idle, repeat that transition at the previous good settings. Resist the urge to raise other limits to hide the symptom. A return to a smaller negative value on the suspected core is an easier comparison. If the cause remains unclear, use zero offsets on all cores and establish whether the original behavior returns.
Read WHEA events and benchmark results together
Open Event Viewer and inspect the System log for WHEA-Logger events around the failure time. Save the event details. Where present, an APIC ID can help relate a reported event to a logical processor. Use an established mapping for your system and treat the ID as a clue. Different WHEA errors can involve memory, interconnects, or other hardware, and a crash can occur without leaving a useful event.
Keep a note of what the computer was doing at the time. A calculation error on the same targeted core immediately after changing its offset offers stronger evidence than a single generic event from a different day. If reversing the change clears the issue in repeat tests, keep the less aggressive setting.
Measure performance with a tool that reports useful work, such as a render time, benchmark score, or game frame-time trace. Log relevant Core Clock and Core Effective Clock values under the same workload. Effective clock reflects activity across the sampling interval. A higher peak with a worse score is a reason to investigate, especially on a sustained, repeatable workload.
Compare each run from similar starting conditions. A warmer cooler or additional background work can reduce the score without a tuning fault. Run enough trials to know the normal variation. A one-off score increase inside that range gives you little reason to accept additional instability.
Recover from unstable settings and verify what persists
Back off the most recent change first
If Windows remains usable, open the same tuning interface and move the culprit core closer to zero or restore your known-good profile. Apply the change and repeat the workload that failed. If you changed multiple cores and lack a reliable mapping, return the new offsets to zero and isolate them in a smaller group.
If your settings are stored in UEFI and Windows is unstable, inspect the motherboard’s Curve Optimizer options directly. Restore the intended values and verify that a Windows utility is not reapplying a different profile. Choose one place to manage the curve during diagnosis. This avoids testing a value in Ryzen Master while an unrelated startup action or firmware configuration changes the result.
If the PC cannot complete startup, follow the motherboard’s documented recovery or clear-CMOS procedure for that condition. Read the model-specific steps before using a button or jumper. A broad reset can clear memory, boot, storage, fan, and security-related settings, so keep the information needed to restore the working configuration. Have any required drive recovery information accessible before changing firmware settings.
Check restart persistence before calling the setup finished
Ryzen Master versions and platforms differ in how tuning is saved or written to firmware. Some versions offer a Write PBO to BIOS preference. Read which parameters that preference covers and verify the active values after a full restart. A profile visible in the application’s library only shows that it was saved.
Compare the result immediately after startup and after the application has loaded. If you maintain values in firmware, verify those values directly in UEFI. If your chosen workflow applies a profile in Windows, document when it runs and how you can stop it while troubleshooting.
Finish with a short record of which BIOS and Ryzen Master versions you tested, the applied offset for each core, and which workloads passed. Keep the baseline beside it. After a BIOS update, cooling change, or material change to memory and power settings, recheck the result before assuming the old margin still holds.
Conclusion
Choose Per Core in Ryzen Master, leave automatic CPU boost active, and apply a small offset to a known core while keeping the rest of the system fixed. Test light bursts, individual cores, sustained work, idle, and startup transitions against a stable baseline. Keep only changes that preserve stability and deliver a measured benefit. Confirm which settings survive a restart and keep a known-good profile available.