🛒 Best Price Today on Amazon
Prime members get fast, free shipping on everything above, plus member-only deals. New members get a 30-day free trial — cancel anytime.
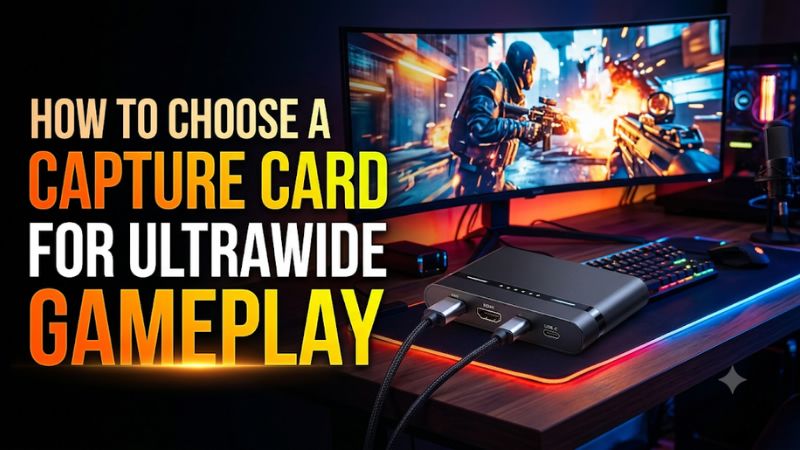
If you want to know how to choose a capture card for ultrawide gameplay, start with the monitor’s exact pixel dimensions and the refresh rate you want to keep. Then decide whether OBS should record the full view or deliver a 16:9 stream. Look up the card’s input, passthrough, and capture modes separately.
How to choose a capture card for ultrawide gameplay at your resolution
Write down the source timing, display timing, and recording dimensions as separate values. A 3440×1440 player display could feed a native ultrawide recording or a standard widescreen stream, depending on your setup. The card needs to accept the signal you give it and deliver a capture format that your software supports.
Identify the exact ultrawide dimensions
Most buying mistakes start with a shorthand label. A product page may say 1440p and mean 2560×1440 in 16:9. Your 3440×1440 display has the same height and 880 more horizontal pixels. A 5120×1440 monitor is wider again. Read the mode table for the full width and height instead of relying on a resolution family name.
| Display dimensions | Approximate shape | What the card documentation must show |
|---|---|---|
| 2560×1080 | Ultrawide, commonly called 21:9 | A supported 2560×1080 input and capture mode |
| 3440×1440 | Ultrawide, commonly called 21:9 | A 3440×1440 row for the desired refresh and format |
| 3840×1600 | Ultrawide, 24:10 | An explicit 3840×1600 timing |
| 5120×1440 | Super ultrawide, 32:9 | A 5120×1440 row or written confirmation for that timing |
| 5120×2160 | Ultrawide, commonly called 21:9 | A 5120×2160 row and a usable capture format |
The difference between 5120×1440 and 5120×2160 is especially important. They share a width, and both can show up in search results about 5K ultrawide capture. They represent different HDMI timings with different active heights and aspect ratios. Treat an explicitly supported 5120×2160 mode as evidence only for that mode. If 5120×1440 is missing from a matrix, ask for confirmation using the exact monitor, GPU, timing, and software you intend to use.
Windows Advanced display can report desktop mode and active signal mode separately. Record both when they differ. A GPU can scale a desktop before transmitting it, and the card only sees the transmitted signal. To verify the monitor’s real input, read its information screen too. This is useful when a driver reports an ultrawide desktop but the video feed has already been padded or converted to a different timing.
Check the monitor’s HDMI mode with a direct connection
Connect the gaming computer directly to the monitor by HDMI before selecting a card for inline passthrough. The monitor’s highest refresh may apply to DisplayPort, to a particular HDMI input, or to a specific color mode. Confirm the resolution and refresh on both the GPU and monitor while the gameplay settings you intend to use are active.
Start in SDR with one fixed rate. If 3440×1440 at 165Hz works directly and you need to keep it, search the vendor table for that exact mode. A card documented for 3440×1440 at 120Hz remains a fit only if you can accept 120Hz or use a separate capture feed. A listing for 4K at 144Hz offers little guidance about 3440×1440 at 165Hz because supported timings depend on the HDMI receiver, firmware, and EDID implementation.
Test HDR and VRR after the baseline works. Changing bit depth may alter the bandwidth needed by the HDMI link. A monitor can also negotiate Display Stream Compression to reach a particular mode. Some cards can forward a compressed signal while having trouble acquiring the image for capture. If the monitor stays alive while OBS turns black, lower the rate or select a mode that avoids DSC and test again. Save the combination that produces both a stable monitor image and a stable capture feed.
Match input, passthrough, and capture as a set
A manufacturer can list 3440×1440 under supported input modes while offering it as a captured format at fewer rates. The maximum passthrough rate belongs to the monitor path. The OBS source rate belongs to the computer connection and video format. Use the intersection the documentation actually supports for your use case.
AVerMedia’s GC553G2 is one example. The manufacturer lists 3440×1440 at 120Hz among its passthrough modes. Its documented 3440×1440 capture options depend on whether the chosen format is MJPEG, NV12, or YUY2 and whether the host link is 5Gbps or 10Gbps. The same chart has different options for 2560×1440. Start at a listed 60 fps capture setting and test the full video path before moving to a higher rate.
The Elgato 4K X also has documented ultrawide support. Elgato gives a firmware requirement for ultrawide use in OBS and explains that the older 4K Capture Utility lacks ultrawide support. The Elgato 4K Pro’s newer driver and firmware notes separately list 2560×1080, 3440×1440, and 5120×2160 capture. These examples show why the exact card, driver, app, and input/output combination all belong in your purchase decision.
Pick a connection that preserves the display mode you play on
Choose the wiring before choosing a capture card. Inline HDMI is straightforward when the monitor accepts your preferred signal over HDMI and the card specifically supports it. A direct DisplayPort monitor with a separate HDMI feed is often easier for unusual resolutions or high-refresh modes. Each method has different setup costs.
Use inline HDMI when the supported modes overlap
Run HDMI from the gaming computer to HDMI In on the card and from HDMI Out to the ultrawide monitor. With a compatible card and matched timing, the monitor continues receiving the gaming image while the card delivers a software capture format. This arrangement usually requires fewer changes to the gaming desktop.
Make sure the card actually has HDMI Out. A capture-only adapter has an HDMI input and a host connection, so it cannot sit between the GPU and monitor in this way. When a card offers EDID options, a display-based or merged profile is a reasonable starting point for inline use. An internal profile can be useful for an unattended input but may advertise a timing the physical monitor cannot display.
Test three transitions after the desktop works. Launch a game in the display mode you use, change to a second application, and wake the setup after the system or monitor sleeps. Also test any fullscreen HDR transition you expect during a stream. If the resolution switches at launch, the card may need to reacquire the HDMI signal. A stable recording while idling on the desktop provides little evidence about those transitions.
Preserve DisplayPort with a separate HDMI signal
Keep the ultrawide screen on the gaming GPU’s direct DisplayPort connection and run a second GPU output to the capture card. The capture input becomes a second display destination in the operating system. This lets you choose a supported HDMI timing while retaining the gaming monitor’s own resolution and high-refresh mode.
Mirroring the two outputs is a convenient first test when the GPU driver supports the combination. If duplication lowers the ultrawide refresh or produces a scaled image, extend the desktop instead. On the gaming PC, an OBS instance can acquire the game and send a fullscreen projector to the capture output. Set that destination to a supported timing such as 1920×1080 at 60Hz. The receiving computer can then use a simpler capture card and take care of the stream encode.
This is a particularly practical route for a 5120×1440 monitor feeding a standard 16:9 broadcast. Configure the outgoing scene deliberately because that projection is what the second computer receives. Run a demanding game and check frame pacing when the projection is active. GPU compositing and copying still take resources on the gaming computer although the other computer handles the stream. For a native 32:9 archive, use a recording method that retains the full frame in addition to or instead of the separate projection.
Choose USB or PCIe only after confirming the exact video format
USB is convenient for laptops, small systems, and desks where the device moves. Confirm the receiving port’s actual speed. PCIe fits a desktop with a free slot that supplies the required electrical lanes. Compare the card’s support matrix before treating either interface as an indication of ultrawide capability.
At 3440×1440 and 60 fps, an active-picture stream is roughly 3.57Gbps in 8-bit NV12 and 4.76Gbps in 8-bit YUY2 before transport overhead. Those figures explain why a particular uncompressed format may require a faster host connection. A compressed MJPEG format can reduce transfer pressure while placing decoding work on the receiving computer. The exact result depends on the implementation and host.
Consider the rest of the workstation. A camera and a capture device sharing a USB controller may compete even if they plug into different nearby ports. A PCIe card can be limited by motherboard slot wiring or lane sharing. Check the USB controller or motherboard manual during planning. Base performance expectations on the individual capture mode delivered to OBS and verify it while the other devices are active.
Choose whether the audience sees ultrawide or 16:9
An ultrawide monitor can feed several different deliverables. A native archive preserves the whole frame for editing. A 16:9 stream can show the original view with bars, crop the outside edges, or use the open canvas space for production elements. Choose the framing at a real playback size before committing to a card or a layout.
Record the complete image for editing or ultrawide viewing
In OBS, set the base canvas and recording output to the native frame dimensions when your card, encoder, and editor support them. Add a Video Capture Device source and select a documented custom resolution and rate if the defaults differ. Fit the source to the canvas with its proportions intact and verify the finished file.
For a 3440×1440 recording, scaling cleanly to a narrower ultrawide frame can lower the demands on storage or editing. Check the dimensions accepted by your codec, hardware encoder, and editor. Confirm that the output still includes all edge content. When the file is intended for publication, upload an unlisted or private test if the platform provides that option and inspect playback on a monitor and phone. Some display surfaces leave more visible empty space around ultrawide video.
Do not judge sharpness from the OBS window alone. Pause during a UI-heavy scene and check inventory text, fine lines, and small HUD labels in the actual recording. If resizing blurs them, try a resolution or framing better suited to the publication target. On a phone a faithful native frame can render tiny lettering, while a carefully planned 16:9 crop may be more readable.
Fit the full ultrawide view inside a 16:9 stream
Create a 1920×1080 canvas and fit the ultrawide source proportionally. A 3440×1440 image scaled to fit the 1920-pixel width occupies about 804 pixels of height. The remaining roughly 276 pixels can be split above and below the scene. This keeps the full field of view and leaves room for a camera or labels.
A 5120×1440 source at the same width occupies 540 pixels of height, leaving half of the 1080p canvas available. That makes every object in the gameplay image smaller than it would look after a centered crop. Consider what viewers need to read. For a racing game, the full cockpit and peripheral motion may justify the space. For a competitive shooter, a smaller crosshair and thinner text can matter more than the peripheral view.
If you add a webcam or chat to the space outside gameplay, leave an intentional boundary between overlays and the game. Check dialogue subtitles in the actual recording. Some games place text close to the bottom edge and some overlays sit too close to the video during scene transitions. Test scenes with and without HUD elements because their relative size and placement affect the viewing experience.
Crop for 16:9 only after checking the HUD
A centered 16:9 crop of 3440×1440 uses the middle 2560 pixels and discards 440 pixels on each side. The vertical frame stays intact. OBS can make that crop before scaling to 1080p. Since radars, team lists, or timers can sit near the edges, compare a live gameplay clip before choosing this framing.
A 5120×1440 frame has 1,280 pixels on each side of its central 2560×1440 area. A centered crop of that much width can remove information the player expects viewers to see. If the game offers a HUD safe area, adjust it while examining the crop. A second option is a scene with a smaller full view for particular moments, such as interpreting a wide tactical map. Save both layouts if the show switches between games that place information differently.
Create and label a test clip for each candidate layout. View it fullscreen, at a small desktop player size, and on a phone. Check any automatic output scaling and make sure the exported motion and text match what you intended. Choose the version that carries the information viewers need without changing the geometry of the image.
Confirm what the card can do before the return window closes
The acceptance test should cover every mode you bought the card to use. Start with the native dimensions at a common rate, then move to the intended refresh, VRR, or HDR one at a time. Save a short recording at each stage so you can tell a monitor handshake issue from a host capture or encoding issue.
Validate the complete path with a short checklist
Record the monitor resolution and rate, the incoming signal reported by the card or GPU, the OBS source format, and the output file dimensions. Run a ten-minute clip with fast camera movement and embedded audio. Test the game during its heaviest sequence and watch for black frames or repeated motion after mode changes.
If a native ultrawide format is absent from OBS, compare it with the device matrix, connection speed, and current firmware. Close the manufacturer’s preview utility in case it has exclusive access to the capture device. Confirm the signal still works on the passthrough monitor. If 1080p60 works but the ultrawide timing fails, return to the exact capture format chart and try the listed combinations. A custom canvas can resize a captured frame, but it cannot recover content that never reached OBS.
Keep the winning settings with your OBS profile. Identify which app and driver exposed the format and which HDMI input it used. That note is useful when adding a second screen, switching cables, or reinstalling OBS. For a purchase decision, verify the modes that matter in your own system within the time allowed by the seller’s return terms.
Weigh the cost of native capture against the editing plan
A native ultrawide recording is worth paying for when you need edge detail in a wide archive or extra framing room in editing. If the only deliverable is a 16:9 broadcast and the gaming computer can project a correctly framed feed, a simpler card can be enough. Set the intended output before ordering hardware.
Consider a weekly racing stream that needs the full cockpit during the race and vertical highlight clips afterward. A native recording keeps more image area for choosing a crop, but the host encoder and editor must handle its resolution for the entire session. Check drive usage with a representative five-minute recording and estimate the size of a full session at the same settings. If disk throughput or decoding becomes a bottleneck, try a proportional output scale and compare the readability of the smallest graphics.
For a team event, agree on the framing with anyone who will edit the footage. A switch from native capture to a cropped HDMI projection changes what can later be recovered, even if both workflows look correct on the stream.
If profile changes are frequent, save an OBS profile and scene collection for the wide archive and another pair for the 16:9 broadcast. A change to the canvas or crop can affect scenes that reuse the same capture source. Load the intended profile and collection, make a short clip, and check both the edges and HUD before an important session.
Conclusion
Choose a capture card by the exact pixel dimensions, HDMI refresh rate, and source format your workflow needs. Use inline HDMI for a documented match and a separate feed for a DisplayPort-only or unusual mode. Test the finished ultrawide or 16:9 recording to confirm the image contains the gameplay and HUD detail your audience needs.