🛒 Best Price Today on Amazon
Prime members get fast, free shipping on everything above, plus member-only deals. New members get a 30-day free trial — cancel anytime.
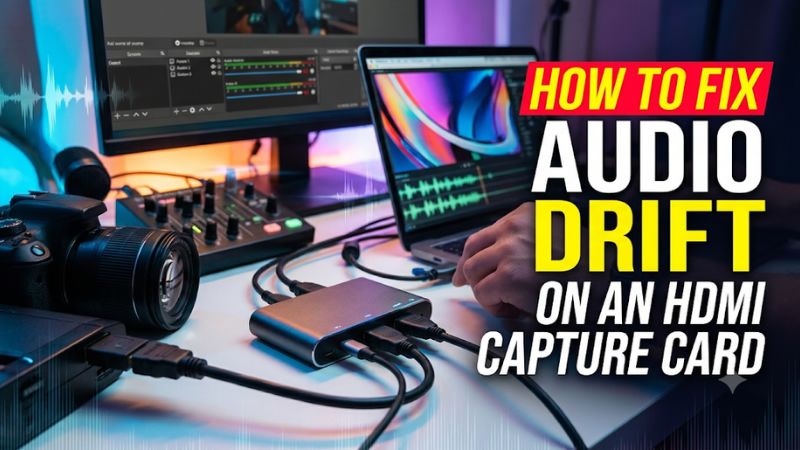
To find out how to fix audio drift on an HDMI capture card, record a visible event with a sharp sound at the start and end of a session. If the gap grows, test the audio route, device timing, and capture link. If it stays steady, measure which signal arrives first and correct the delay on that source in OBS.
How to fix audio drift on an HDMI capture card by measuring it
A short preview can reveal echo or a fixed delay. A longer local recording shows whether sync changes over time. Keep the original recording and measure before changing the sample rate, plugging into another port, or applying a sync offset.
Create a test with clear audio and video markers
Use a reliable flash-and-click sync clip sent through the HDMI capture path. A game action with an obvious point of impact can work if the animation and sound are consistent. Record one marker shortly after starting and another near the end. A twenty-minute test is reasonable if the fault develops gradually. Use the original failure duration when it takes longer.
Open the recording in an editor with an audio waveform. Identify the video frame showing the flash or impact. Find the leading edge of the matching sound. Subtract the video time from the audio time. A positive result means the sound plays late. At 60 fps, successive video frames are separated by about 16.7 milliseconds, so treat a few milliseconds of apparent difference as approximate.
When possible, record game audio and your commentary microphone on separate tracks. In OBS, check that the recording settings include the selected tracks and that each source is assigned to the intended track. A media player may play only one track by default. Use an editor or a player that lets you choose each track before concluding a source is missing.
A helpful starting test measures the embedded HDMI soundtrack against its own video. If you also need to align a camera and mic, record a separate visible clap for that pair. Two markers for two different signal paths let you identify which relationship changed. Trying to measure game action against commentary can introduce a different variable because the speaker’s timing is independent of the action.
Identify fixed delay, growing drift, a jump, or a double
Use the same measurement convention throughout the test. Compare the first marker with the final one and listen to the footage around the first point where the problem becomes obvious.
| What the recording shows | Example | First check |
|---|---|---|
| Delay stays approximately fixed | Audio is 90 ms late at the start and 95 ms late at the end | Check routing and adjust the earlier signal after verifying stability |
| Offset grows steadily | Audio goes from 20 ms late to 280 ms late in twenty minutes | Test clocks, timestamps, audio endpoints, and capture delivery |
| Sync changes suddenly | The offset jumps after a freeze or a display mode change | Inspect the device, link, and OBS log at that moment |
| Audio sounds doubled | Two closely spaced copies of the same game sound | Mute duplicate monitoring, capture, or desktop paths |
| Only your headset sounds delayed | File playback stays aligned | Inspect audio monitoring and the listening device |
A steady increase from 20 ms to 280 ms represents about 260 ms of drift over the measurement window. A single offset might align the start or the end, but the mismatch returns somewhere along the recording. A sudden step after a capture freeze may also leave the rest of the recording offset. Look around the first bad moment for repeated frames, a black image, or a change in the audio waveform.
If the editor shows an issue that a second player does not reproduce, inspect the imported tracks and how the editing project interprets the file’s frame rate and timestamps. Compare the unmodified file before changing the capture setup. Monitoring can also differ from the saved program. Evaluate the issue in the place where it affects your work, whether that is a recording, stream, or headset.
Simplify the HDMI audio route in OBS
Begin with one capture device source, one gameplay audio path, and a known working video mode such as 1080p60 SDR. Detach or mute commentary, chat, software mixers, and monitoring temporarily. They can be restored one at a time after the embedded game feed passes.
Capture one copy of game audio
In OBS on Windows, open the properties of the Video Capture Device. When the card presents embedded HDMI audio through that source, start with Capture Only or the equivalent label. Some cards provide a dedicated audio endpoint or need the custom audio device option. Follow the card’s documented routing and observe the mixer while the game makes a distinctive sound.
If gameplay shows on multiple meters, mute one route and make a recording. Desktop Audio can pick up the game again when you monitor the capture source through a playback device that OBS also captures. A separate Audio Input Capture source can duplicate a card’s audio when the Video Capture Device already includes it. Check Advanced Audio Properties for monitoring and track assignments.
Listening in your headset remains a separate test. A setup with monitoring disabled can still record game audio correctly. Listen to the saved file and compare the waveform with the visual marker. After the recording is stable, decide how you will hear the game. Prevent the selected monitor output from returning into the mix through another captured endpoint.
If you add a controller, headset adapter, or analog chat input, test with game audio paused while another person speaks. Then test game audio while the chat is quiet. This identifies which sources contain each signal. Verify that remote voices travel to the intended recording track and that a separate headset mic or camera mic does not duplicate the same conversation.
Use compatible sample rates and a simple channel format
Set the OBS sample rate in Settings under Audio. A common video workflow uses 48 kHz. On Windows, review the participating playback and recording endpoints and check their supported default formats. On a Mac, look at adjustable endpoints in Audio MIDI Setup. Test the HDMI source’s audio configuration as well, particularly if the source and capture computer are separate.
Use 48 kHz on the devices that support the desired configuration. A device may only expose one rate, and OBS can resample incoming audio. Matching the nominal sample-rate setting removes one variable. Devices with distinct clocks can still drift. If an endpoint lacks a setting you expected, record its actual format and compare an isolated test with that endpoint active and inactive.
For consoles, stereo PCM is a useful baseline when your equipment supports it. A surround output or encoded bitstream can create routing or compatibility changes. Confirm game audio at ordinary volume and with no secondary inputs first. Restart the relevant application or reconnect the device after changes that require it, then repeat the original test instead of measuring two clips made under different conditions.
Isolate a separate microphone or virtual mixer
If HDMI audio and HDMI video stay aligned but you lose sync after enabling a microphone, camera, or virtual mixer, focus on that additional route. Create a distinct audio track for it and use an appropriate marker. A visible clap works well for comparing a camera and live microphone. Repeat at the same intervals used in the gameplay test.
Where available, investigate the source’s device timestamp option with a controlled A/B test. Availability depends on the source type, device, driver, and platform. Keep the recording settings identical for both passes. Change the timestamp option alone and compare the start and endpoint measurements. Also check the driver’s supported rate and connection requirements if the issue follows one endpoint across multiple scenes.
In a dual-PC setup, gameplay sent inside HDMI provides a common diagnostic path. If a software mixer on the source PC splits game and chat, establish the embedded stream first. Add the virtual routing the production needs one component at a time. Keep notes on which machine owns each source and how sound reaches the headset, OBS mixer, and local recording.
Check for capture interruptions and processing delays
If the embedded game pair still moves out of sync in a simple scene, examine the physical connection, the capture format, and the receiving computer’s workload. A sudden offset change is especially useful because the point of failure can be matched to an event in OBS or to a source change.
Test USB, PCIe, and HDMI connections one change at a time
For an external card, use its supplied data cable or a correctly rated replacement. Plug it directly into a suitable host port. Temporarily remove high-bandwidth devices from the same dock or nearby controller during the minimal test. A USB-C charging cable can provide less data bandwidth than a card needs for the selected format even when the preview opens.
Repeat the original sync markers on each test. If the drift or freeze appears only when a webcam or external SSD is active, try moving one device to a port with a different controller or reduce the capture format to a documented lower-bandwidth option and compare. Moving two devices while changing frame rate leaves several plausible explanations for a successful test.
For a PCIe card, verify the electrical width and supported generation. Check the driver and whether the motherboard changed the expansion-slot configuration when another device was installed. With either host interface, test a known-good HDMI cable and a fixed supported video mode. If the problem appears immediately after HDR turns on or a game switches fullscreen mode, record the transition under both conditions.
Inspect OBS Stats and test buffering separately
In OBS, open Stats and note the rendering, encoding, and network counters while recreating the issue. Rendering misses can occur when OBS lacks enough resources to composite the scene. Encoding skips can indicate encoder pressure. Network-dropped frames matter for a stream. A card can also freeze upstream while the OBS counters still look acceptable, so inspect the file and source behavior alongside those numbers.
For supported Video Capture Device sources, OBS provides options such as Auto-Detect, Enable, and Disable for buffering. Use the default for your initial measurement. If delivery stutters, compare one alternative with all other settings fixed. Enabling buffering can improve playback smoothness and add delay. Disabling it can reduce some delay while exposing unstable delivery. Retest the actual workload after selecting the setting.
Match a simple capture and output cadence during troubleshooting. Try a supported 60 fps pair or a documented 59.94 fps pair when your source uses that timing. A rate difference can produce repeated or dropped frames at predictable intervals. If timestamps and playback timing are correct, that difference may not explain steadily increasing audio drift. Use the test result to decide whether the frame rate matters to your specific issue.
Compare the same feed in the vendor application and OBS
Save a reproducible case before changing drivers. Note the card model, firmware, driver, operating system, port, format, and point where the problem appears. Check the manufacturer for updates that address your model and operating system. Install the appropriate update if it applies to the fault and follow the vendor’s update procedure.
Then run a pass in the manufacturer’s utility when it supports the source and recording mode. Close that program before opening OBS so it releases the device. Use the same input timing, wiring, and test duration. If both recordings exhibit the problem, concentrate on components they share. If OBS shows the issue by itself, try a fresh collection with one source and restore the usual settings, plugins, and filters in stages.
Also check whether the fault requires a particular sequence, such as resuming from sleep or starting a second capture device. A first recording after a restart can appear perfect while a post-sleep recording drifts. Document the sequence and compare both files. When you can reproduce the failure on demand, it is easier to evaluate a port change, driver update, or replacement device.
Apply a fixed sync correction after the signal is stable
When the measured gap stays approximately the same throughout a long recording, delay the earlier element. Measure again after the correction and inspect the saved program. Choose a value based on evidence from your specific setup.
Delay audio that arrives before video
If the captured sound is about 100 ms early throughout the test, open Advanced Audio Properties in OBS and apply about +100 ms of Sync Offset to that source. Record a new marker and check the file. Test an early and late point again to confirm that the correction works throughout the session.
If the audio is already late, first check for avoidable buffering, duplicated monitoring, or a slow audio route. If the audio path must keep that delay, you can delay the corresponding video with OBS’s Render Delay filter where suitable. Check how that source is used across scenes because the filter can affect every scene sharing the source. Verify any game and commentary pairing that depends on the same camera.
If two problems are present, fix them in order. An audio source can be early initially and still drift later. Stabilize the drift before applying the offset. A constant correction changes the starting alignment. It leaves the rate difference in the recording, so measuring again at multiple points remains necessary.
Validate the fix under the normal full-session workload
Record for as long as the old failure took to appear. Add the usual game, camera, commentary, chat, scene changes, and storage. Measure a marker near the beginning, midpoint, and end. Check at least one interval where you used to see drift or a jump.
Repeat after a restart if the issue was intermittent. For a problem tied to fullscreen switches, trigger one transition per test and note the moment in the recording. Verify both the final file and the listening path if headset monitoring is important. Save a known working OBS profile and identify the capture source, port, sample rate, and measured offset.
If it returns, preserve the affected session’s OBS log and a short original clip. Use the exact time of the first movement in sync or frame freeze to correlate the log and file. Keep a record of whether the source changed timing, the computer resumed, or a device reconnected. Those facts make support requests easier to reproduce and help you avoid repeating tests that already passed.
Repair an old recording based on the type of drift
Work on a copy of the original media. For a fixed delay on an isolated audio track, slide the audio to match a visible event and check a second marker farther into the file. For a steady change in offset, measure the intervals between matching audio and video markers. Time-stretch the audio so its measured interval matches the video interval, then verify a middle point.
For instance, if two video events are exactly 1,200 seconds apart and their matching audio peaks are 1,200.260 seconds apart, the audio needs slight compression in time. Its target duration is approximately 99.9783% of the measured interval, or approximately 100.0217% playback speed in an editor that uses a speed control. Preserve pitch when appropriate and set the start alignment after changing the duration.
A stepped shift after a freeze may need edits on either side of the interruption. If audio or video is missing around that point, repair the timing of the parts that survived and listen for a gap. A correction that works in the editor remains separate from the live capture fix. Diagnose the original connection before using the same OBS setup for the next session.
Conclusion
Measure HDMI audio against a visible marker at the start and end of a local recording. Growing drift calls for tests of the audio route, device timing, connection, and OBS workload. Once the gap stays steady, delay the earlier signal and verify the result in a full-length recording with your normal devices and scenes active.